Buy Magic Mushrooms
Magic Mushroom Gummies Best Amanita Muscaria Gummies

No Craft-night for January 4th 2018

 Uncategorized  Comments Off on No Craft-night for January 4th 2018
Jan 042018
 

NYC is blanketed in snow, travel is hard, the air is cold.

We have no craft-night tonight. Stay warm!

Grizzly bear playing a guitar in the snow.

 Posted by at 2:48 pm

No Craft Night for Jan 1

 Uncategorized  Comments Off on No Craft Night for Jan 1
Jan 012018
 

We partied ourselves out last night. No Craft Night today.

Happy New Year’s everyone!

Pulling Teeth From a Corpse: Extracting the Vector Font From the Apple 410 Color Plotter

 Uncategorized  Comments Off on Pulling Teeth From a Corpse: Extracting the Vector Font From the Apple 410 Color Plotter
Dec 292017
 

My favorite artifacts to extract from an old ROM dump are the fonts. For old 80’s-era computers and control equipment, these are usually 1-bit raster fonts covering the ASCII character set. Sometimes, the fonts are even encoded on their own ROM and accessed directly by the video generator logic; old terminals and displays will often take this route, allowing the device to be modified for markets that use different character sets by just swapping one chip. Other systems embed the font in the same ROM as all the other logic.

Finding these fonts is trivial– you usually just have to render the ROM as a 1-bit bitmap and look for the text. A small throwaway python script is sufficient to extract them and generate a bitmap font.

four 1-bit ascii bitmap fonts

From left to right: the fonts from an AT&T 3B2, a Compaq Portable III, a LED scrolling sign, and a Waters 600E pump controller

Extracting the font from the Apple 410 Color Plotter is an entirely different can of worms. For one thing, it’s a vector font– each character is described as a series of pen movements, instead of a bitmap. That means rendering the ROM as an image won’t help me; the font is a set of code snippets, not images. For another, this is 1983, storage space is limited, and there aren’t any real standards for this sort of thing. That means I’m looking for code that I don’t understand and, when I find it, won’t recognize.

There are a few approaches I can use here. A bunch of them will turn out to be dead ends, but I’ll document them as I go to help folks understand how to work something like this out for themselves.

First of all, I start by listing what I actually know about the vector font and how it’s processed:

  • It’s somewhere in my ROM dump; there’s no dedicated vector drawing chip or mystery blob on this board.
  • The ROM is spread across three physical chips on the board.
  • The processor on board is a Z80 (an instruction set still in use in some microcontrollers!).
  • Most of the ASCII character set is represented in the font.

It’s not much to go on, but it’s a start. The first thing to do is just look at the ROM with a hex editor and see what I can see.

Approach 1: Look for text

When you don’t know what you’re looking for, the first thing to look for is ASCII. This is how I found the test script; by scrolling through the ROM in emacs. The standard UNIX utility strings does a good job of finding human-readable strings in a binary. In this case, the hope would be that the vector format would be human-readable, or even in the same format that the plotter uses to receive commands from the host. No such luck; all I can find is the test script.

Approach 2: Disassemble and find the garbage

The next thing to try was to disassemble the binary and try to find regions of “garbage” instructions that are likely to actually represent data, not code. I used the venerable dz80 disassembler to try and narrow down the search a bit. To give you an idea of what we’re talking about, here’s a disassembled region that’s almost certainly data:

	nop			;0187	00 	. 
	ld b,b			;0188	40 	@ 
	sbc a,h			;0189	9c 	. 
	ld c,000h		;018a	0e 00 	. . 
	nop			;018c	00 	. 
	ld d,b			;018d	50 	P 
	jp l0011h		;018e	c3 11 00 	. . . 
	nop			;0191	00 	. 
	inc h			;0192	24 	$ 

This has a lot of the hallmarks of garbage code– lots of NOPs, commands that follow one another that operate on unrelated registers, unreachable code following unconditional jumps. By contrast, working code looks more like this:

	push hl			;0243	e5 	. 
	push ix		;0244	dd e5 	. . 
	push iy		;0246	fd e5 	. . 
	ld hl,l120fh		;0248	21 0f 12 	! . . 
	jp (hl)			;024b	e9 	. 
l024ch:
	pop iy		;024c	fd e1 	. . 
	pop ix		;024e	dd e1 	. . 
	pop hl			;0250	e1 	. 
	pop de			;0251	d1 	. 
	pop bc			;0252	c1 	. 
	pop af			;0253	f1 	. 
	ei			;0254	fb 	. 
	ret			;0255	c9 	. 

Here we’re doing rational things like pushing registers to the stack and popping them in reverse order when we’re done, enabling interrupts before returning from a subroutine… it’s likely that this is part of an interrupt handler. There are no nops, registers are used after they’re modified, etc.

This helped a bit, but there was enough nonsense code (and enough obscure working code) that all this approach really got me was the ability to rule a few regions of the ROM out. Let’s try something a little more directed.

Approach 3: Look at the chip starts

As mentioned before, it often makes sense to put your fonts, strings, and other localized data on a single chip, so you only have to swap one IC to ready a unit for a different market. With this in mind, I took a quick look to see if I could find anything special at the starting points of the different physical ICs (at 0x0000, 0x2000, and 0x4000) in case the designers had taken this approach. I came up completely empty here, except for this tantalizing function at the start of 0x4000:

	push bc			;4000	c5 	. 
	push de			;4001	d5 	. 
	push hl			;4002	e5 	. 
l4003h:
	ld a,b			;4003	78 	x 
	cp 048h		;4004	fe 48 	. H 
	jr z,l4026h		;4006	28 1e 	( . 
	cp 056h		;4008	fe 56 	. V 
	jr z,l402bh		;400a	28 1f 	( . 
	cp 043h		;400c	fe 43 	. C 
	jr z,l4030h		;400e	28 20 	(   
	cp 055h		;4010	fe 55 	. U 
	jr z,l4035h		;4012	28 21 	( ! 
	cp 044h		;4014	fe 44 	. D 
	jr z,l403ah		;4016	28 22 	( " 
	cp 041h		;4018	fe 41 	. A 
	jr z,l403fh		;401a	28 23 	( # 
	cp 050h		;401c	fe 50 	. P 
	jr z,l4044h		;401e	28 24 	( $ 
	or a			;4020	b7 	. 
l4021h:
	ccf			;4021	3f 	? 
	pop hl			;4022	e1 	. 
	pop de			;4023	d1 	. 
	pop bc			;4024	c1 	. 
	ret			;4025	c9 	. 

This is pretty interesting– it’s loading a value in the accumulator and then comparing to the ASCII values for ‘H’, ‘V’, ‘C’, ‘U’, ‘D’, ‘A’, and ‘P’. It sure looks like it’s parsing an ASCII character! Unfortunately I didn’t see these characters appearing in any quantity in the rest of the ROM, so whatever it’s parsing, it’s not an on-chip font. Let’s try something else.

Approach 4: Monotonically increasing values

This approach involves making a few more assumptions about how the original designer was going to encode the vector font. The first is that they’re unlikely to toss all the drawing commands into the ROM at random; they will probably appear one after another in an orderly fashion. The second is that, since some characters are more complex than others (and we’re trying to save space!), they won’t just be in a table with fixed-width entries. That means that in order to find the character drawing instructions, there will have to be a lookup table somewhere in the ROM. Now, if that lookup table is organized sequentially by ASCII code, and the character instructions also appear sequentially in the ROM– and although they don’t have to, why wouldn’t they?– we can look for a sequence of monotonically increasing numbers, probably 16-bit addresses, that are separated by small but varying amounts. And, scrolling through the raw hex, we come across that exact thing around 0x2560:

00002560: 6dc1 cd09 25c9 205f 4827 2628 2631 263a  m...%. _H'&(&1&:
00002570: 264b 265e 2671 2680 2685 268e 2697 26a2  &K&^&q&.&.&.&.&.
00002580: 26aa 26b3 26b8 26c0 26c5 26d1 26d9 26e4  &.&.&.&.&.&.&.&.
00002590: 26f4 26fb 2607 2716 271d 2730 273f 274e  &.&.&.'.'.'0'?'N
000025a0: 275e 2764 276d 2773 2782 2795 279e 27ad  '^'d'm's'.'.'.'.
000025b0: 27b8 27c2 27cc 27d5 27e2 27eb 27f4 27fe  '.'.'.'.'.'.'.'.
000025c0: 2707 280d 2815 281c 2828 2832 2842 284e  '.(.(.(.(((2(B(N
000025d0: 285d 2864 286d 2873 287b 2883 288b 2892  (](d(m(s({(.(.(.

The xxd utility is doing us a disservice here by arbitrarily inserting spaces between values at 2-byte intervals. It’s tempting to think this table starts around 0x256A with the values 0x2628, 0x2631, 0x263a… but it’s a mirage. If that alignment were correct, then a bit later we’d come across the sequence 0x26f4, 0x26fb, 0x2607, 0x2716… which doesn’t make much sense. What’s actually happening here is that the 16-bit values start at 0x2569, and are little-endian– the small half of the value comes first. Once we interpret it that way, the numbers are monotonically increasing like we’d expect.

Now let’s look at the values themselves. The first few values are 0x2627, 0x2628, 0x2631, 0x263a, 0x264b. That means the lengths of the first four entries are 1, 9, 9, and 17. The first four printable ASCII characters are SPACE (no strokes), ! (two strokes), ” (two strokes), and # (four strokes)… it looks like we’ve found our font!

Decoding the vectors

Now it’s time to look at the actual data pointed to at the table. Again, taking the first few characters, we have:

SPACE  ff
!      01 08 21 02 01 00 21 00 ff
"      01 28 21 26 01 68 21 66 ff
#      01 00 21 48 01 88 21 40 01 83 21 03 01 05 21 85 ff

It’s pretty clear what’s going on here: 0xff is the end-of-character delimiter (so the SPACE character, reasonably enough, draws nothing). Each stroke consists of a sequence 01 AB 21 CD, so we can think of 01 as indicating a “move to” command, and a 21 as indicating a “draw to” command. That only leaves one byte to indicate an X/Y coordinate. As it happens, this is all we need: the high four bits of the byte indicate the X coordinate, and the low four bits indicate the Y coordinate. We’re limited to points on a 16×16 grid, but that’s sufficient for a plotter font like this. (Keep in mind that the raster fonts above are often 8×10, and they don’t have the benefit of being able to draw smooth lines between points.) It’s also fair to assume that these are signed four-bit numbers; for instance, a Y value of 0xf indicates a point one unit below the baseline.

Later on, we find sequences like this:

%     01 47 24 28 07 26 47 01 88 21 00 01 41 24 60 81 62 41 ff

This is made up of three strokes, but the two circles in the ‘%’ sign are drawn as small squares. Instead of the draw-to sequence starting with 0x21, these sequences start with 0x24. It’s clear that 0x2X codes represent a sequence of draws, with the X representing the number of points to draw to (in this case, 4).

I wrote a quick python script to render these characters as SVG to see if this hunch was correct, and it worked perfectly– or almost.
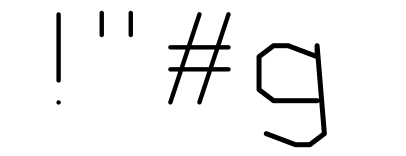
negative numbers are problematic

good good good oof

For some internal reason I’m not entirely sure of, points with a Y coordinate below the baseline are offset by one X unit. This is probably related to how they implemented the packing/unpacking algorithm (probably allowing the Y value to overflow into the X coordinate). Anyway, I put a quick fix in the python extraction script and we were good to go.

Building the TrueType font

I set up the python script to go through the font and generate an SVG file for each character. The only remaining problem was to create a valid TrueType font from these characters. Luckily, the fontforge tool is scriptable in python, so I was able to whip up a small script to generate the TT font. Less luckily, fontforge’s SVG import is very unstable, so I had to do a lot of manual cleanup, but eventually I was able to generate something renderable.

And here it is. It’s monospace, so you can use it as your terminal font, if you like, and you’re completely nuts. Not like me, an ordinary human who is definitely sane.

sample of font text

Postscript

The next step is to integrate the font into my plot-to-svg script. This should let you experience all the fun of having an Apple 410 without the frustration and maintenance issues of having an Apple 410, and at a fraction of the cost!

Also, a big thank you to Matthew Blain who was able to find a copy of the Apple 410 manual and complete the documentation for the remaining functions!
New Year’s Eve Craft Night @ NYC Resistor

 Uncategorized  Comments Off on New Year’s Eve Craft Night @ NYC Resistor
Dec 252017
 

We’re throwing a special NYE Craft Night at NYC Resistor!

A large drunk polar bear with a kabuki face painted on his stomach dances in the foreground while his friends, a llama, a panda, and a woman look on in amazement.

All usual Craft Night shenanigans welcome, whether that’s knitting/soldering/whatever projecting you want. We’ll be starting at 8pm and going til…whenever.

From left to right, a polar bear, a penguin, a panda bear, and a grizzly bear are dancing back and forth, flapping their hands near their face. The polar bear is wearing an apron and blue scarf. The grizzly bear is wearing a leather jacket, cross neckless and goggles

Bring your projects, bring your friends, most importantly – bring yourself.

87 3rd Avenue
4th floor
Brooklyn NY 11217

A polar bear in a blue belly dancer costume is dancing in front of a blue sand desert at night. A camel wearing a regal blue rug gazes at him from behind.

Reviving the Apple 410 Color Plotter

 Uncategorized  Comments Off on Reviving the Apple 410 Color Plotter
Dec 132017
 

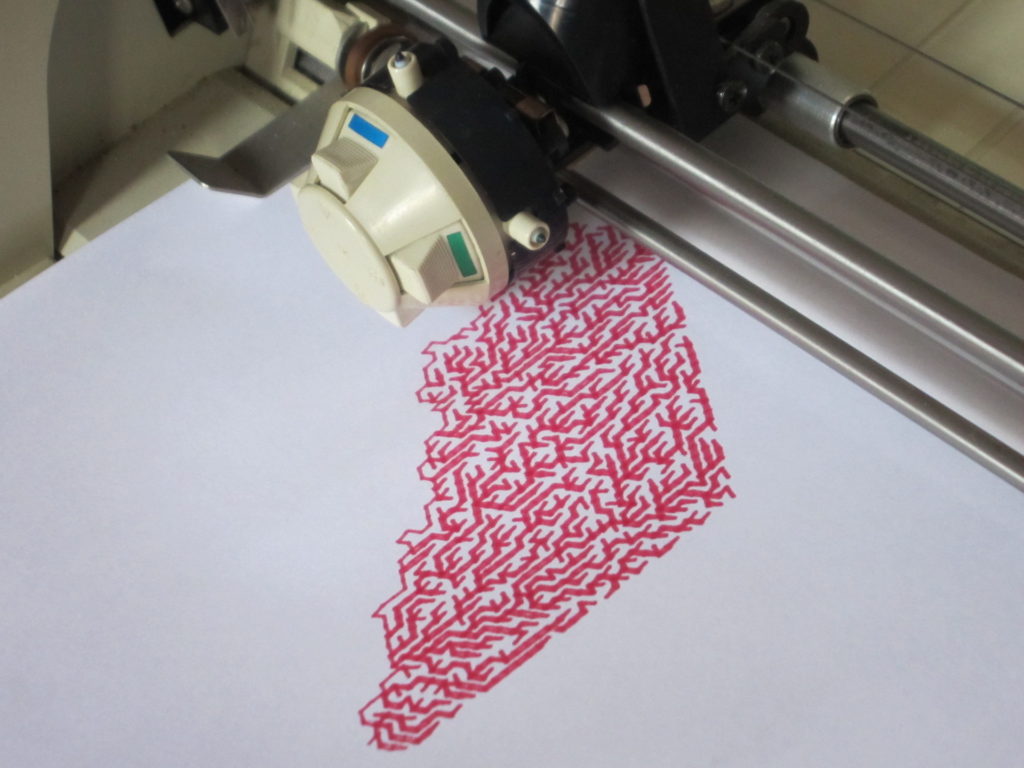
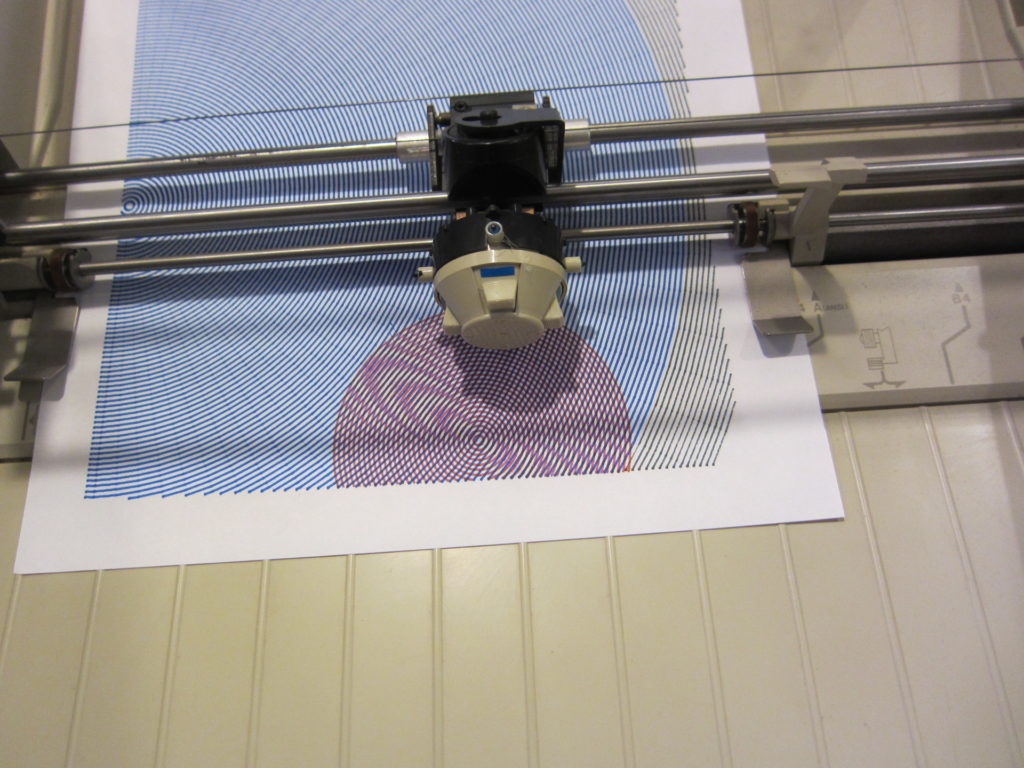
Apple 410 plotter drawing hexagonal spanning tree

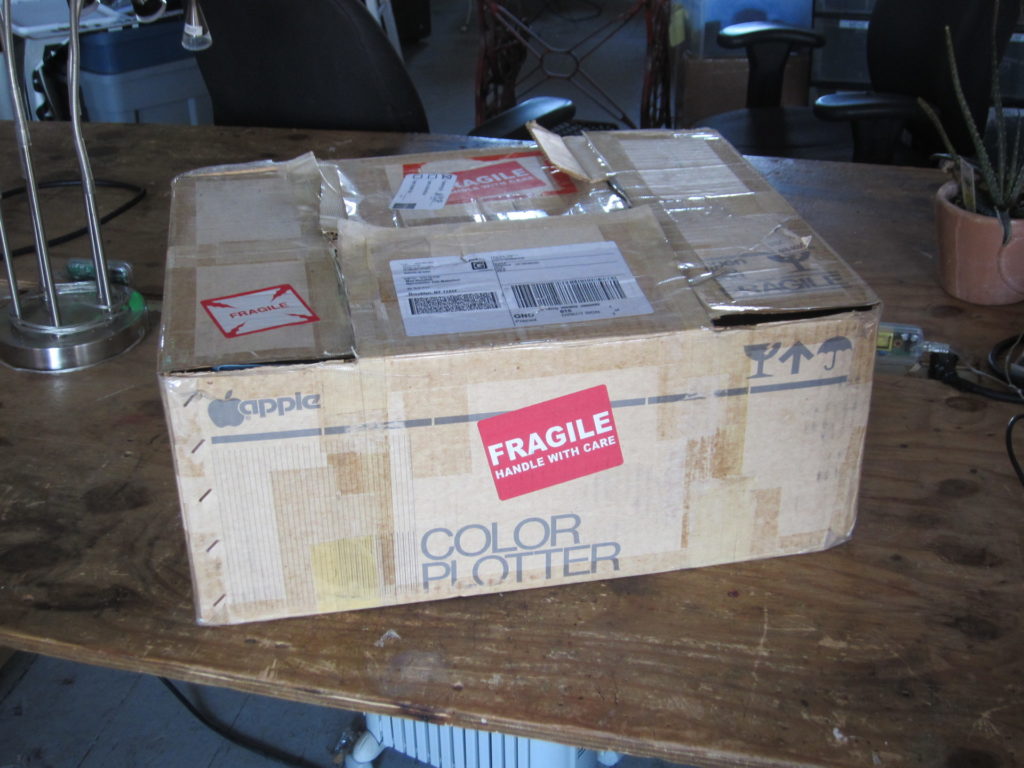
After seeing some of the jaw-dropping and inspiring plotter art that’s been popping up on #plottertwitter this year, I decided to get in on the fun. We don’t have an Axidraw or other modern plotting device handy, but I did have a hazy memory of someone donating a sweet large-format HP plotter of some sort to NYCR a few years back. Armed with a ladder and flashlight, I scoured the loft for a bit and eventually emerged filthy but sort of victorious, with this:

Apple 410 Color Plotter box

Spoiler alert: this is not going to be a sweet large-format HP plotter

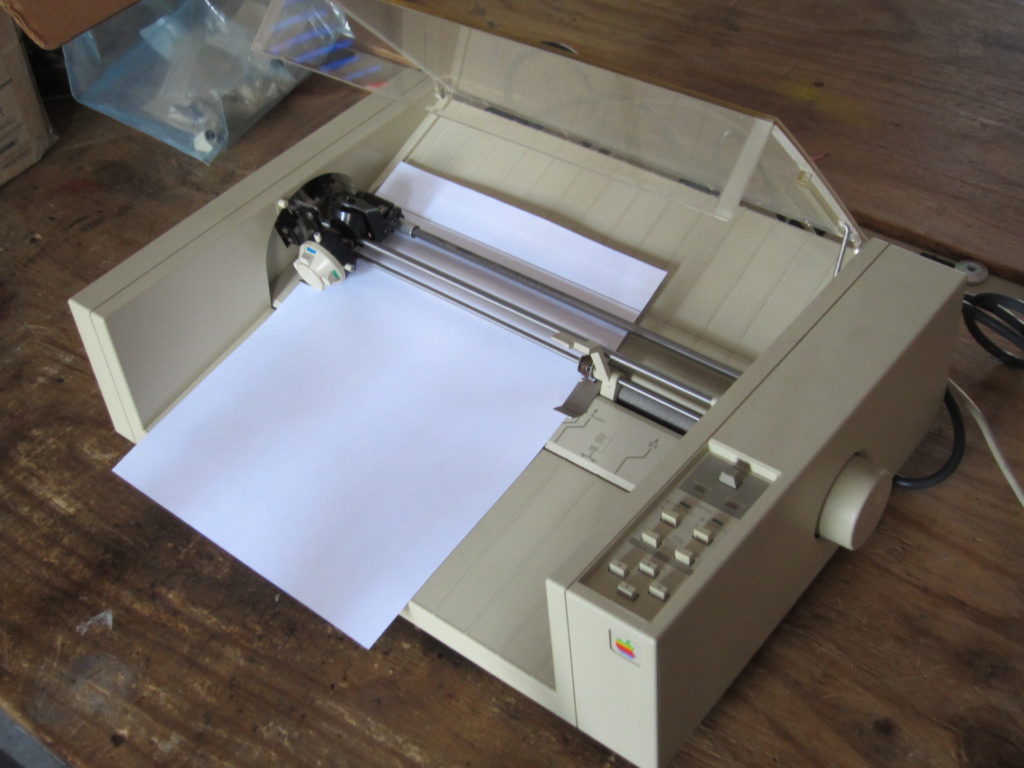
apple 410 plotter

oh hai

Say hello to the Apple 410 Color Plotter. It’s set up like many low-cost plotters of the era, with a plotter head traveling on the Y axis (left-to-right facing the printer) and a roller underneath the paper moving it along the X axis (up-and-down) as it goes. A solenoid pulls the pen head down, and a limit switch at the left end of the Y axis travel allows the printer to home itself. That’s it!

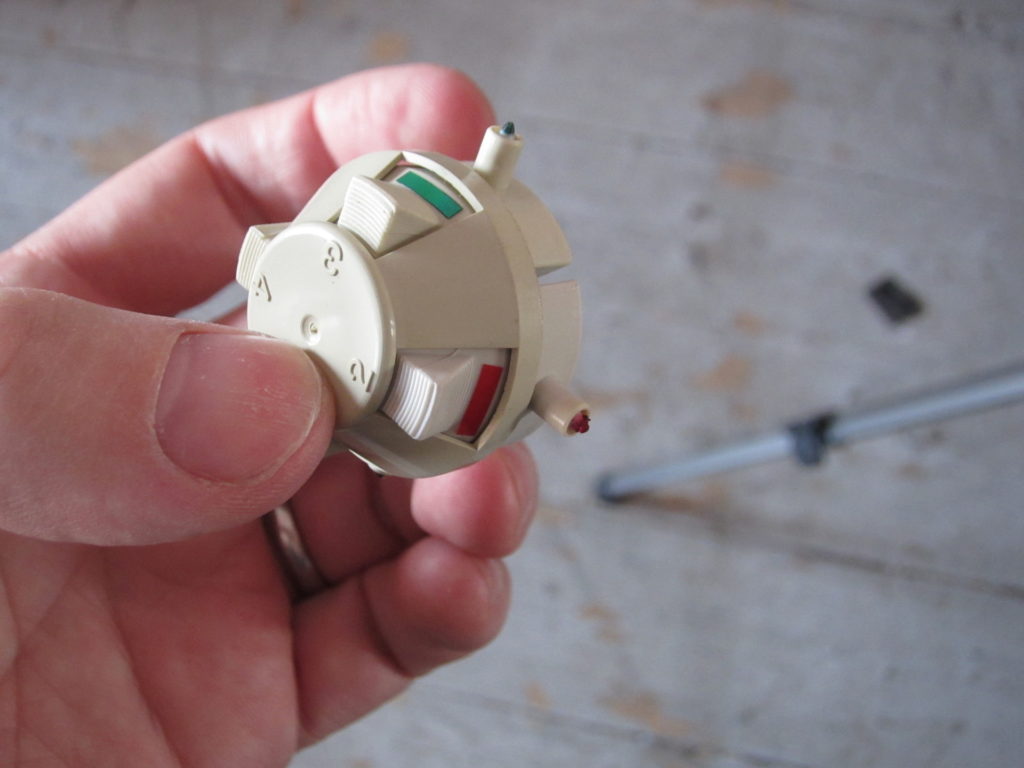
What makes is a color plotter, of course, is the multi-pen head.

The four-pen plotting head.

I like this design quite a bit.

There’s a pawl at the left end of the head’s travel. As the head moves to the right, it catches on to a peg on the head’s carousel, rotating it an eighth of a turn. In this way the plotter can (a bit slowly) swap between pens of various colors. It’s a nice, low-cost design, and as long as you keep your number of pen swaps down, it doesn’t make your plots appreciably slower.

If you didn’t know Apple made a plotter, well, they didn’t. It’s actually a similarly obscure Yokogawa YEW PL-1000. There were no reference manuals available online that I could find, but maybe Apple itself can lend a hand?

apple support

This didn’t work.

As charming the idea of rolling wild-eyed into a Genius Bar with a thirty-plus-year-old plotter and screaming “I NEED THIS WORKING BY MONDAY” was, I figured if I really wanted this thing running I’d have to get it chugging myself. Although I couldn’t find a command reference anywhere, I was able to find a few snippets here and there (like the configuration file incongruously pasted into the wikipedia page) and, vitally, an old service manual which had the dip switch settings for various serial port configurations.

I say “vitally” here because ordinarily when I need to figure out the baud rate on a mysterious serial device, I’ll just try connecting to it at various speed/parity settings, toss a few linefeeds at it, and see if the response looks legible or at least consistent. That approach wasn’t yielding any results for me this time. As it turns out, the 410 didn’t respond to commands with acknowledgement or error codes. As far as the serial connection went, it was completely mute. There is one bit of feedback, though. When you send a message the plotter doesn’t like, it lights up a jaunty red ERROR led, which stays lit until it receives a reset command or you restart the plotter. Rough.

Luckily, the plotter does have a self-test mode which plots text, graphs, circles, and other complex designs. In fact, if you search for the Apple 410 on YouTube you’ll find a few videos of the self-test running. I figured that the script for that self-test had to be present somewhere in the firmware, and you know what that means.

YEW PL-1000 logic board

It’s ROM-dumping time!

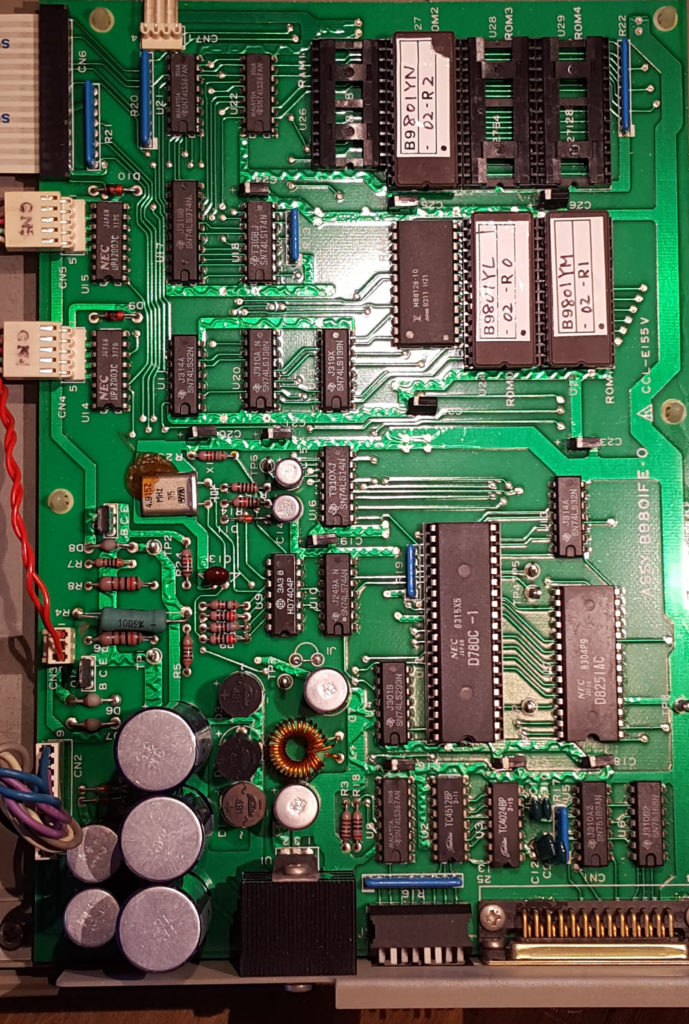
This device is as simple internally as it is externally. What you’re looking at here is a Z80 processor, an additional IC to handle the serial interface, a bit of RAM, a few ROMs, a power supply and some driving logic for the motors and panel switches. The ROMs were socketed and clearly labeled; yanking, dumping, and reinstalling them was a breeze. Browsing through the firmware quickly bought me to exactly what I was looking for: the text of the self-test script.

hexdump of rom with test script

Ah, that’s the stuff.

Searching for other instances of the command codes quickly bought me to a dispatch table, which meant I could enumerate all the valid commands for the plotter. From this I was able to cobble together a rough command reference. A few simple test plots later, we were in business!

There was one last thorny patch to resolve, though. As you’ll recall, the plotter doesn’t send any responses over the serial connection. As you’d expect of a device of this vintage, there’s not a lot of RAM to serve as a buffer, so you can’t just send a whole complex plot at once. The plotter needs to let you know when the buffer is full, and for this it uses hardware handshaking. DTR/DSR hardware handshaking is a (now rarely-used) technique for out-of-band signaling over an RS232 connection. Essentially, when the plotter sets the DSR bit, it’s saying “I’m full, daddy,” and very much like a toddler, if you keep feeding it it will vomit all over the place. If your USB to serial adapter handles hardware handshaking well, more power to you, but mine doesn’t, so I ended up flushing the the connection and checking the DSR line manually after every byte. It’s ugly, but it works.

And that’s it. If you are one of the maybe dozen people worldwide saddled with one of these beasts, I’ve got a half-assed python library that will get you started. Have fun!

(And if you’re wondering how I’m getting those nice beefy lines with dried-out plotter pens from the 80’s, that’s another blog post.)


Learn to Program with p5js Animations on Dec 10th

 classes  Comments Off on Learn to Program with p5js Animations on Dec 10th
Dec 062017
 

We’re offering a brand-new intro to programming class on December 10th! Tickets available here.

p5js is an excellent gateway to get up and running with programming fundamentals. In the class we will breifly cover some necessary basics of HTML and Javascript, but will primarily focus on the p5js environment for fun animations and interactivity. By the end of this class you will create your own interactive web page, and will have the tools to continue exploring and learning p5js on your own.

Get your tickets on Eventbrite.

More ShopBot Plywood CNC Joinery for Dilettantes

 Uncategorized  Comments Off on More ShopBot Plywood CNC Joinery for Dilettantes
Dec 042017
 

“When all you have is a hammer, everything starts to look like a nail,” or so the saying goes. Well, when all you have is a cartoonishly large CNC router, everything starts to look like you should cut it on there, even if a better tool would be, say, a table saw. Fortunately, the ShopBot is pretty much the ultimate multitasker, and this weekend I set about expanding my very slight knowledge of plywood joinery by making a few rabbet joints. I’ve more or less skated by with just box or finger joints for all my projects to date, and while those are extremely useful and strong, they do require filleting the corners of each joint to make them fit correctly, which isn’t always ideal or pretty.

What on earth is a rabbet joint?, I hear you ask. Is that some sort of drug paraphernalia for small fuzzy mammals? Alas, no (although that does sound like an entertaining ShopBot project in its own right.) A rabbet–or a rebate if you’re from Britain–is a groove cut into the edge of a board. Rabbet joints use them to strengthen and straighten what would otherwise be a butt joint, which is simply where the two parts meet without any modification. Rabbet joints are much stronger because they allow any load to be distributed over a greater surface area, and give glue more crevices to get into. I’m particularly interested in a double rabbet because less of the ugly outer edges of the plywood are visible.

Traditionally, rabbets are cut with a table saw and a dado set, and truth be told, that’s a much faster, simpler, and elegant way to go about this. But I set myself a challenge: I wanted to figure out how to do this on a ShopBot, and I also wanted to take Fusion 360’s CAM package for a spin, and this seemed like a simple way to get started.

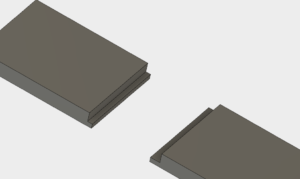
I began with the simplest starting point: just one part made out of a bit of scrap:

One of the things that I keep tripping over in Fusion is that because you absolutely have to model everything in three dimensions before you cut it, assumptions that you made early on can come back to haunt you. For example, it’s easy to assume that your stock is exactly, say, half an inch thick, but when you measure it with the calipers, it’s 0.469″ or somesuch. That 1/32″ isn’t usually too much of a problem, but if you want everything to fit precisely without any gaps or bits sticking out that you have to account for it. I find it immensely helpful to define a variable that holds the measured thickness of the stock material, and then define everything else in terms of it.

This is especially helpful if you’re designing something speculatively, before you’ve purchased the wood, and then you just need to go back and make this change in one place rather than re-drawing the entire thing from scratch. So in my case, I started with the nominal plywood thickness of 0.5″, defined the rabbet depth to be 1/3 of that, and the rabbet width to be 2/3  on one side and 1/3 on the other.

This first attempt went pretty well. This was my first meaningful attempt at using Fusion 360 as a full-fledged CAM suite in addition to its design capabilities. Things I noticed right off the bat about the resulting toolpaths were:

  • The “adaptive clearance” mode for pocketing out large areas results in a very good surface finish at the expense of a bit more waste stock. Fusion is used most frequently for machining metal, so it makes some sense that the programming is especially well-suited for doing very fine finishing passes.
  • If you want to sacrifice some of the spoilboard to ensure that cuts go completely through the material, the adjustment to make is the “bottom” plane of the cutting operation, not by monkeying with the dimensions of the board or the zero plane, both of which I tried with bad results.
  • If using triangular hold-down tabs, which tend to cut off more easily, be sure to make them long and thick enough to hold up during the final finishing pass if you have one programmed.
  • For pocketing/clearance operations where perfect fit is needed, be sure to uncheck “stock to leave” which is, annoyingly, configured to some random value by default.

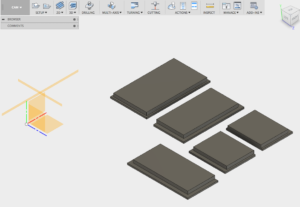
My new skill in hand, I set about making something more useful: a simple five-sided box, open at the top.

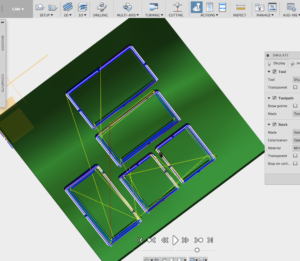
Once I’d sketched out the parts in Fusion, I set up the CNC operations:

This time, I actually remembered to simulate the whole thing to make sure I’d put in tabs and make sure I had set everything else up properly


I was pretty pleased with the surface finish, especially against the sides of the material. I cleaned everything up by hand with a bit of 220-grit sandpaper. Wood, as they say, is a forgiving medium, and sandpaper is the apology.

The moment of truth is the dry-fit to confirm that the design was correct, which it fortunately was.

After glue-up, a quick douse down with a coat of lacquer and it’s…almost presentable.

You can see here what I meant about not seeing too much of the edges of the plywood. Of course, they’re visible on the top–there’s not much to be done about that. But on the sides of the box, only at most 1/3 of the ply side is visible. Even more elegant rabbet joints mitre the edges to hide everything completely. I’d like to try that as a version 2.0.

You can find me on Twitter at @gdickinson.