“When all you have is a hammer, everything starts to look like a nail,” or so the saying goes. Well, when all you have is a cartoonishly large CNC router, everything starts to look like you should cut it on there, even if a better tool would be, say, a table saw. Fortunately, the ShopBot is pretty much the ultimate multitasker, and this weekend I set about expanding my very slight knowledge of plywood joinery by making a few rabbet joints. I’ve more or less skated by with just box or finger joints for all my projects to date, and while those are extremely useful and strong, they do require filleting the corners of each joint to make them fit correctly, which isn’t always ideal or pretty.
What on earth is a rabbet joint?, I hear you ask. Is that some sort of drug paraphernalia for small fuzzy mammals? Alas, no (although that does sound like an entertaining ShopBot project in its own right.) A rabbet–or a rebate if you’re from Britain–is a groove cut into the edge of a board. Rabbet joints use them to strengthen and straighten what would otherwise be a butt joint, which is simply where the two parts meet without any modification. Rabbet joints are much stronger because they allow any load to be distributed over a greater surface area, and give glue more crevices to get into. I’m particularly interested in a double rabbet because less of the ugly outer edges of the plywood are visible.
Traditionally, rabbets are cut with a table saw and a dado set, and truth be told, that’s a much faster, simpler, and elegant way to go about this. But I set myself a challenge: I wanted to figure out how to do this on a ShopBot, and I also wanted to take Fusion 360’s CAM package for a spin, and this seemed like a simple way to get started.
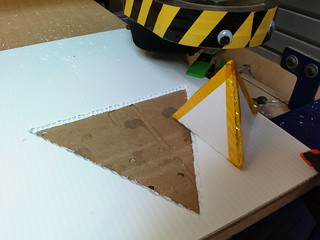
I began with the simplest starting point: just one part made out of a bit of scrap:
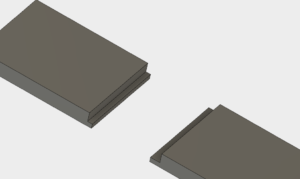
One of the things that I keep tripping over in Fusion is that because you absolutely have to model everything in three dimensions before you cut it, assumptions that you made early on can come back to haunt you. For example, it’s easy to assume that your stock is exactly, say, half an inch thick, but when you measure it with the calipers, it’s 0.469″ or somesuch. That 1/32″ isn’t usually too much of a problem, but if you want everything to fit precisely without any gaps or bits sticking out that you have to account for it. I find it immensely helpful to define a variable that holds the measured thickness of the stock material, and then define everything else in terms of it.
![]()
This is especially helpful if you’re designing something speculatively, before you’ve purchased the wood, and then you just need to go back and make this change in one place rather than re-drawing the entire thing from scratch. So in my case, I started with the nominal plywood thickness of 0.5″, defined the rabbet depth to be 1/3 of that, and the rabbet width to be 2/3 on one side and 1/3 on the other.

This first attempt went pretty well. This was my first meaningful attempt at using Fusion 360 as a full-fledged CAM suite in addition to its design capabilities. Things I noticed right off the bat about the resulting toolpaths were:
- The “adaptive clearance” mode for pocketing out large areas results in a very good surface finish at the expense of a bit more waste stock. Fusion is used most frequently for machining metal, so it makes some sense that the programming is especially well-suited for doing very fine finishing passes.
- If you want to sacrifice some of the spoilboard to ensure that cuts go completely through the material, the adjustment to make is the “bottom” plane of the cutting operation, not by monkeying with the dimensions of the board or the zero plane, both of which I tried with bad results.
- If using triangular hold-down tabs, which tend to cut off more easily, be sure to make them long and thick enough to hold up during the final finishing pass if you have one programmed.
- For pocketing/clearance operations where perfect fit is needed, be sure to uncheck “stock to leave” which is, annoyingly, configured to some random value by default.
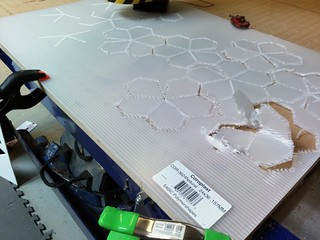
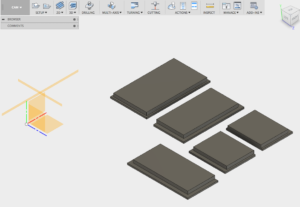
My new skill in hand, I set about making something more useful: a simple five-sided box, open at the top.
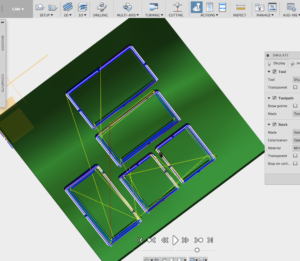
Once I’d sketched out the parts in Fusion, I set up the CNC operations:
This time, I actually remembered to simulate the whole thing to make sure I’d put in tabs and make sure I had set everything else up properly
I was pretty pleased with the surface finish, especially against the sides of the material. I cleaned everything up by hand with a bit of 220-grit sandpaper. Wood, as they say, is a forgiving medium, and sandpaper is the apology.

The moment of truth is the dry-fit to confirm that the design was correct, which it fortunately was.

After glue-up, a quick douse down with a coat of lacquer and it’s…almost presentable.

You can see here what I meant about not seeing too much of the edges of the plywood. Of course, they’re visible on the top–there’s not much to be done about that. But on the sides of the box, only at most 1/3 of the ply side is visible. Even more elegant rabbet joints mitre the edges to hide everything completely. I’d like to try that as a version 2.0.
You can find me on Twitter at @gdickinson.