Buy Magic Mushrooms
Magic Mushroom Gummies

Visitor project: Dominion storage solution

 Uncategorized  Comments Off on Visitor project: Dominion storage solution
Jun 142017
 

Dominion is an award-winning deck-building card game that has ten expansions released as of this writing. There are a wide variety of proposed storage solutions to the problem of toting about several thousand cards and sundry mats and tokens, and Sherwin decided it was high time he moved on up from the method he had been using to a proper receptacle.

First, a look at the final product:

Wooden box sitting on its edge with the word "Dominion" etched in stylized text on its face. Open wooden box displaying contents consisting of rows of Dominion cards separated by labeled dividers.


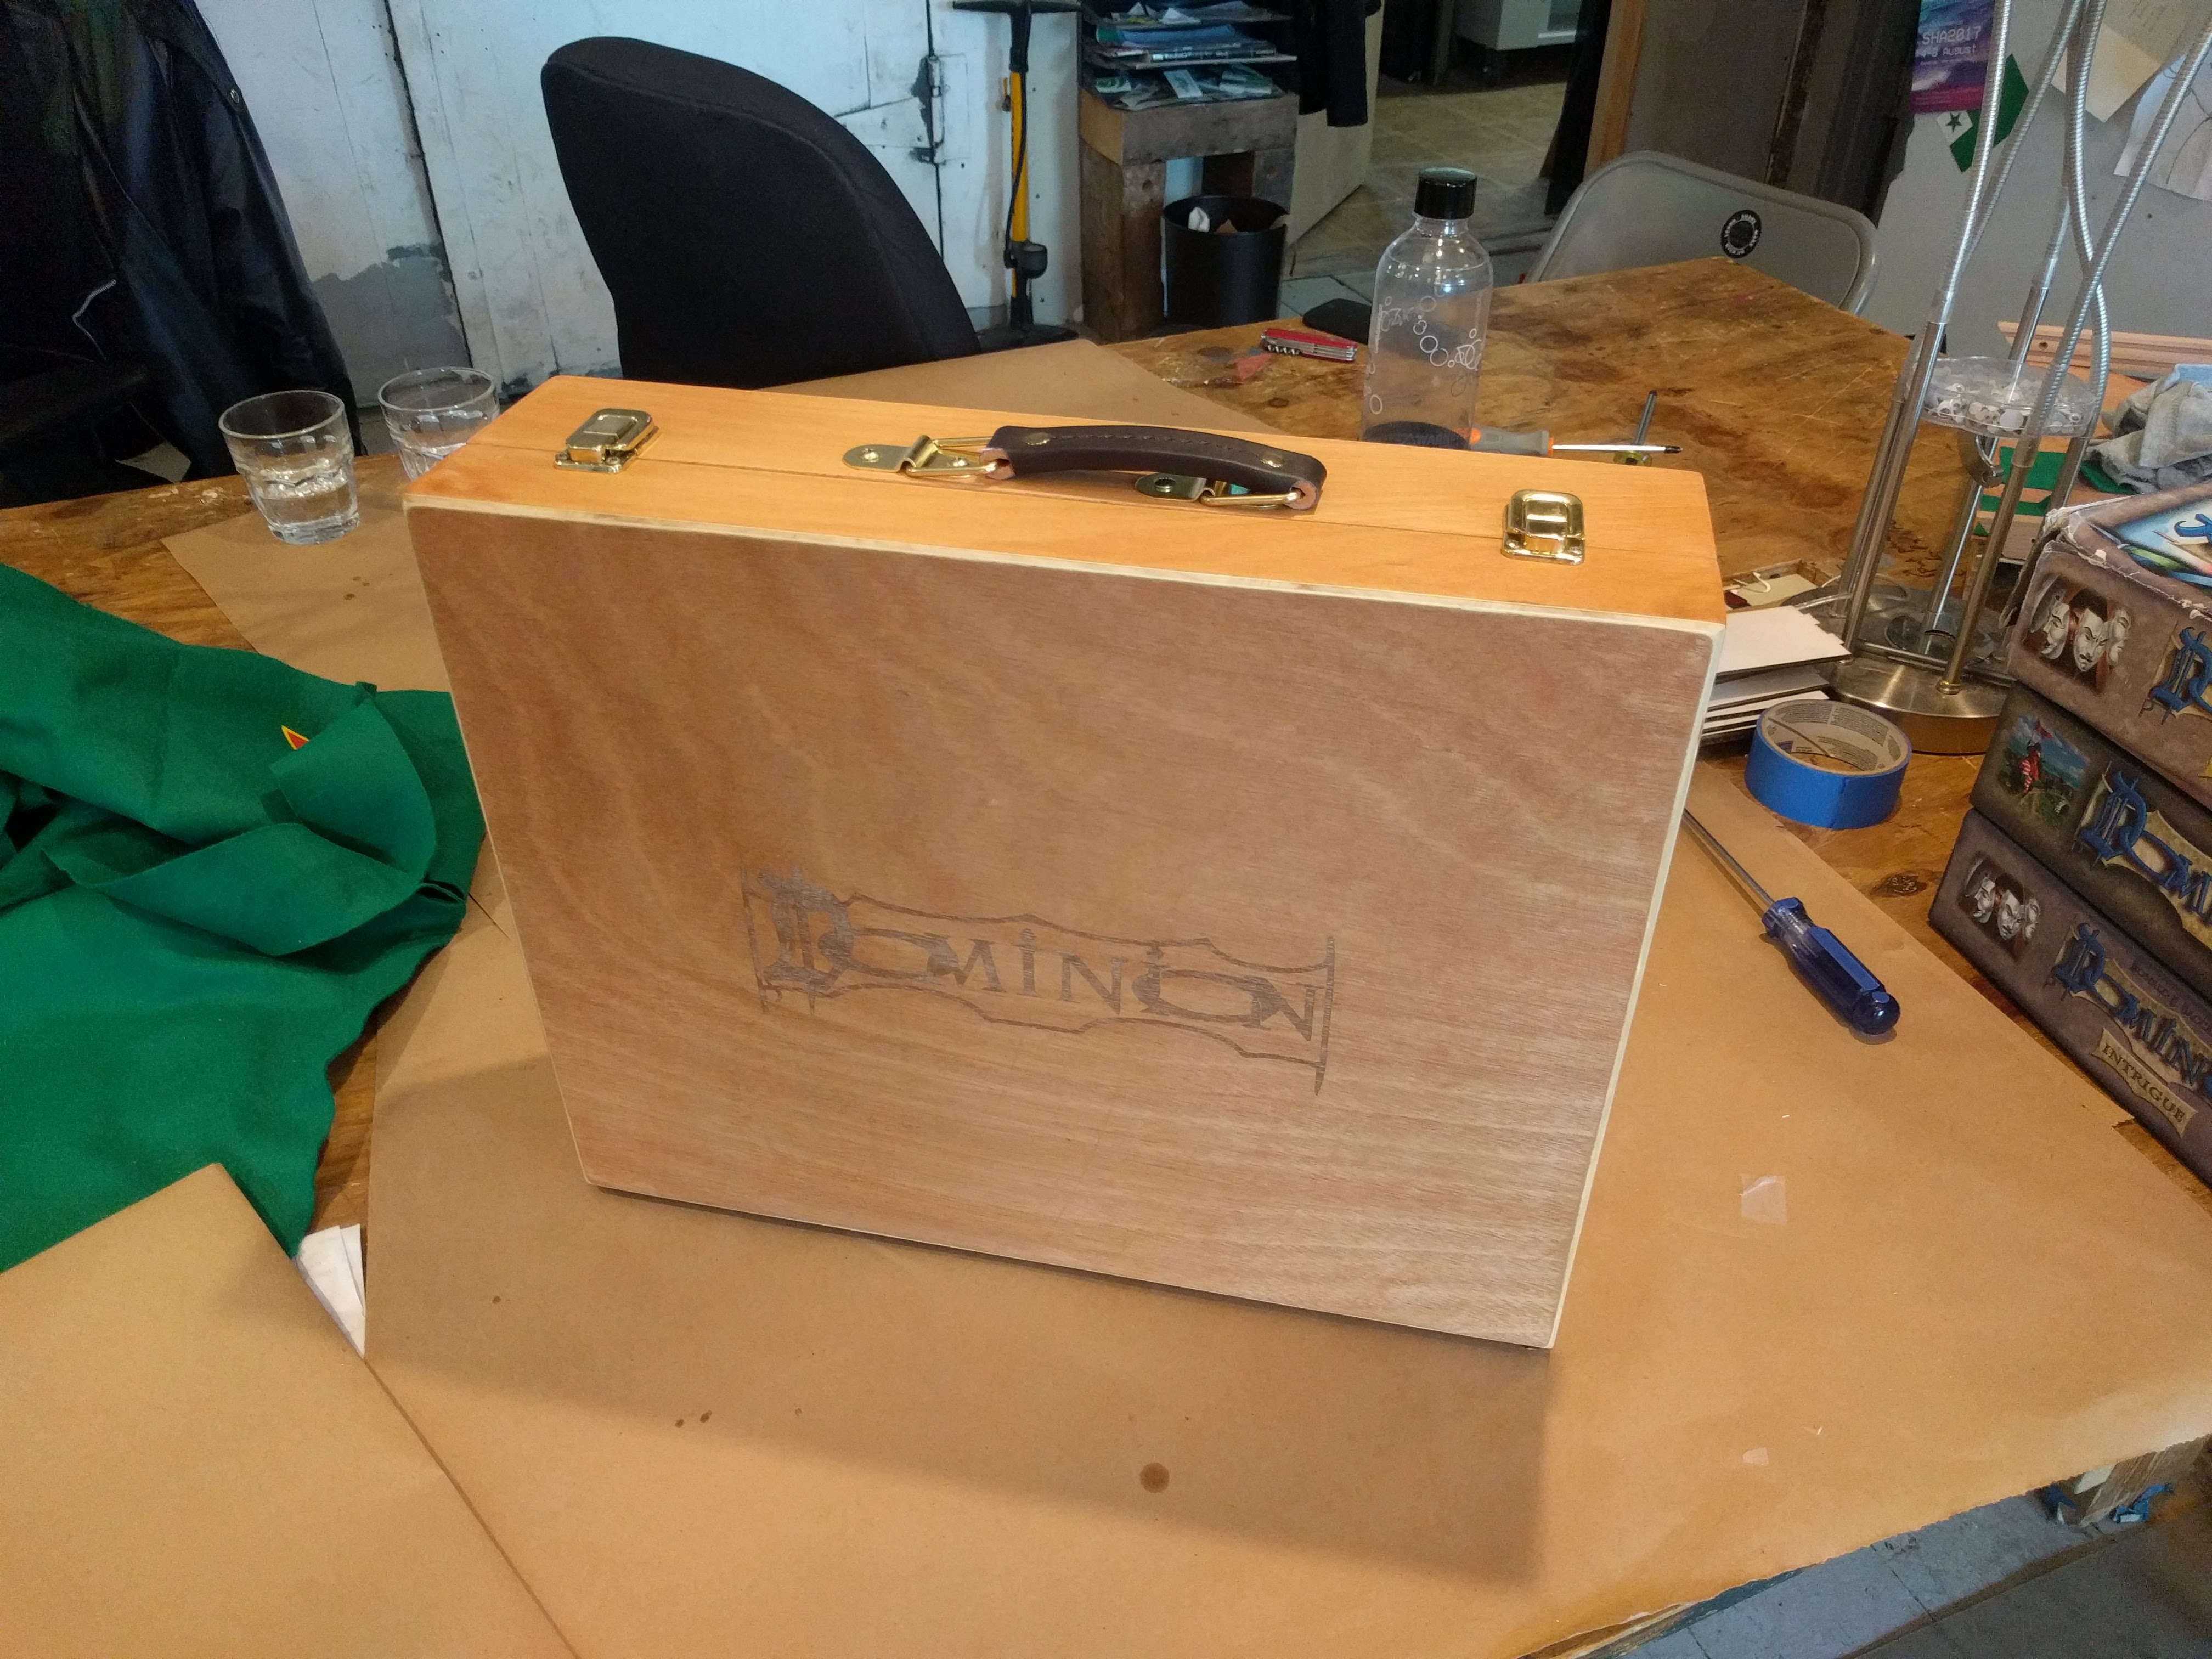
We managed to fit about 3700 unsleeved cards along with the other odds and ends in with room for further expansion. The dividers make every card easy to locate and access, and the box dimensions keep the whole package relatively compact and portable.

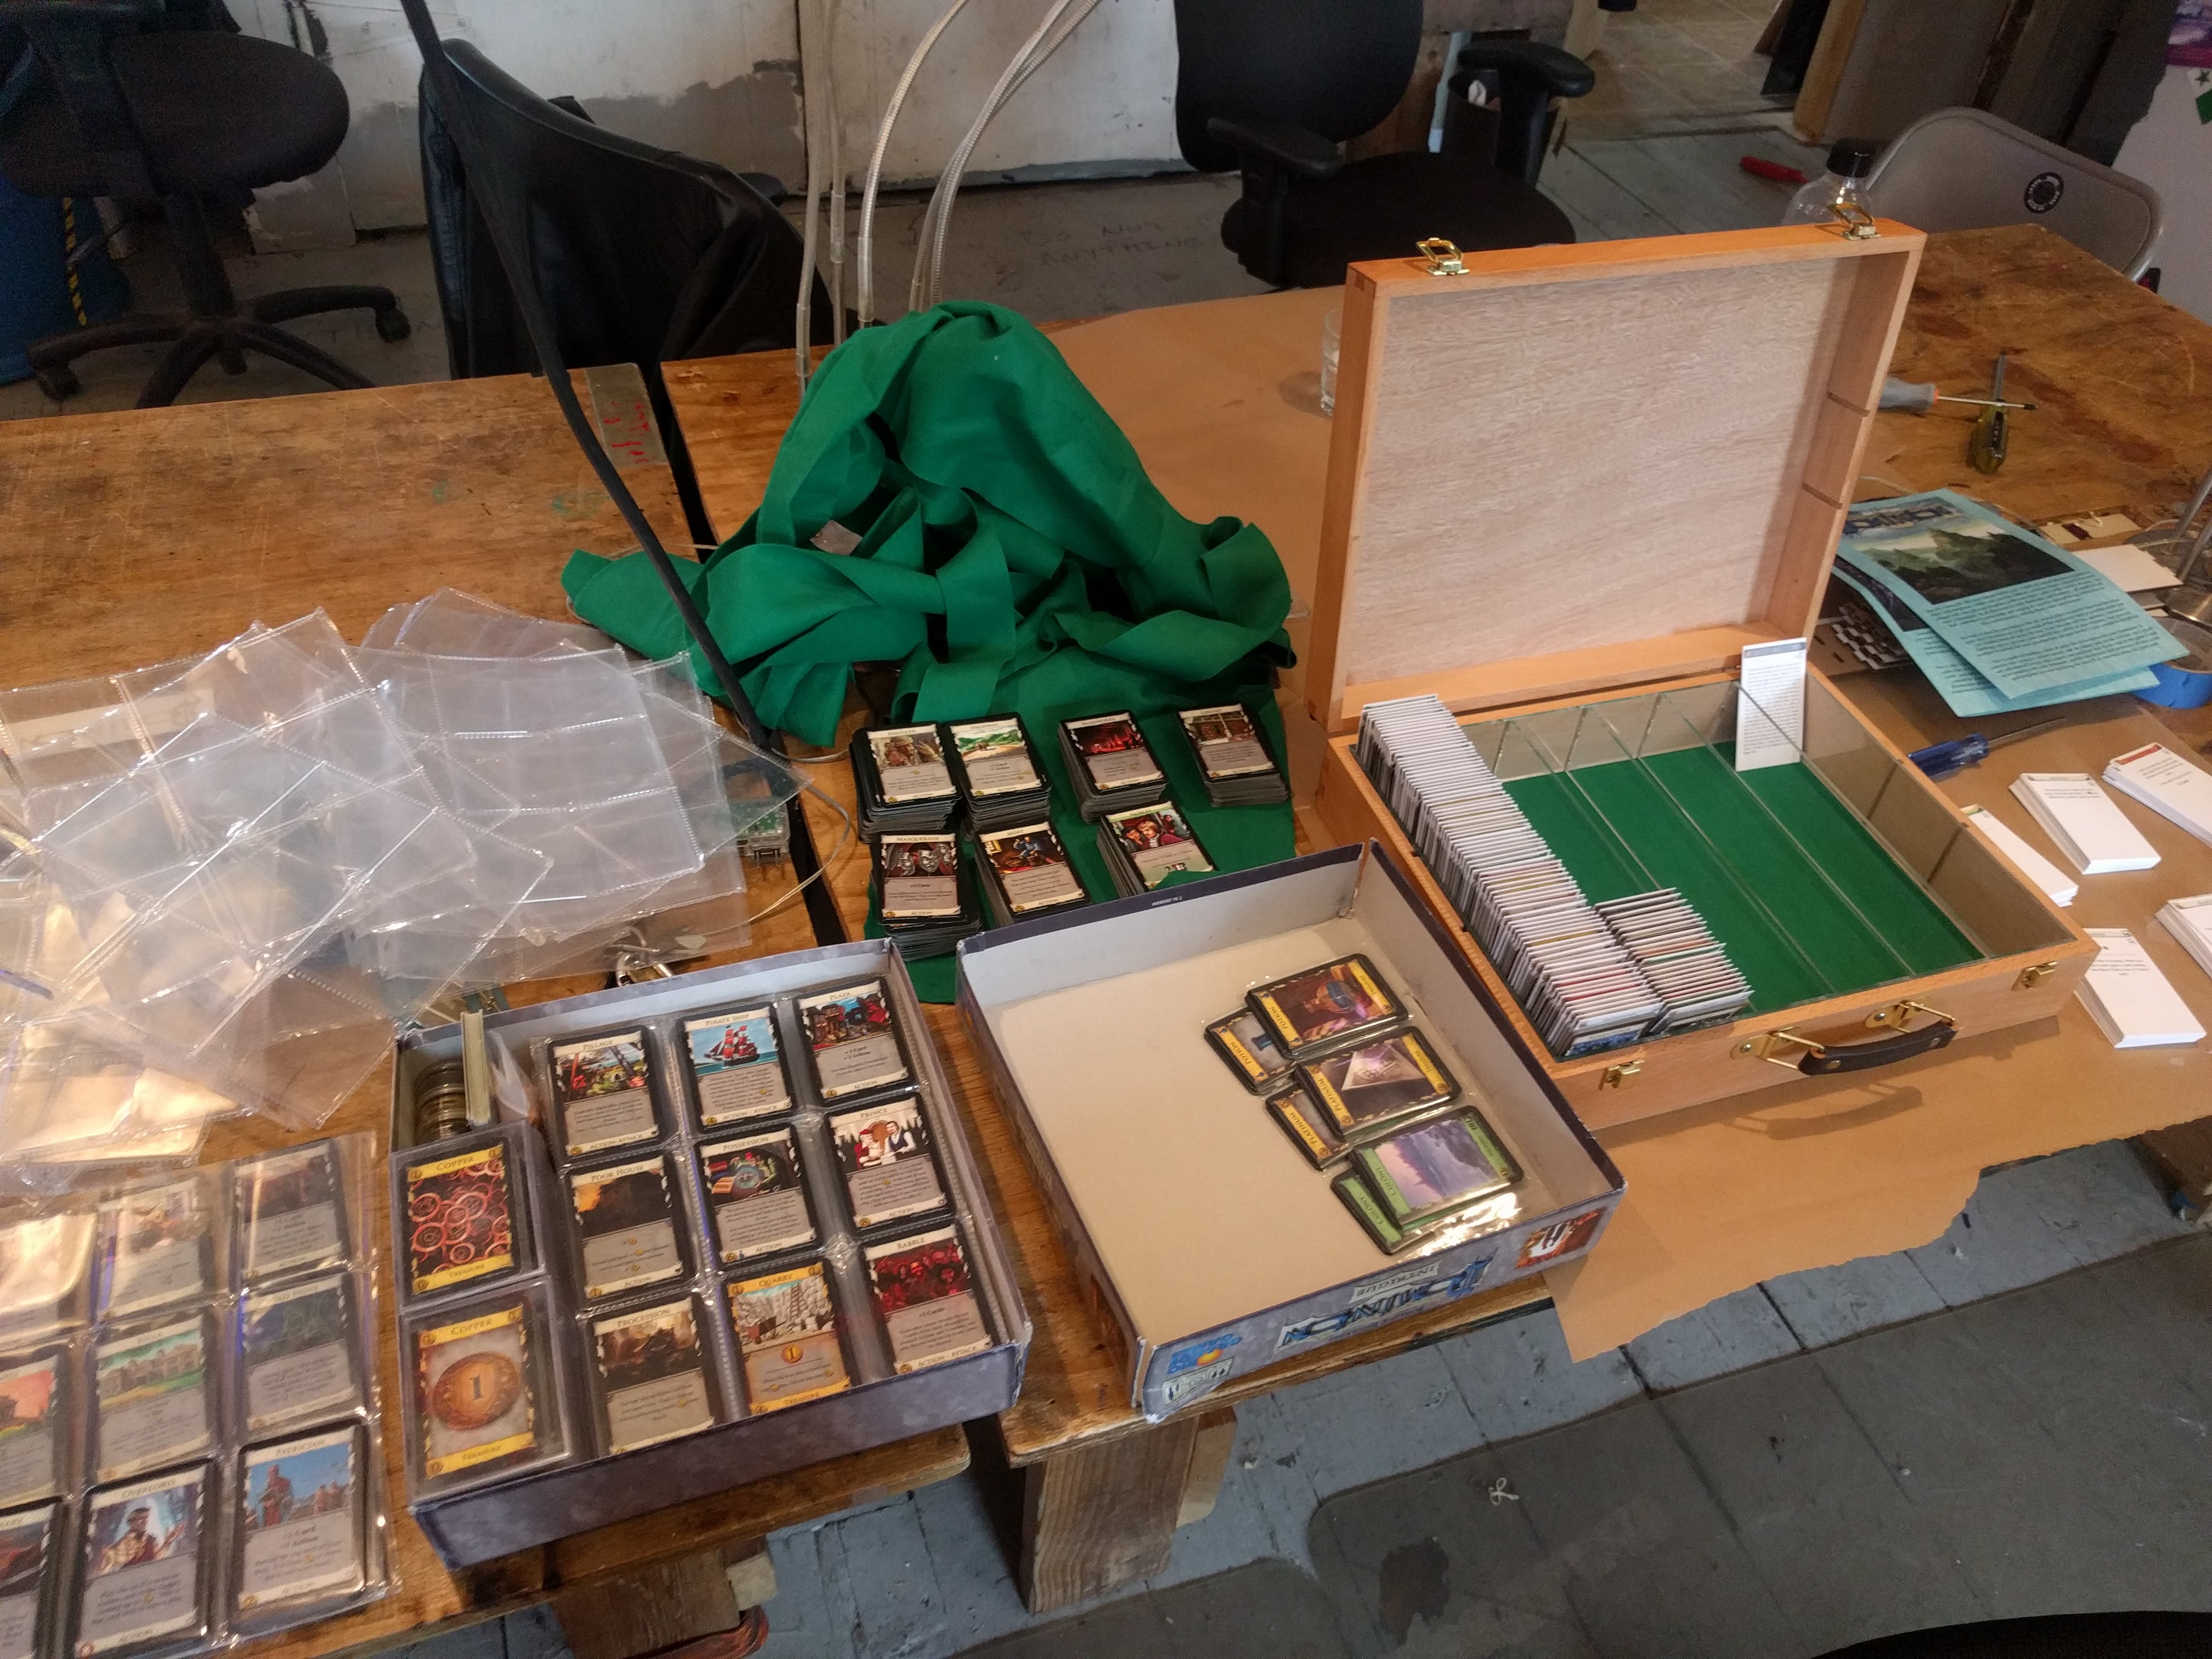
Our starting point was an ad-hoc solution that involved storing each set of Kingdom cards in separate pockets on 9-card sheets, with the base cards being held in deck boxes and the tokens in a bead container, all of which were piled into one of the original game boxes and wrapped in a tote bag. This system worked for a time, but as further expansions were released, both box and tote showed increased signs of strain, neither having been designed to hold more than one game or expansion at a time.

Old, beaten Dominion Intrigue box sitting on a wooden table, overflowing with sleeved dominion cards. To its left sits a threadbare Dominion tote bag.

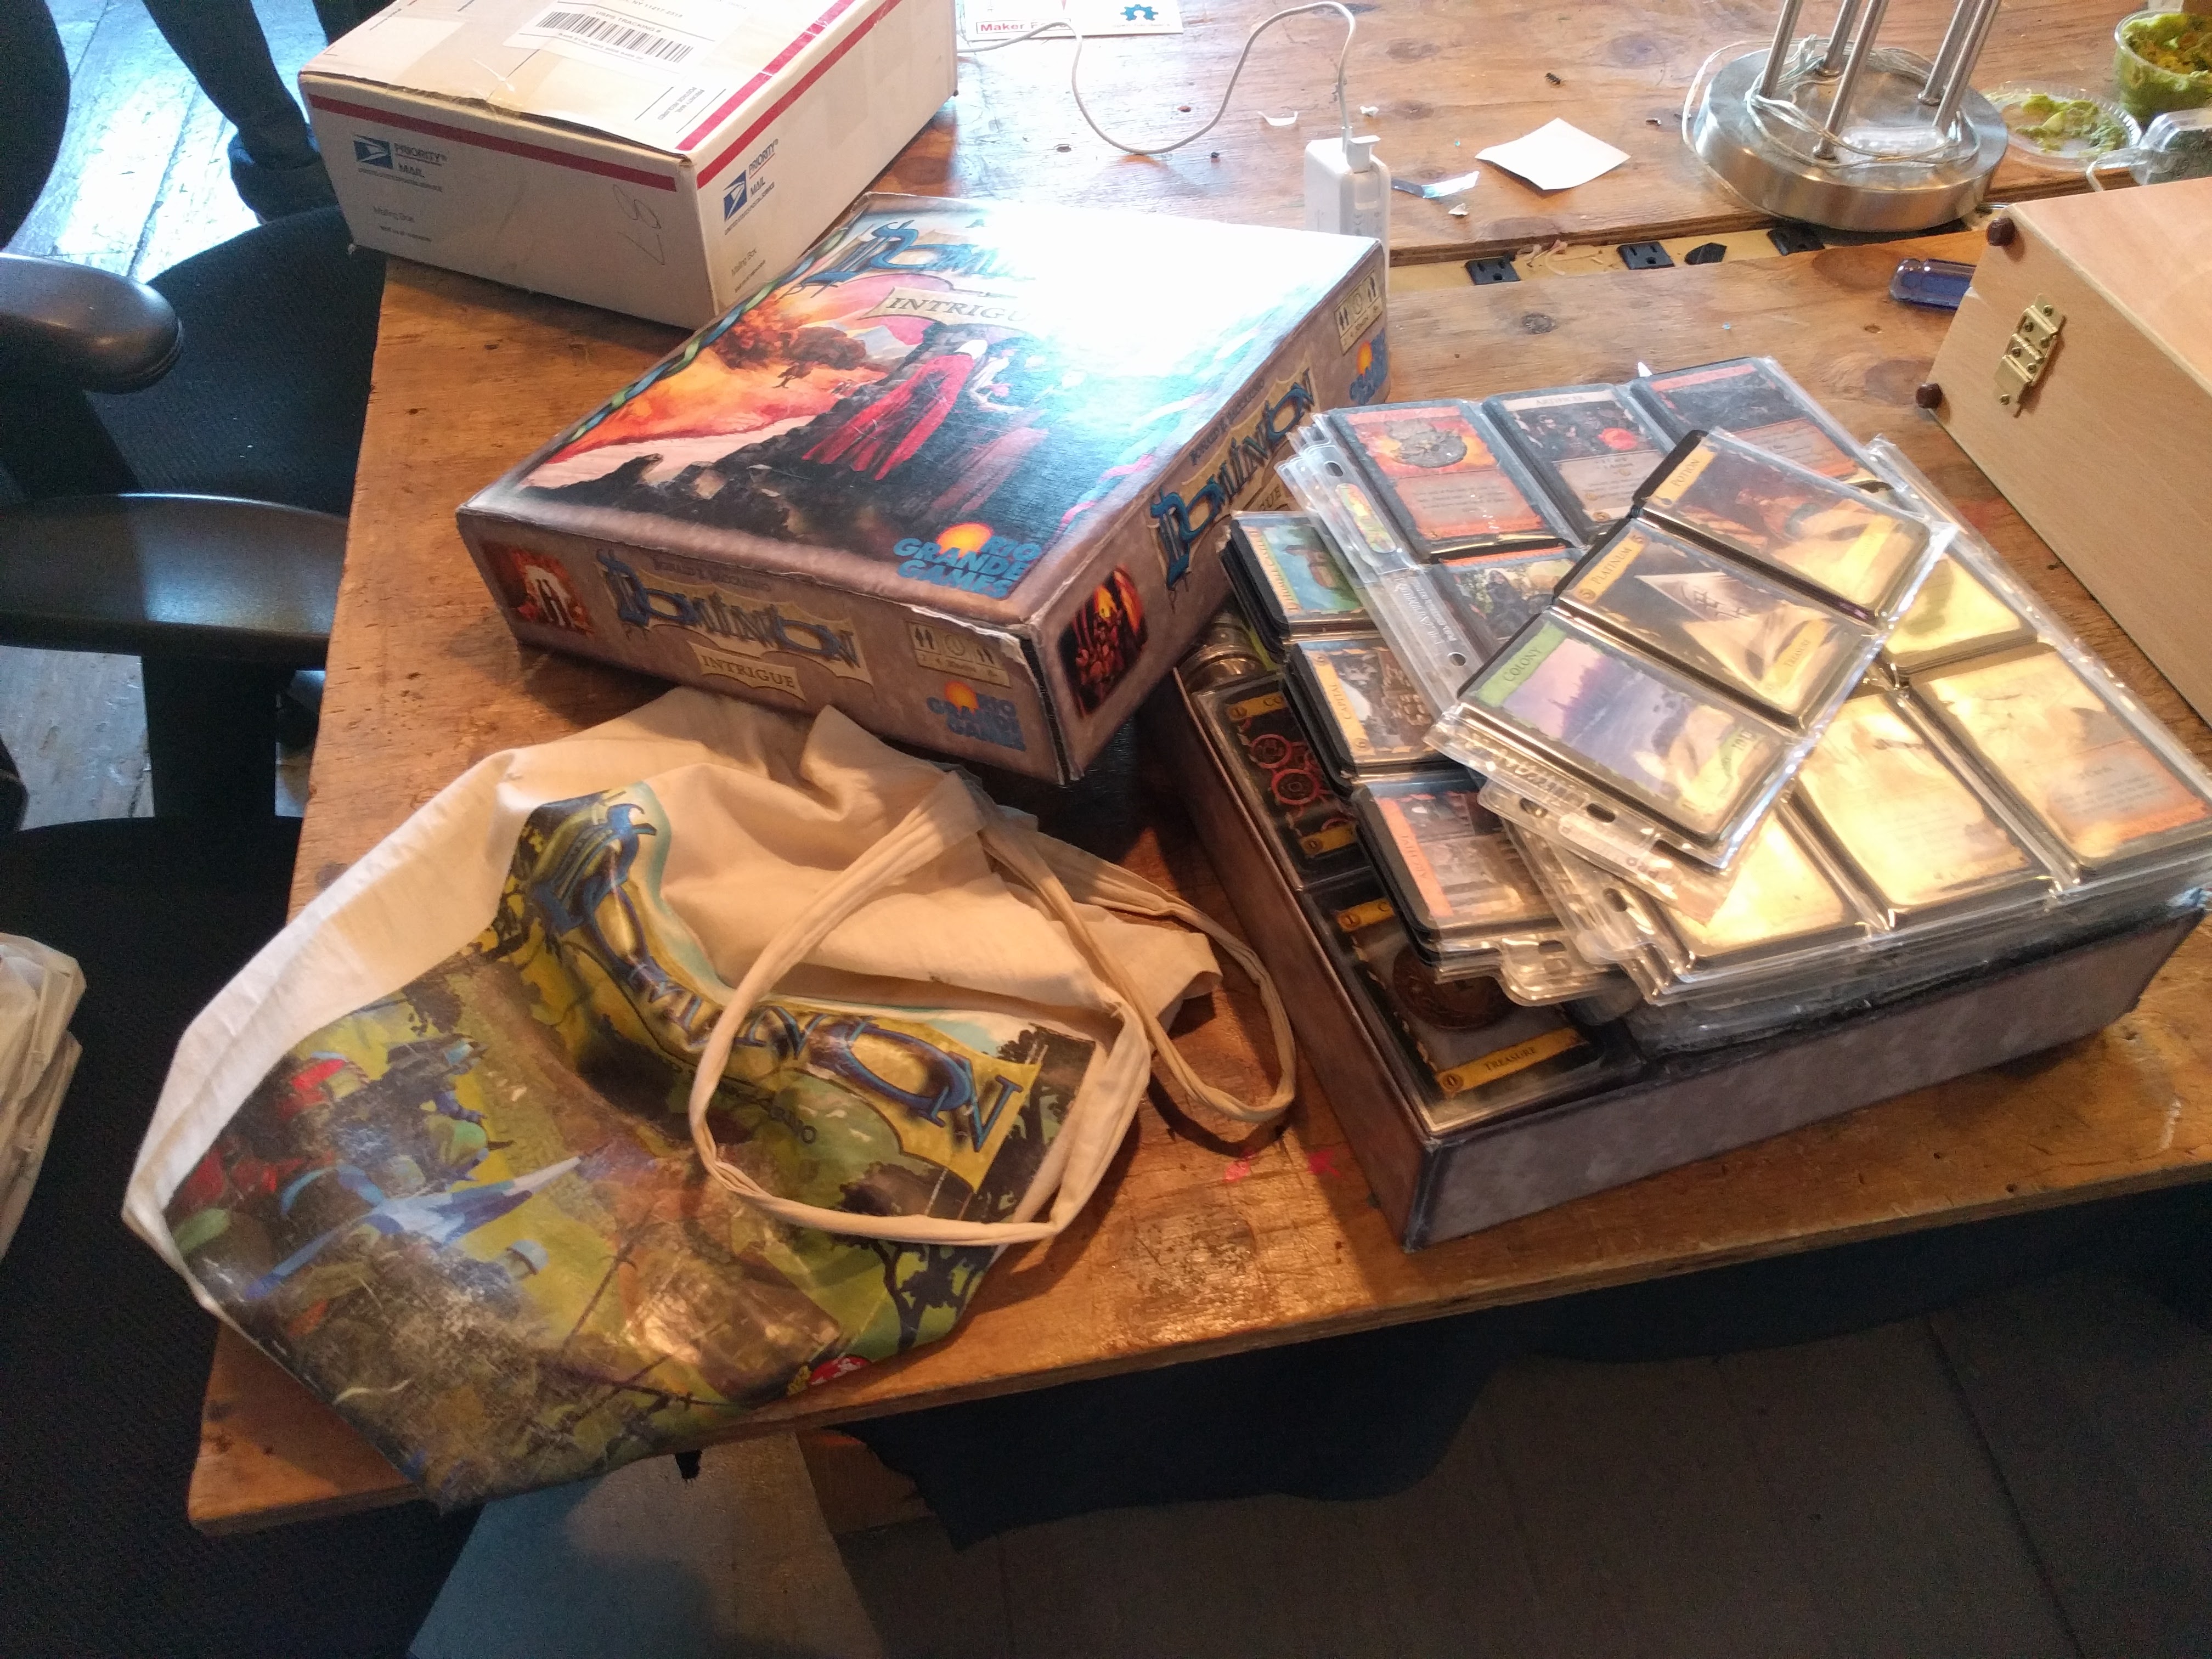
The sheets can be seen overflowing from the game box, which barely squeezed into the tote

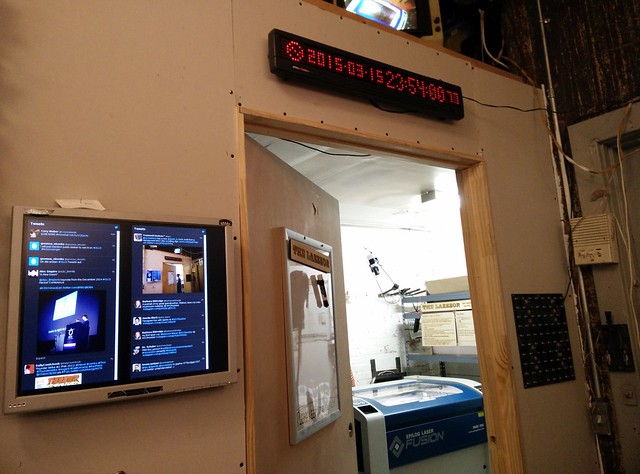
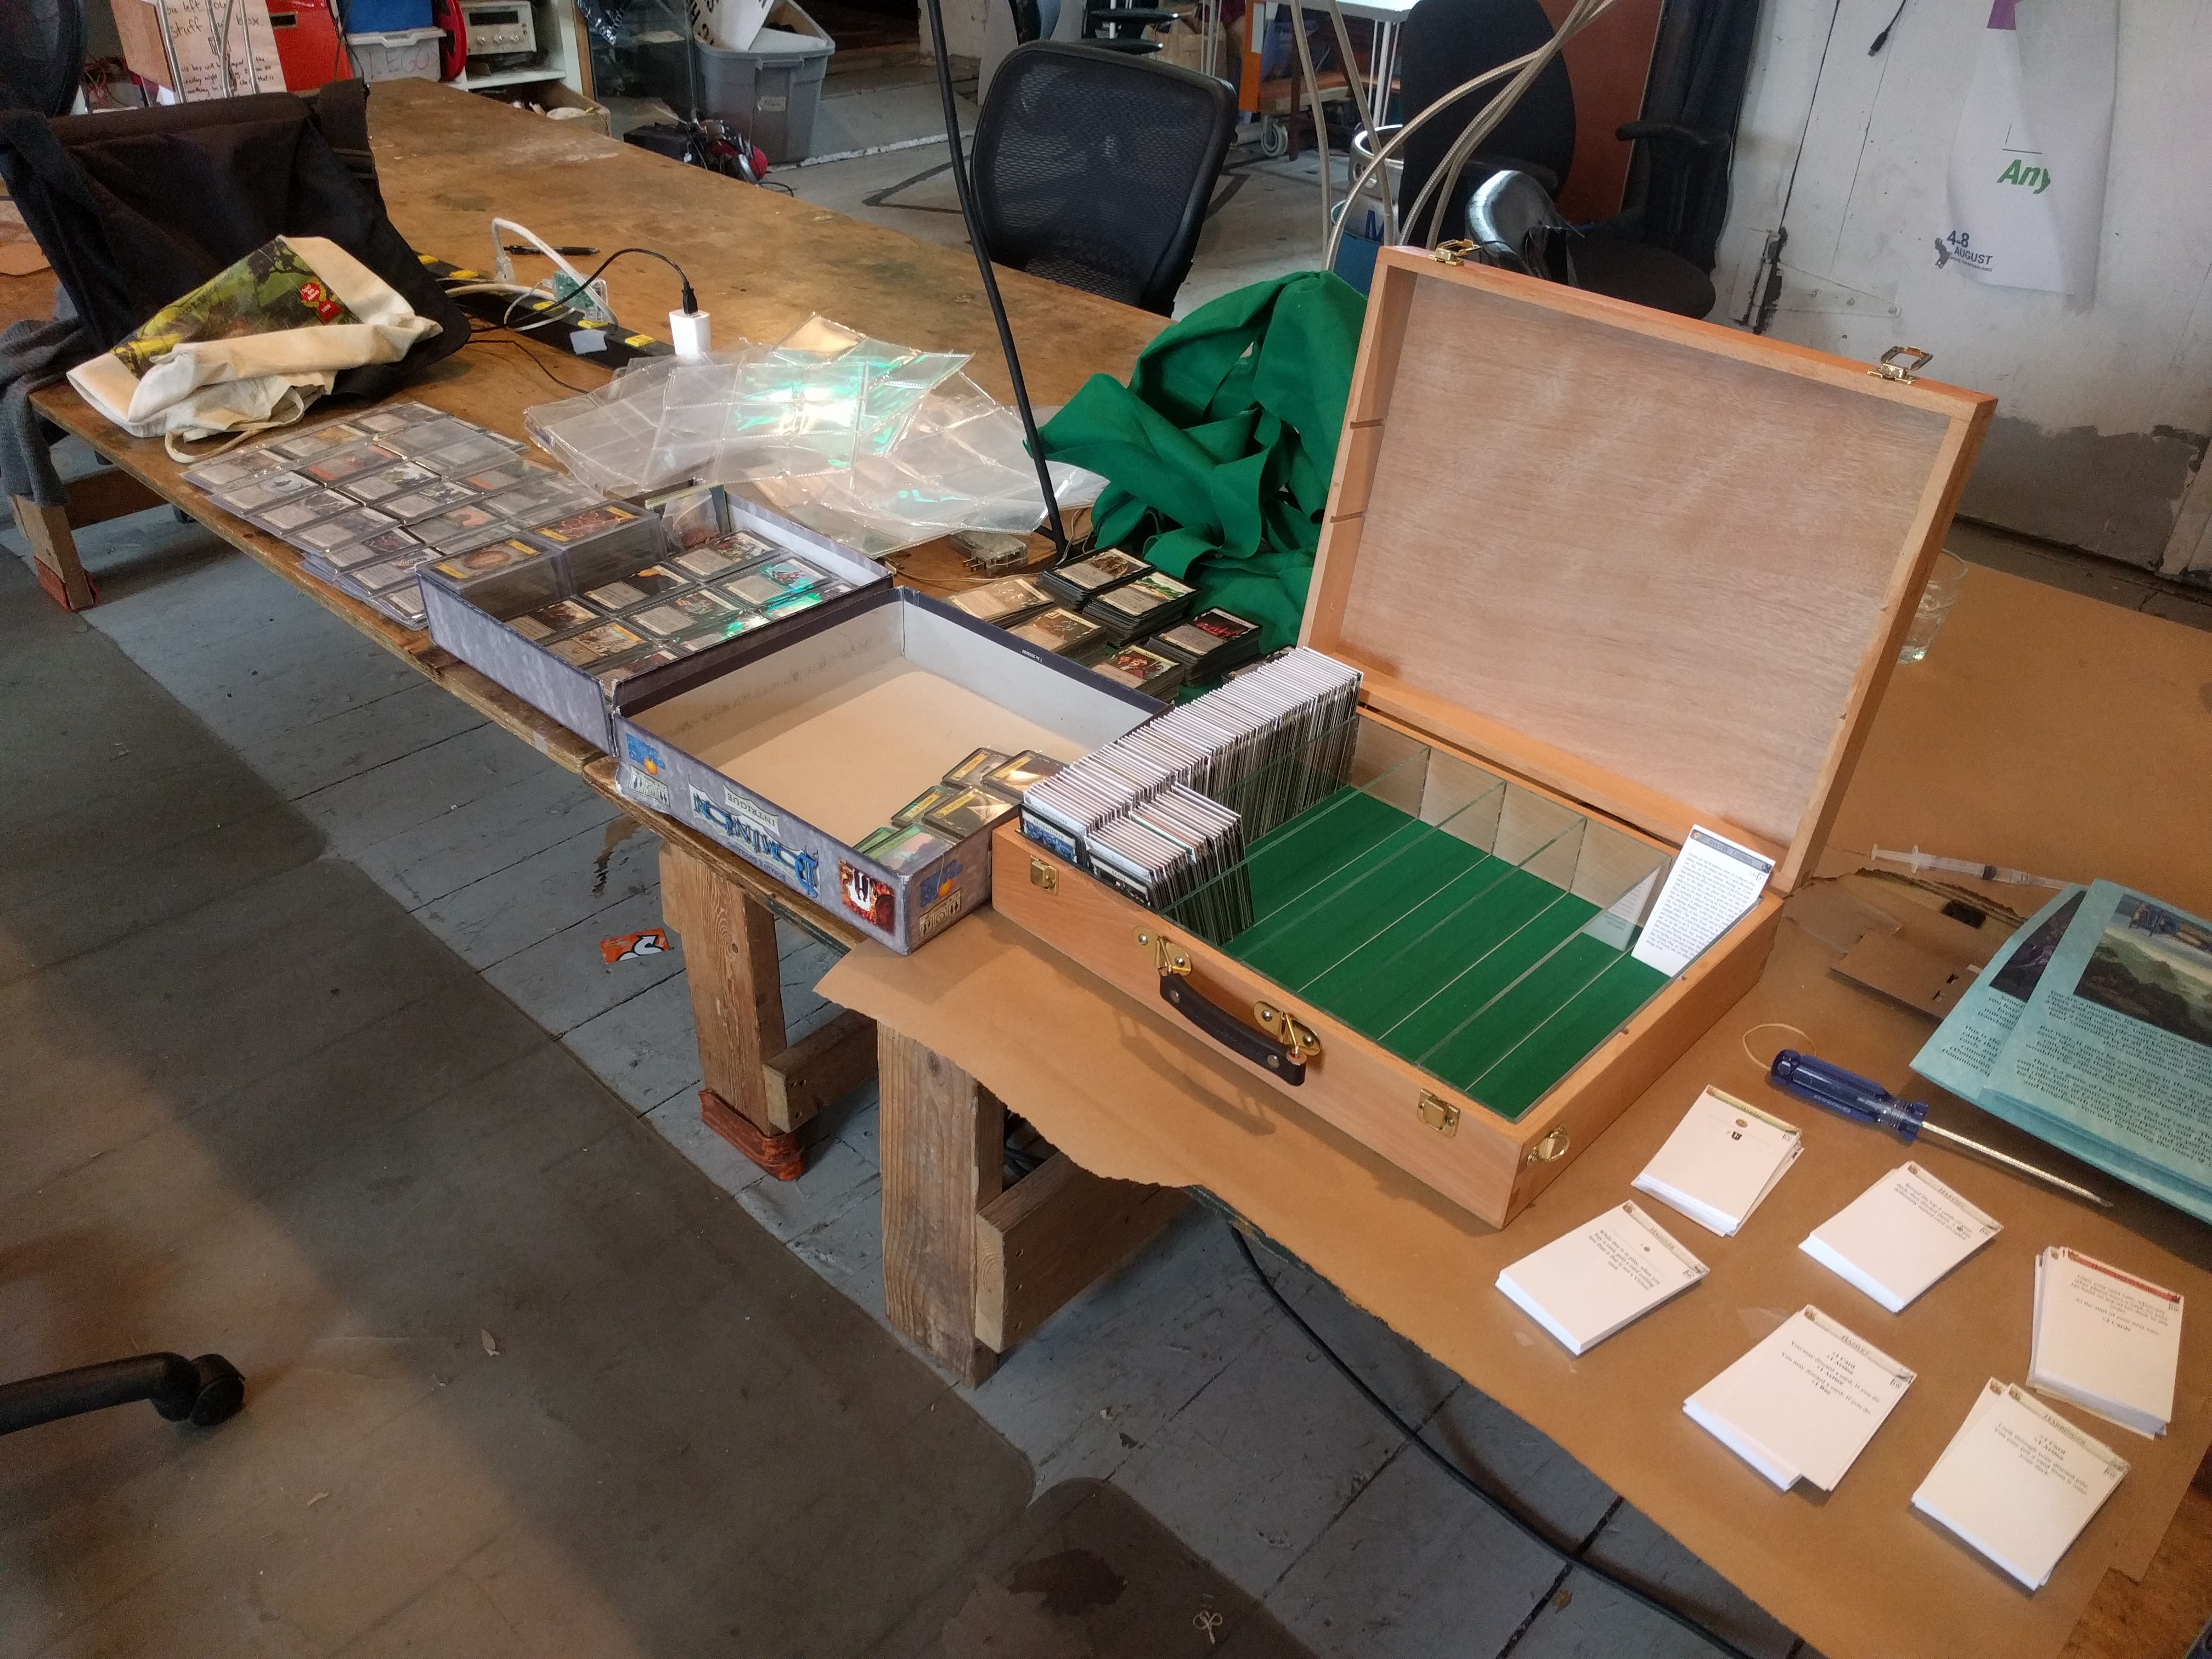
The box had already been replaced once before, and when the replacement itself began showing severe signs of wear we began looking into other options. We debated building one out of lumber, but eventually settled on using a case that had been tried and tested in other storage solutions for our first attempt.

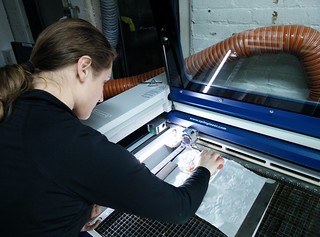
We knew that we would require some sort of organizer to keep each column of cards in line, and laser-cut some test pieces out of cardboard to check the fit.

White paper sitting on a mac laptop keyboard with seemingly random numbers and lines scribbled in blue pen. White paper fills the page. In black pen, there are lines an measurements scrawled over the page. In the upper left sits the bottom half of a pencil and a set of mechanical calipers.

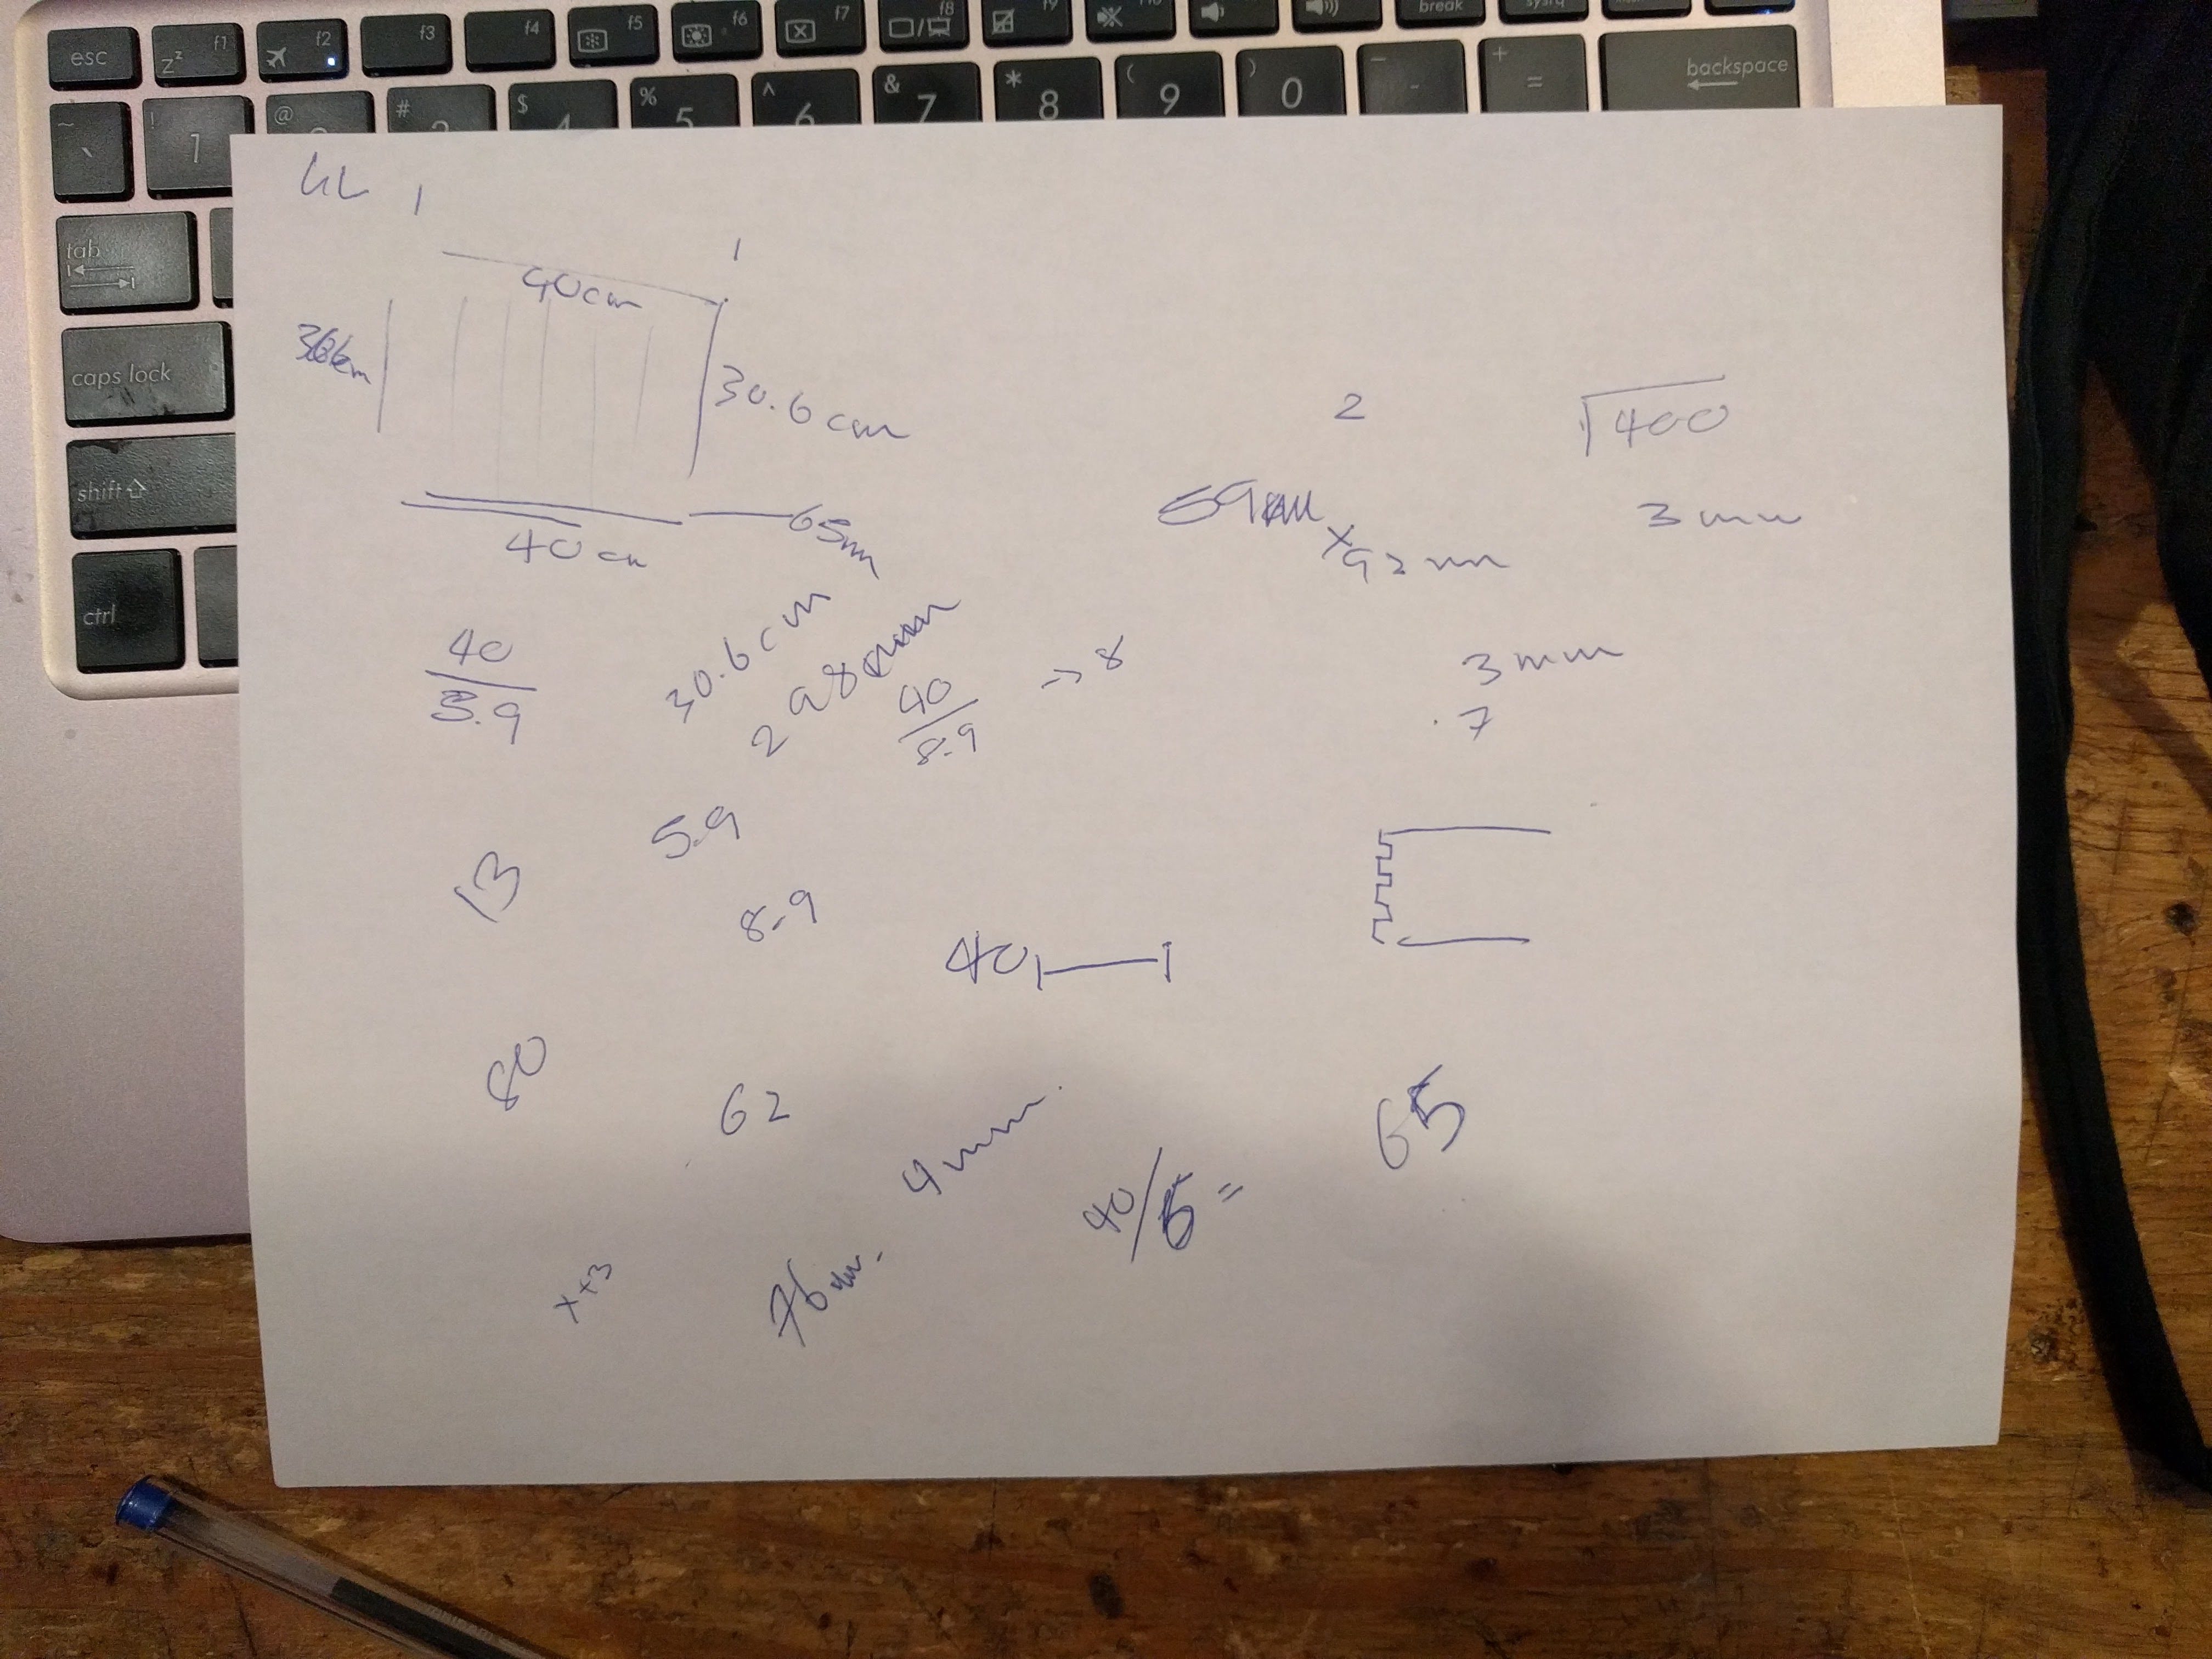
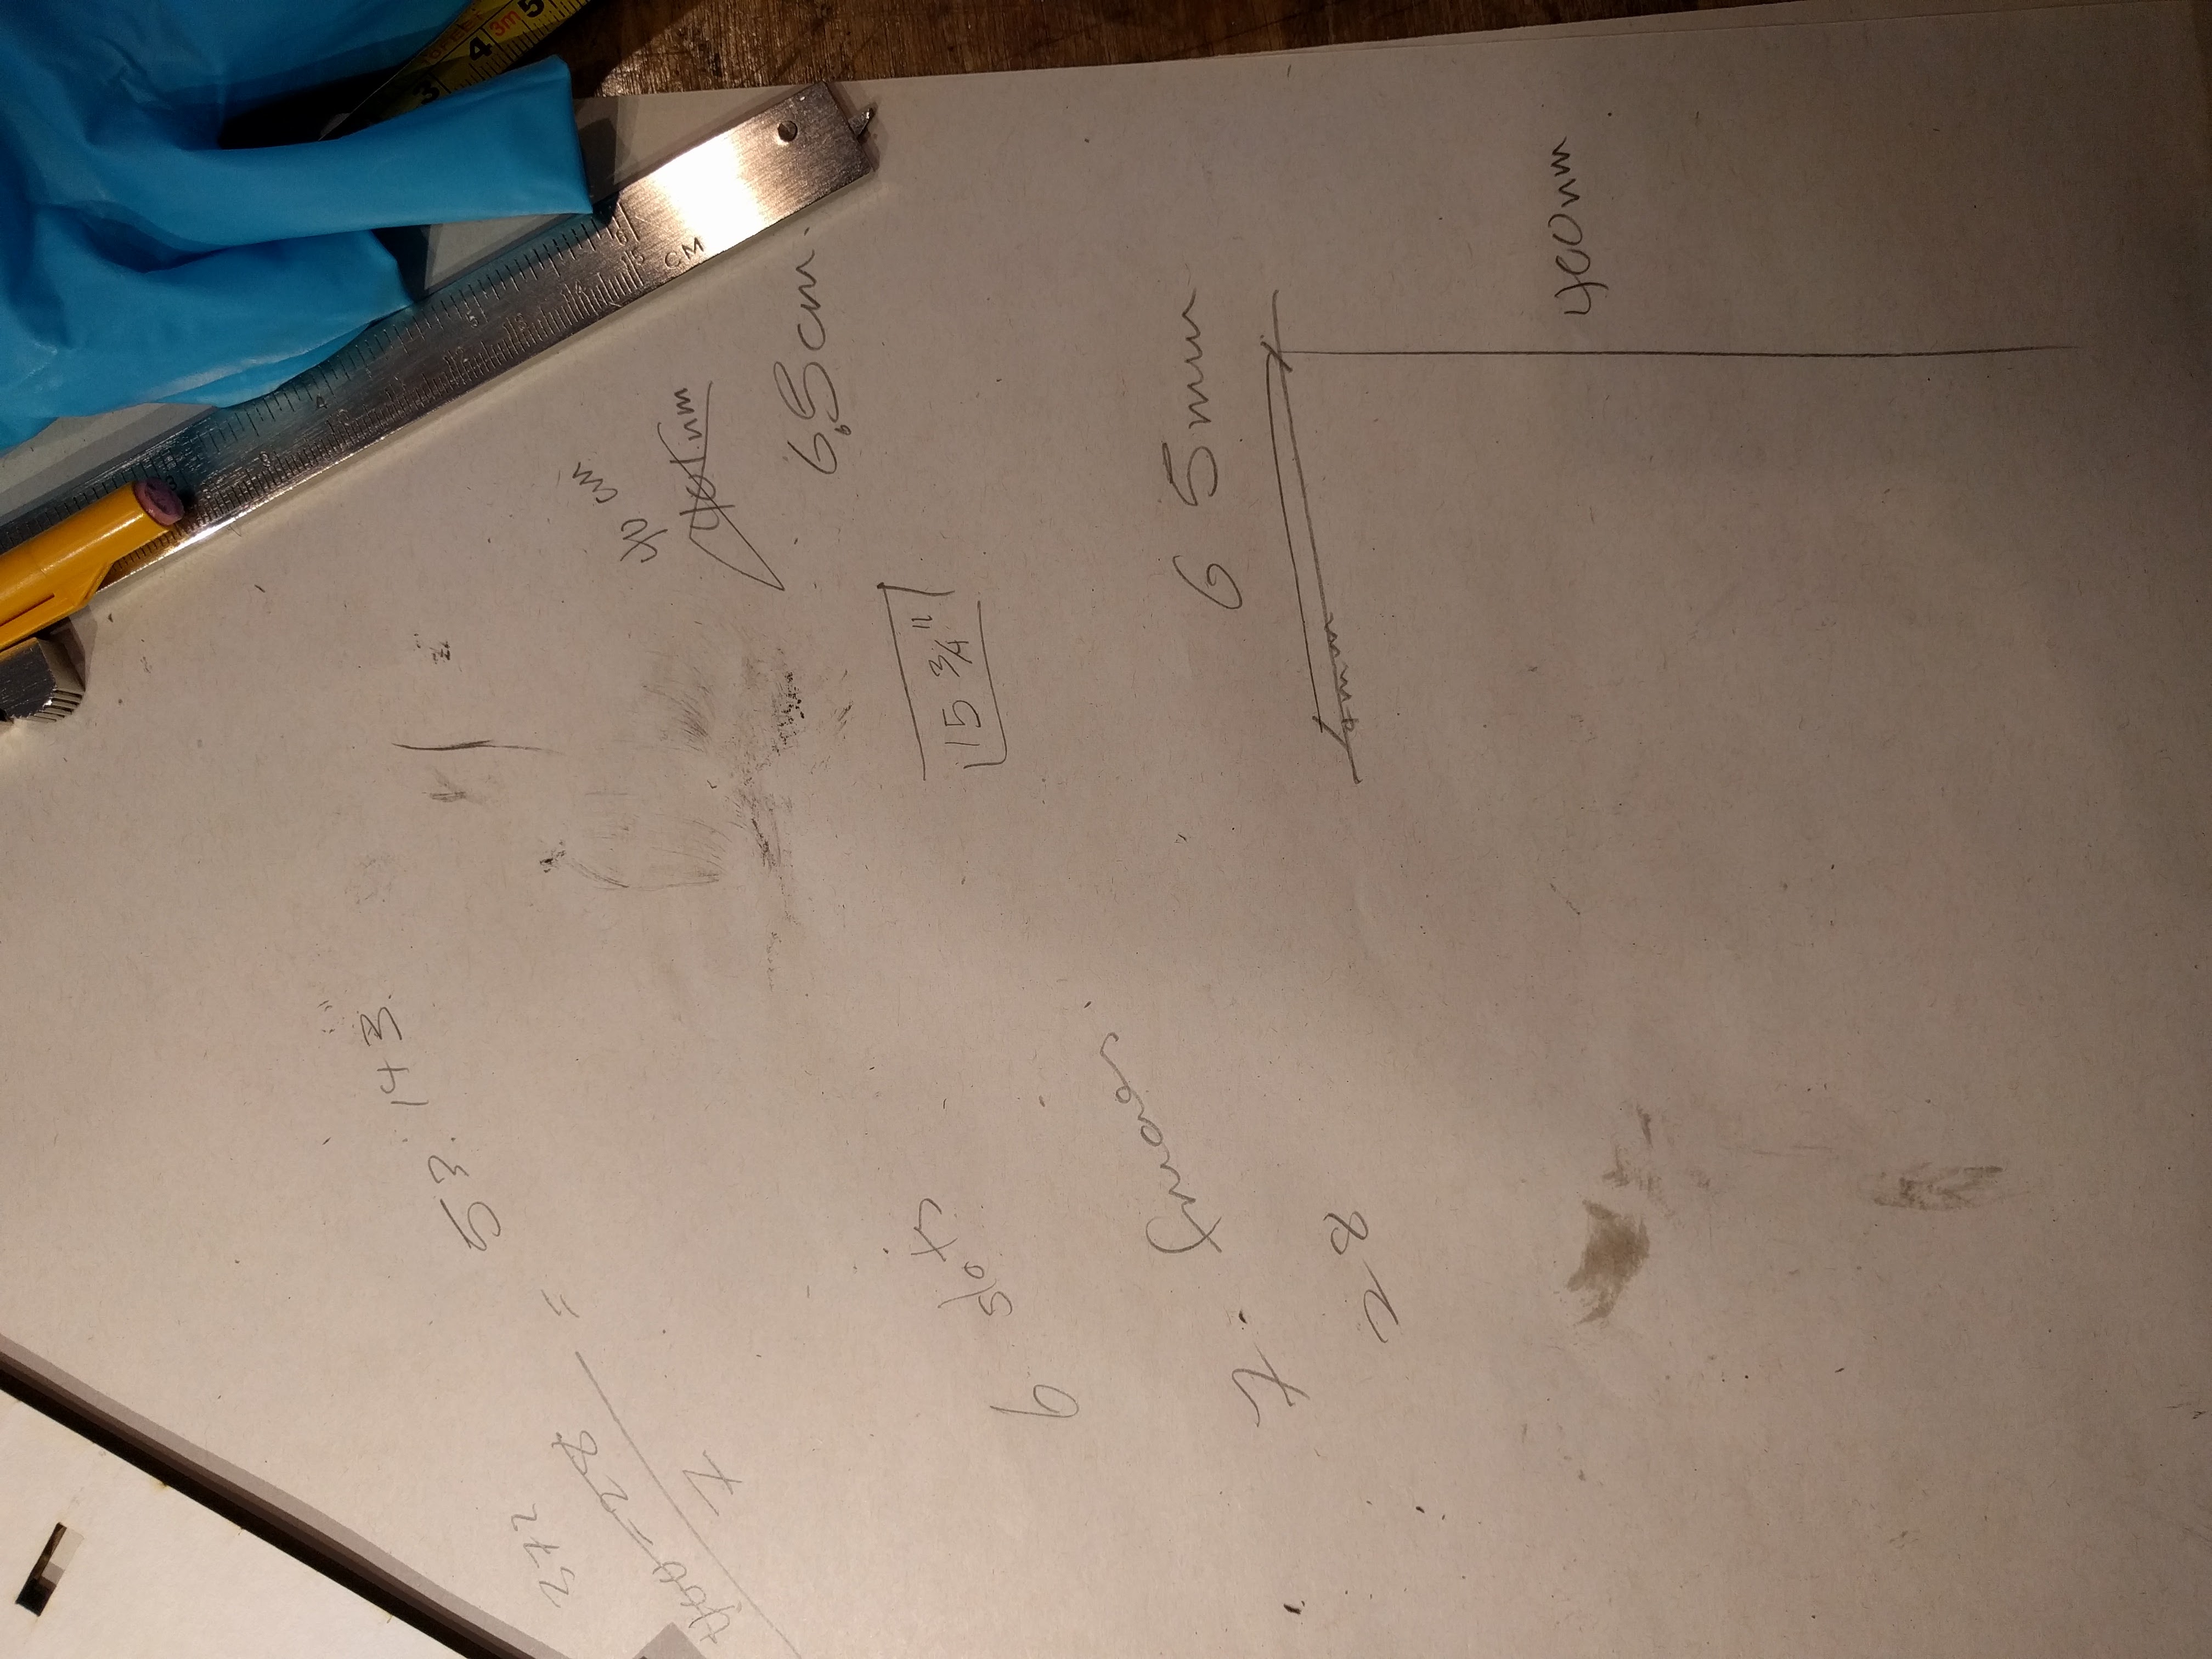
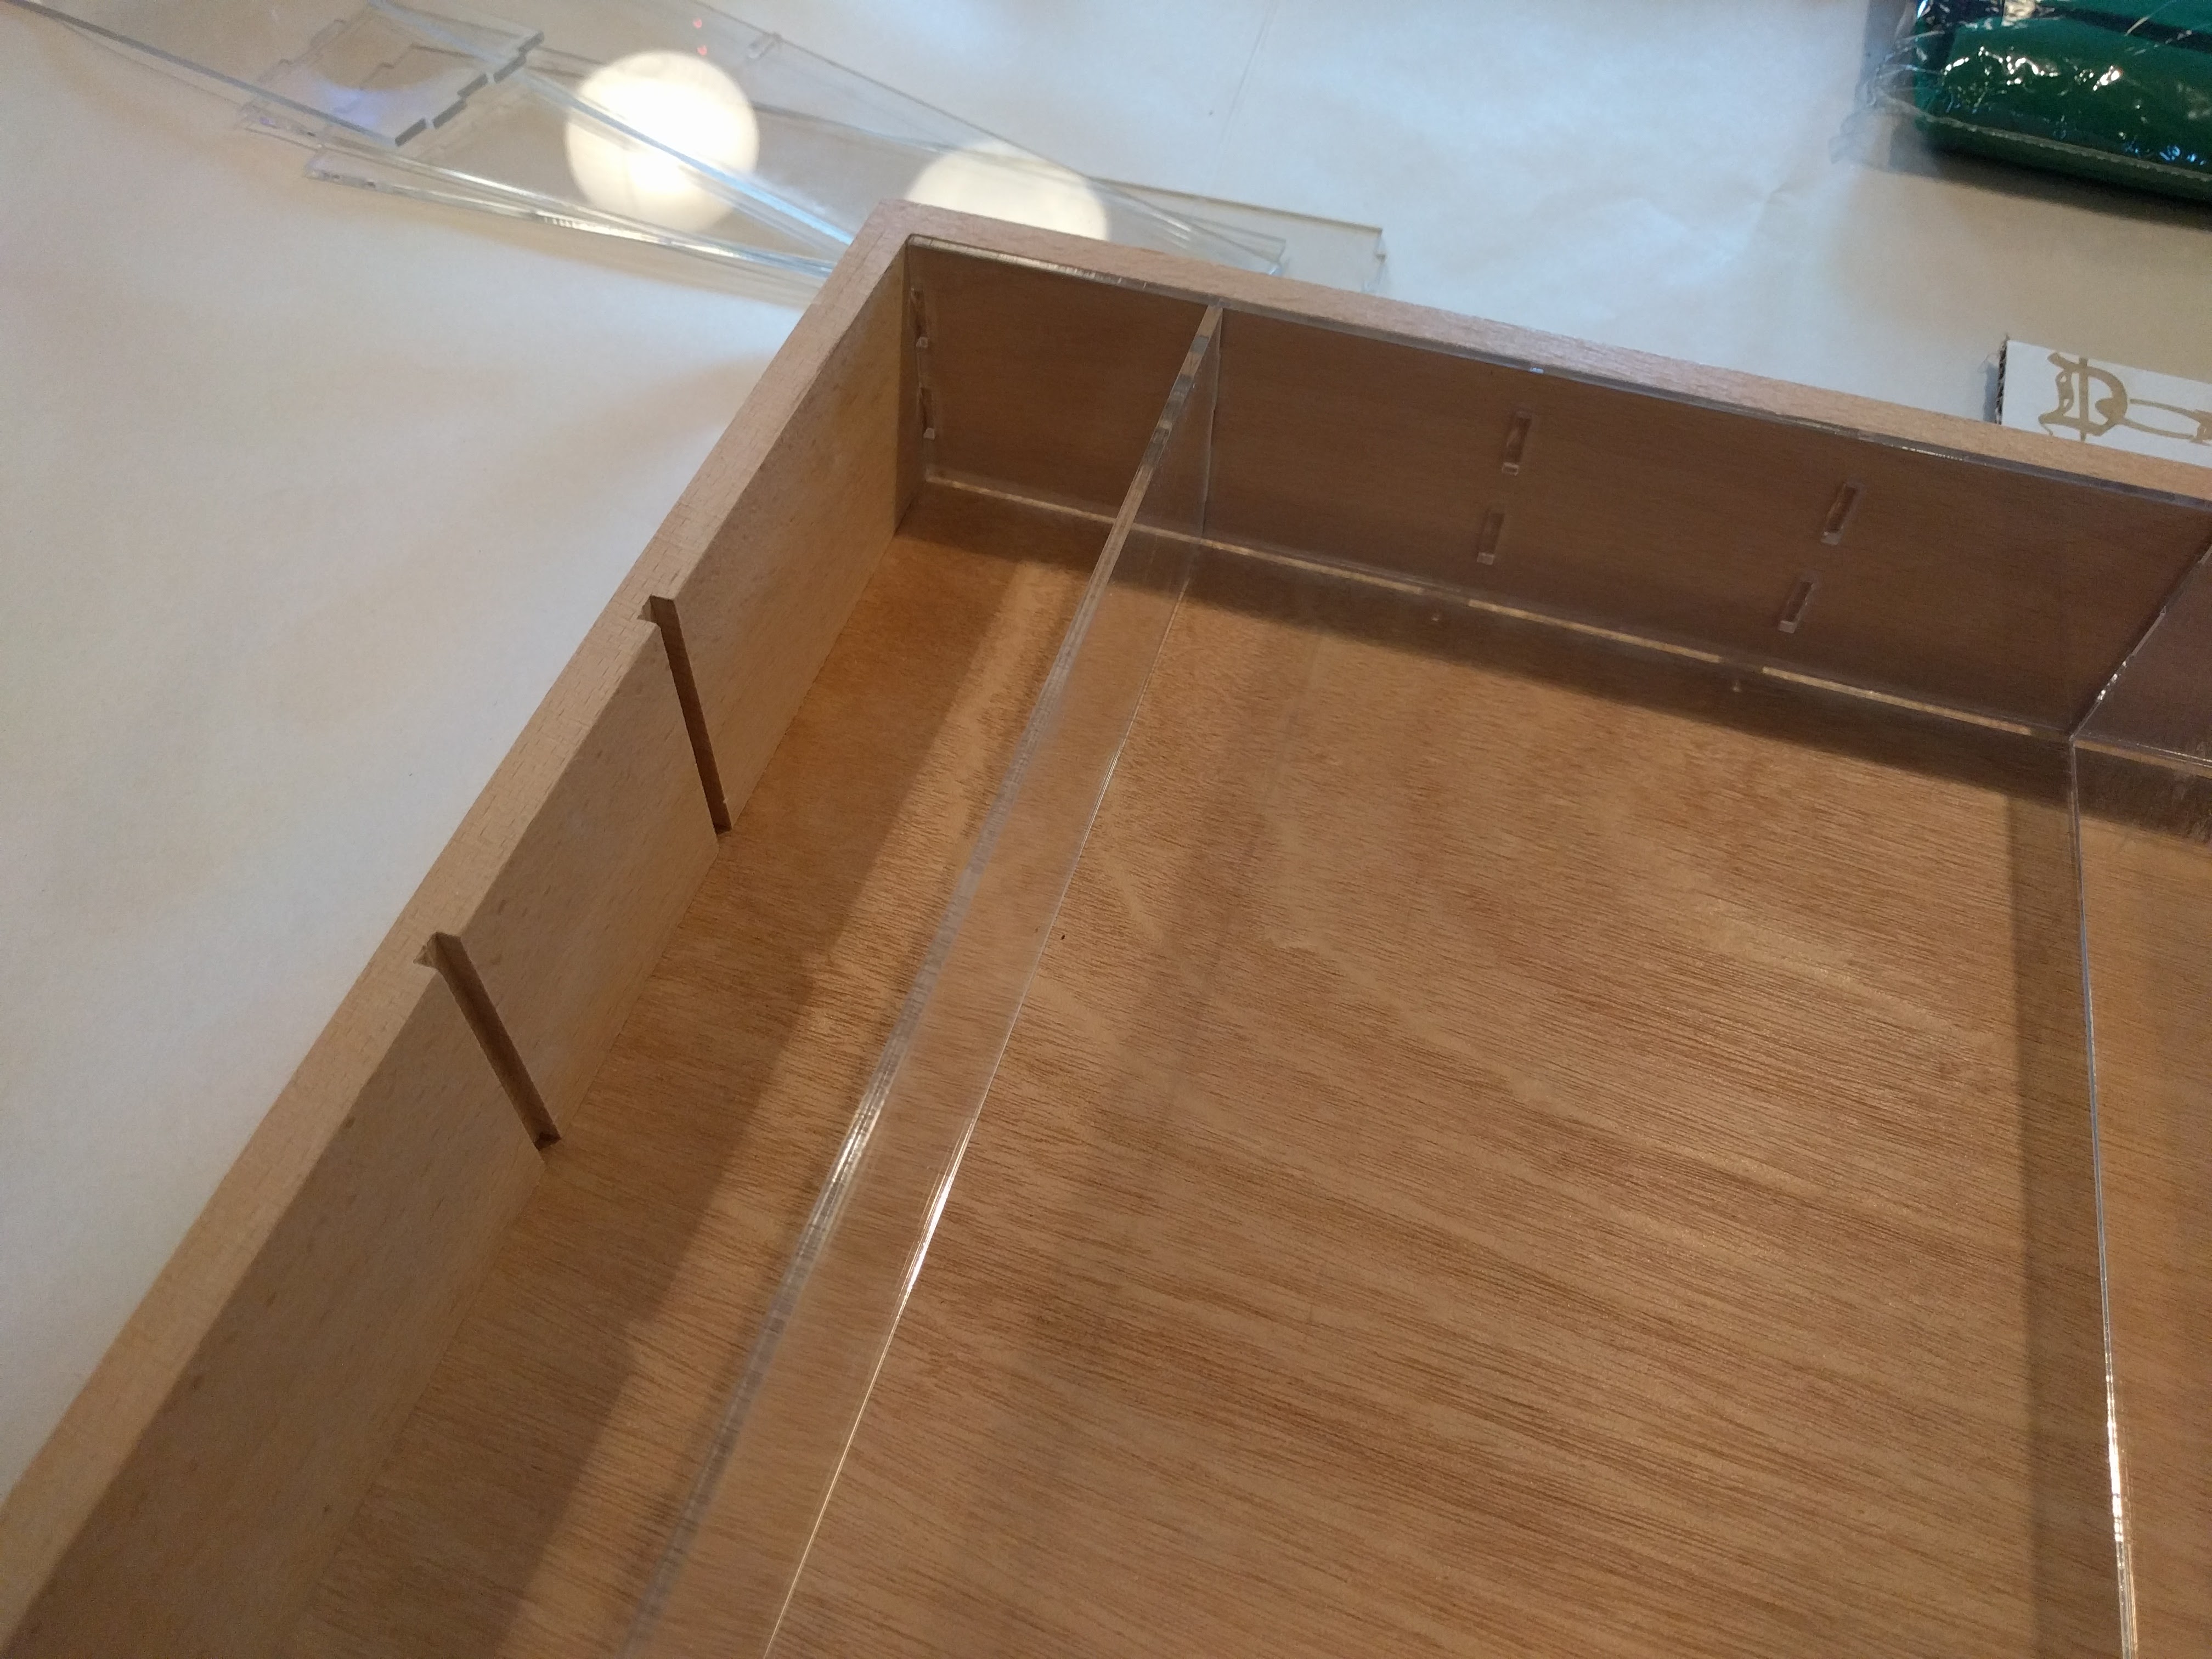
Determining the dimensions of the caddy and how to fasten them

Seen from above, the right half of a wooden table is covered in two disjoint halves of a wooden box, the left is covered in white paper. Strewn over everything is a set of cardboard inserts which are white on one face and brown on the other. Wooden box with cardboard inserts fills the page. There one small stack of Dominion cards sitting in each of the six columns.

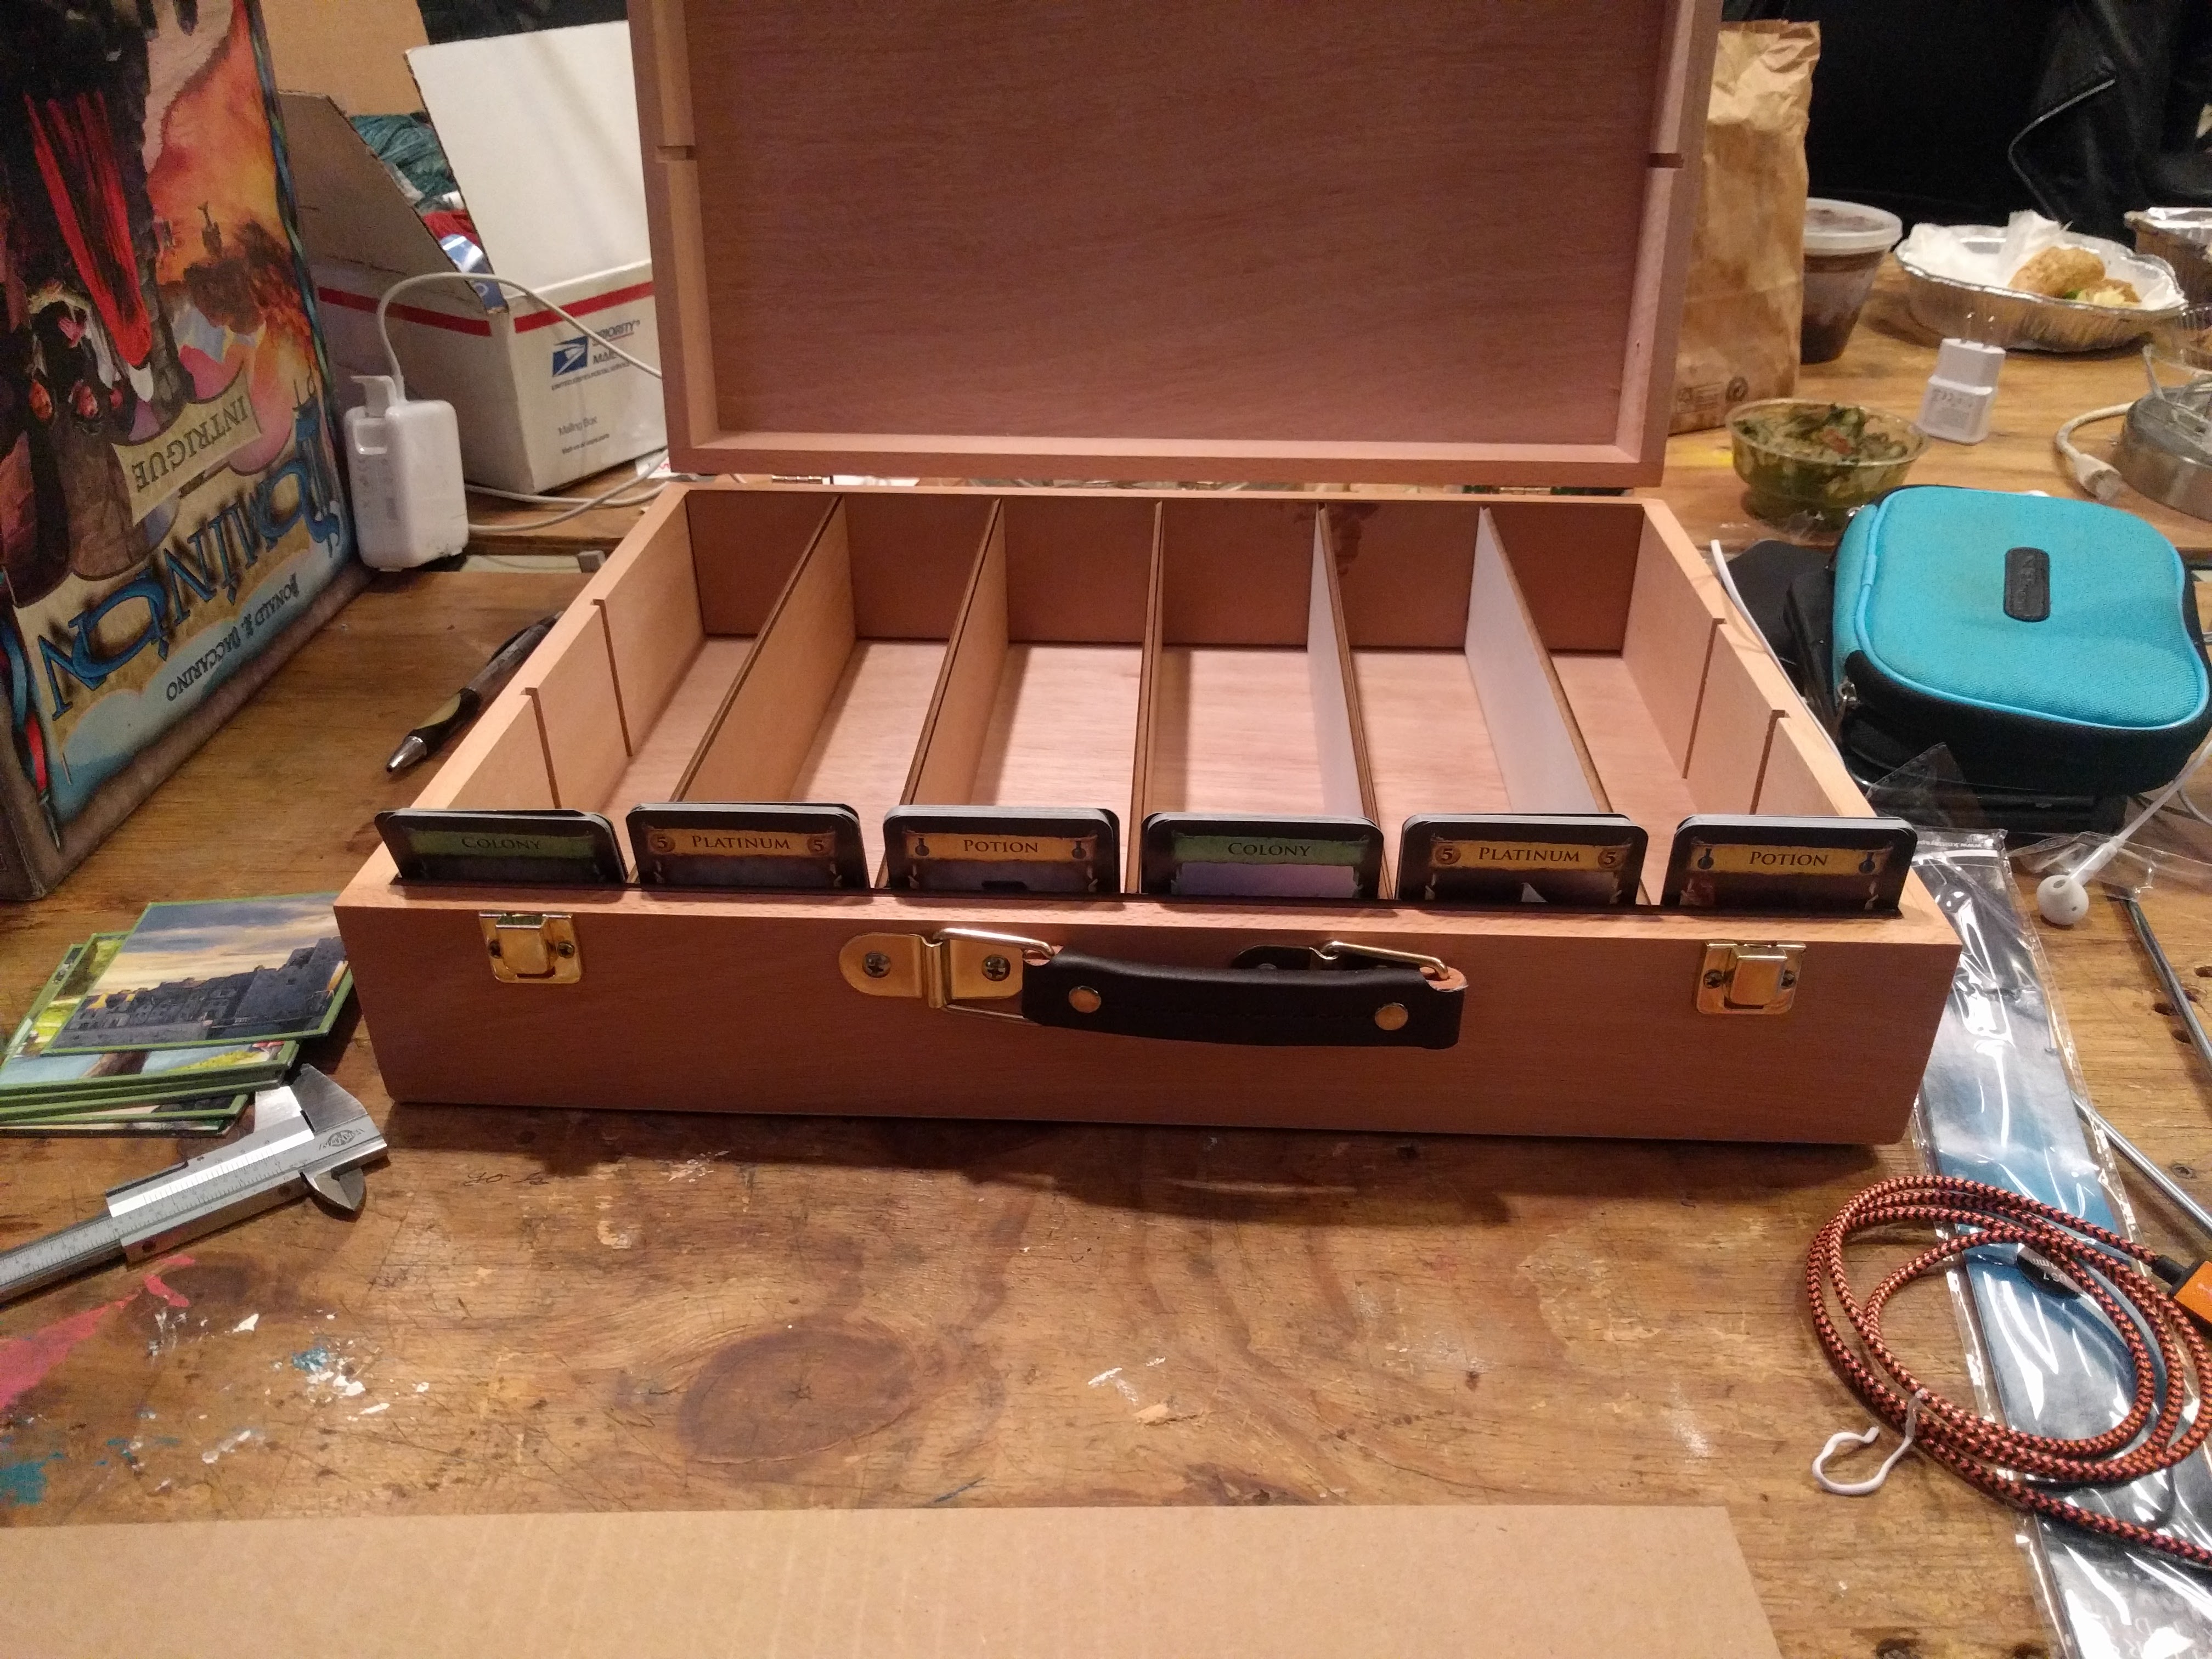
Assembling the mock caddy, then testing the fit of the cards
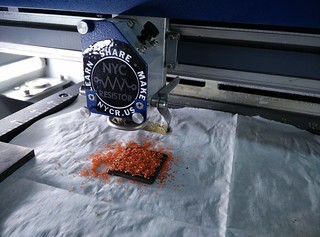
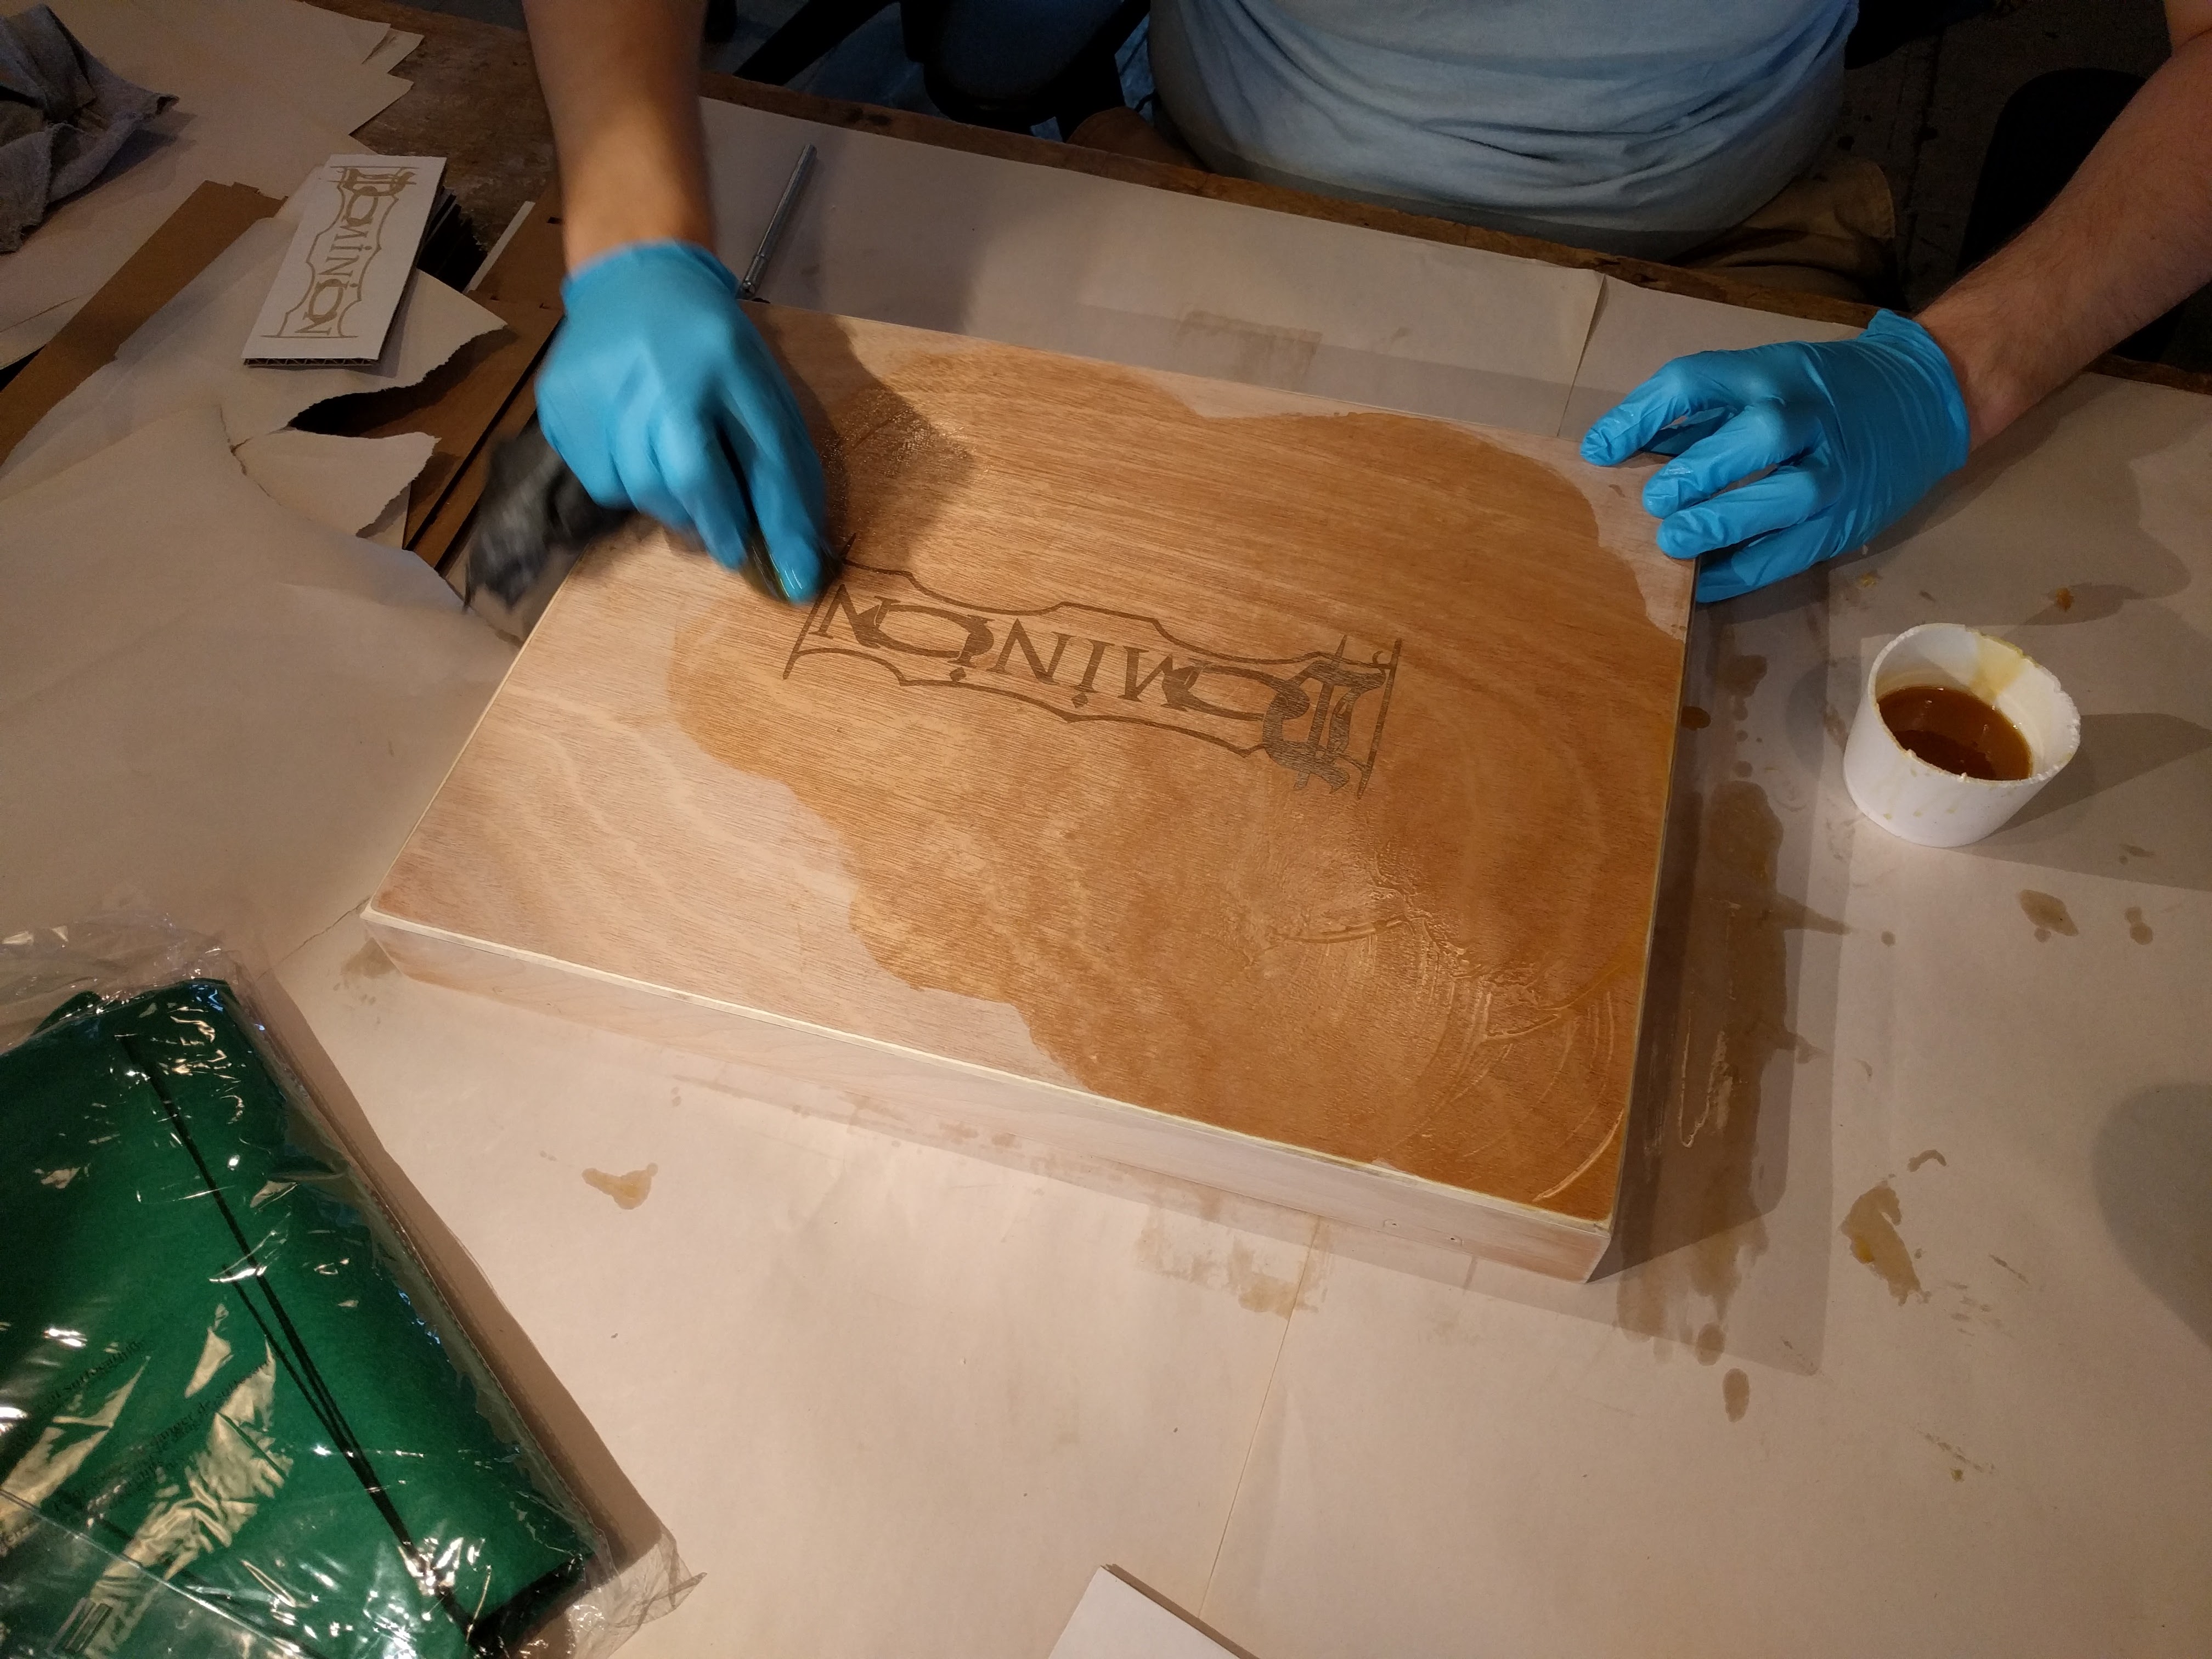
We also planned to engrave the game’s logo onto the box using the laser cutter, and had two waxes and two stains we wanted to try. The case came with a tray insert that was made of the same wood, though unfinished, so we did a test burn both before and after applying the four coats to observe the effect. We also removed the hardware from the case and sanded off the veneer in preparation.

Strip of birch plywood with two blury laser etched dominion logos filling it's length runs across the center of the picture. Behind it is the metal latice of a laser cutter. Wooden rectangle sites atop white paper. The words "Hello World!" are laser etched into four rows filling its left half.

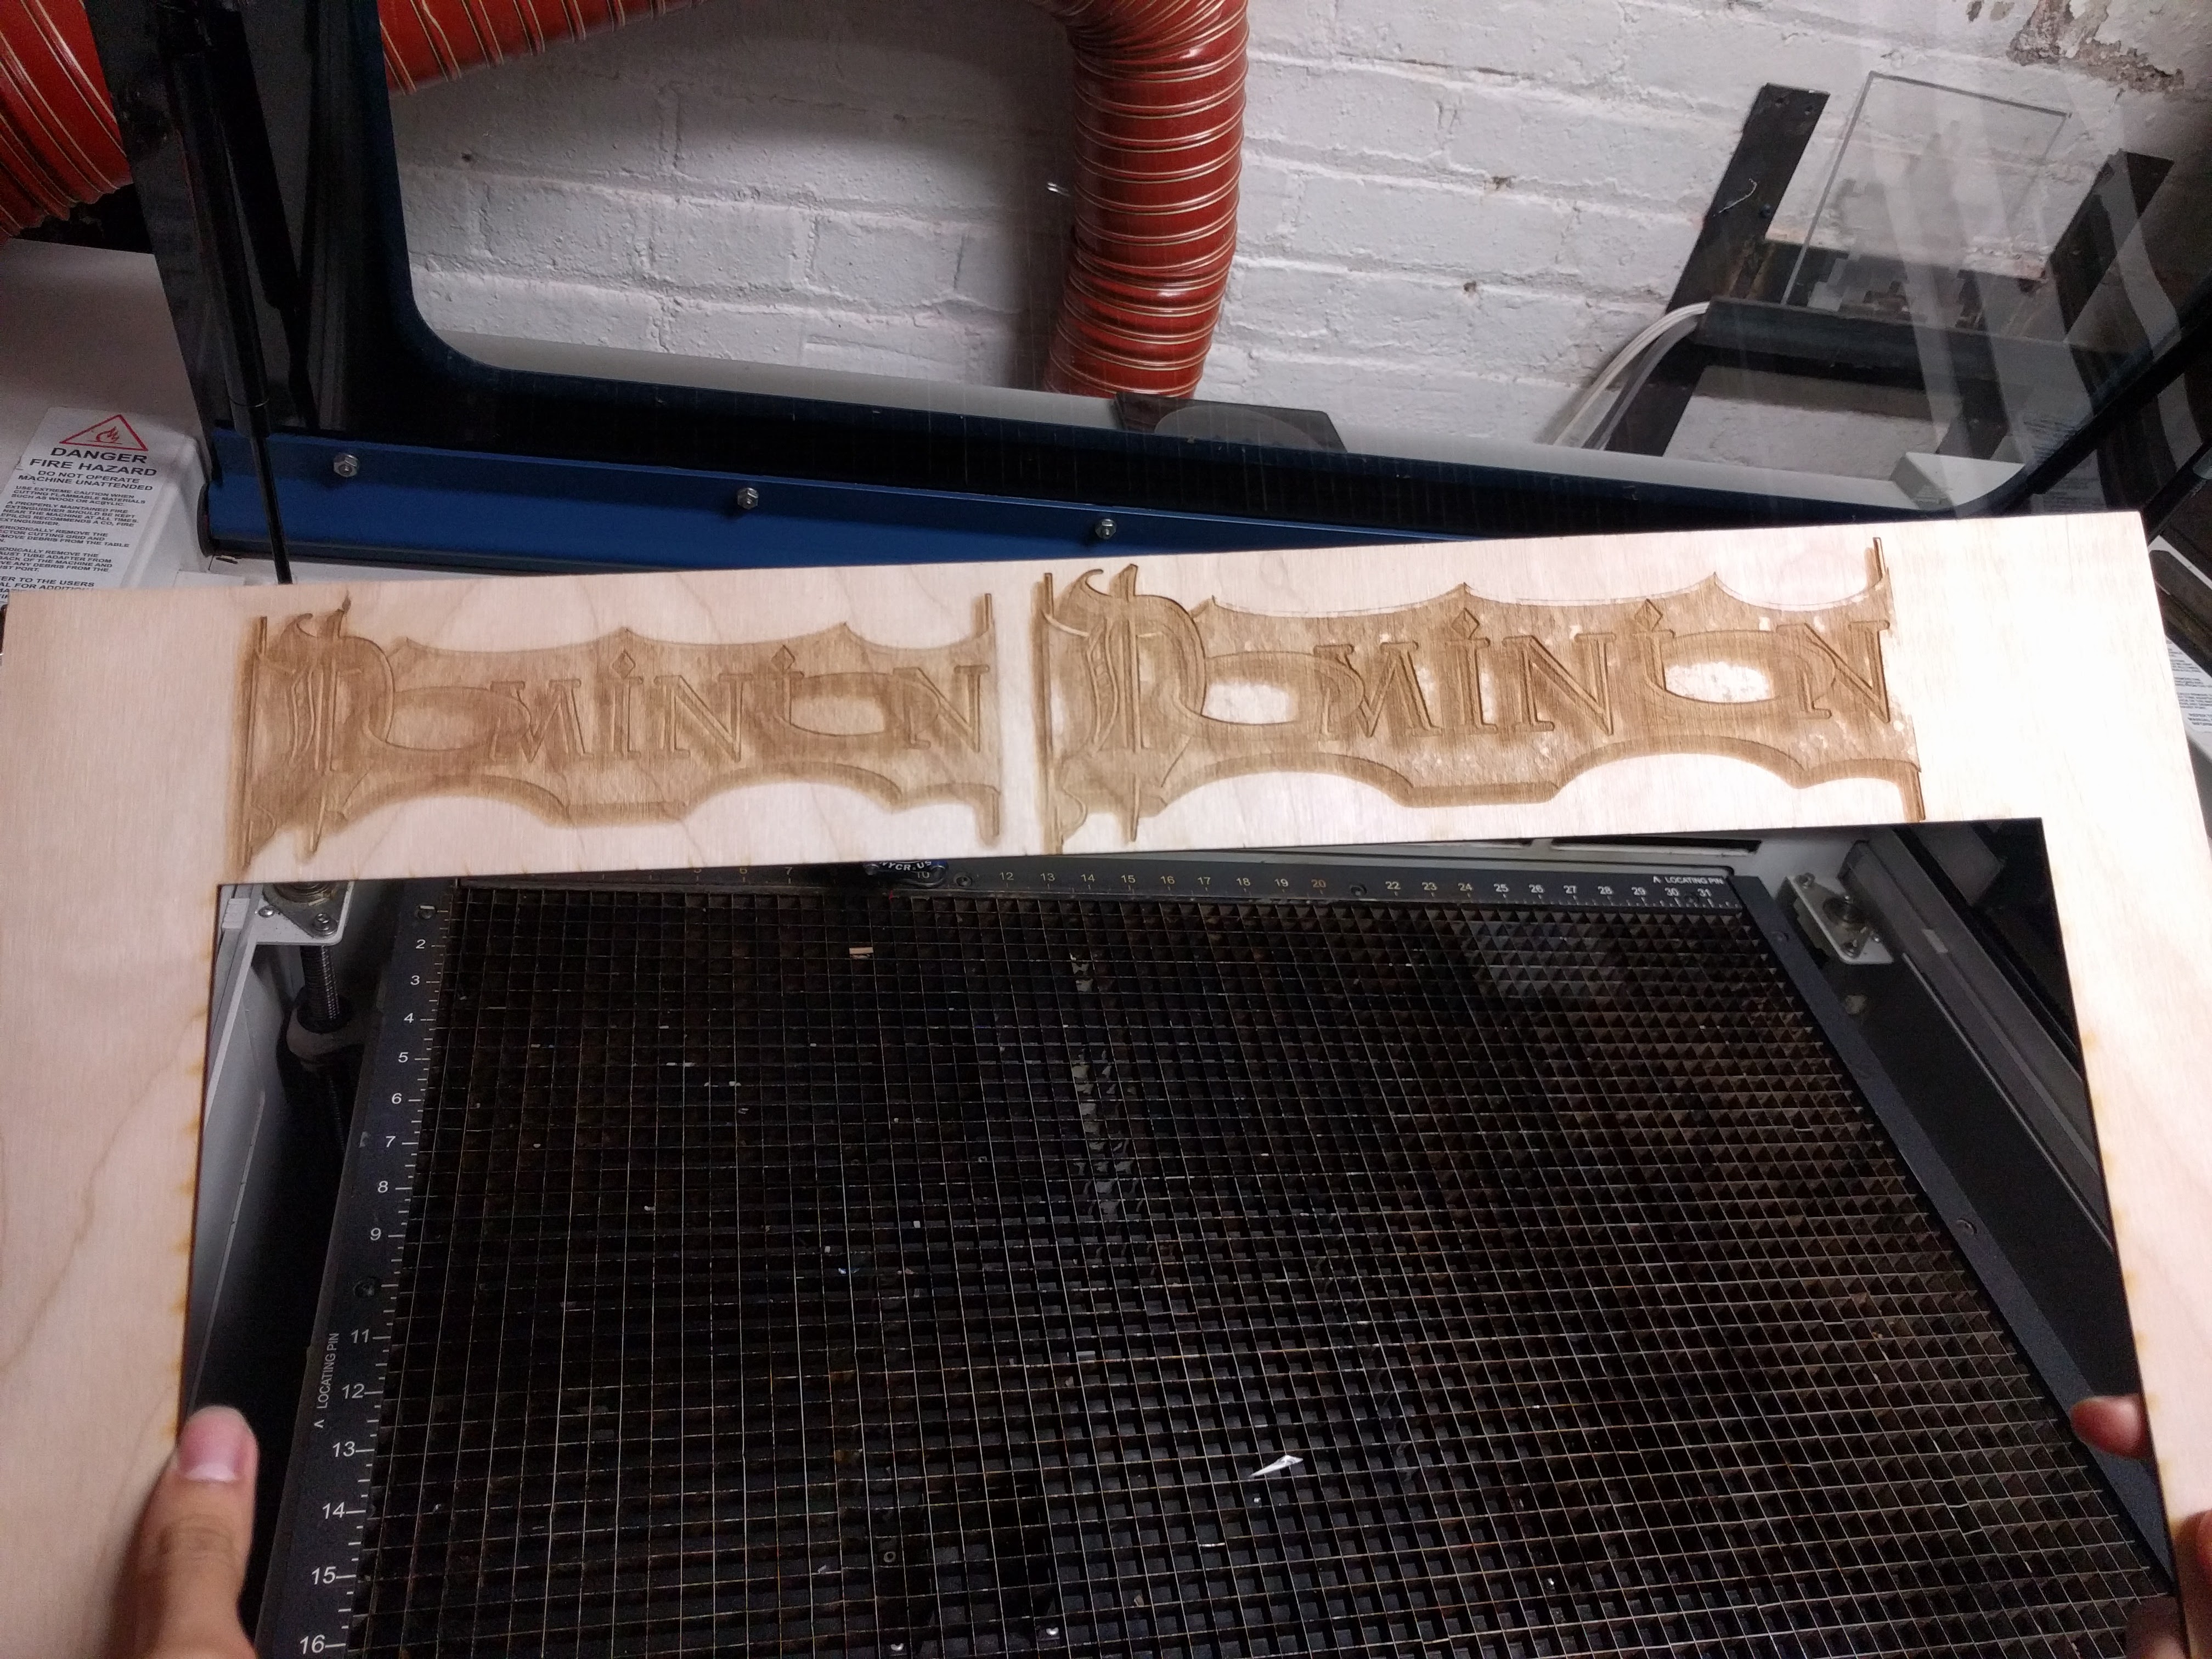
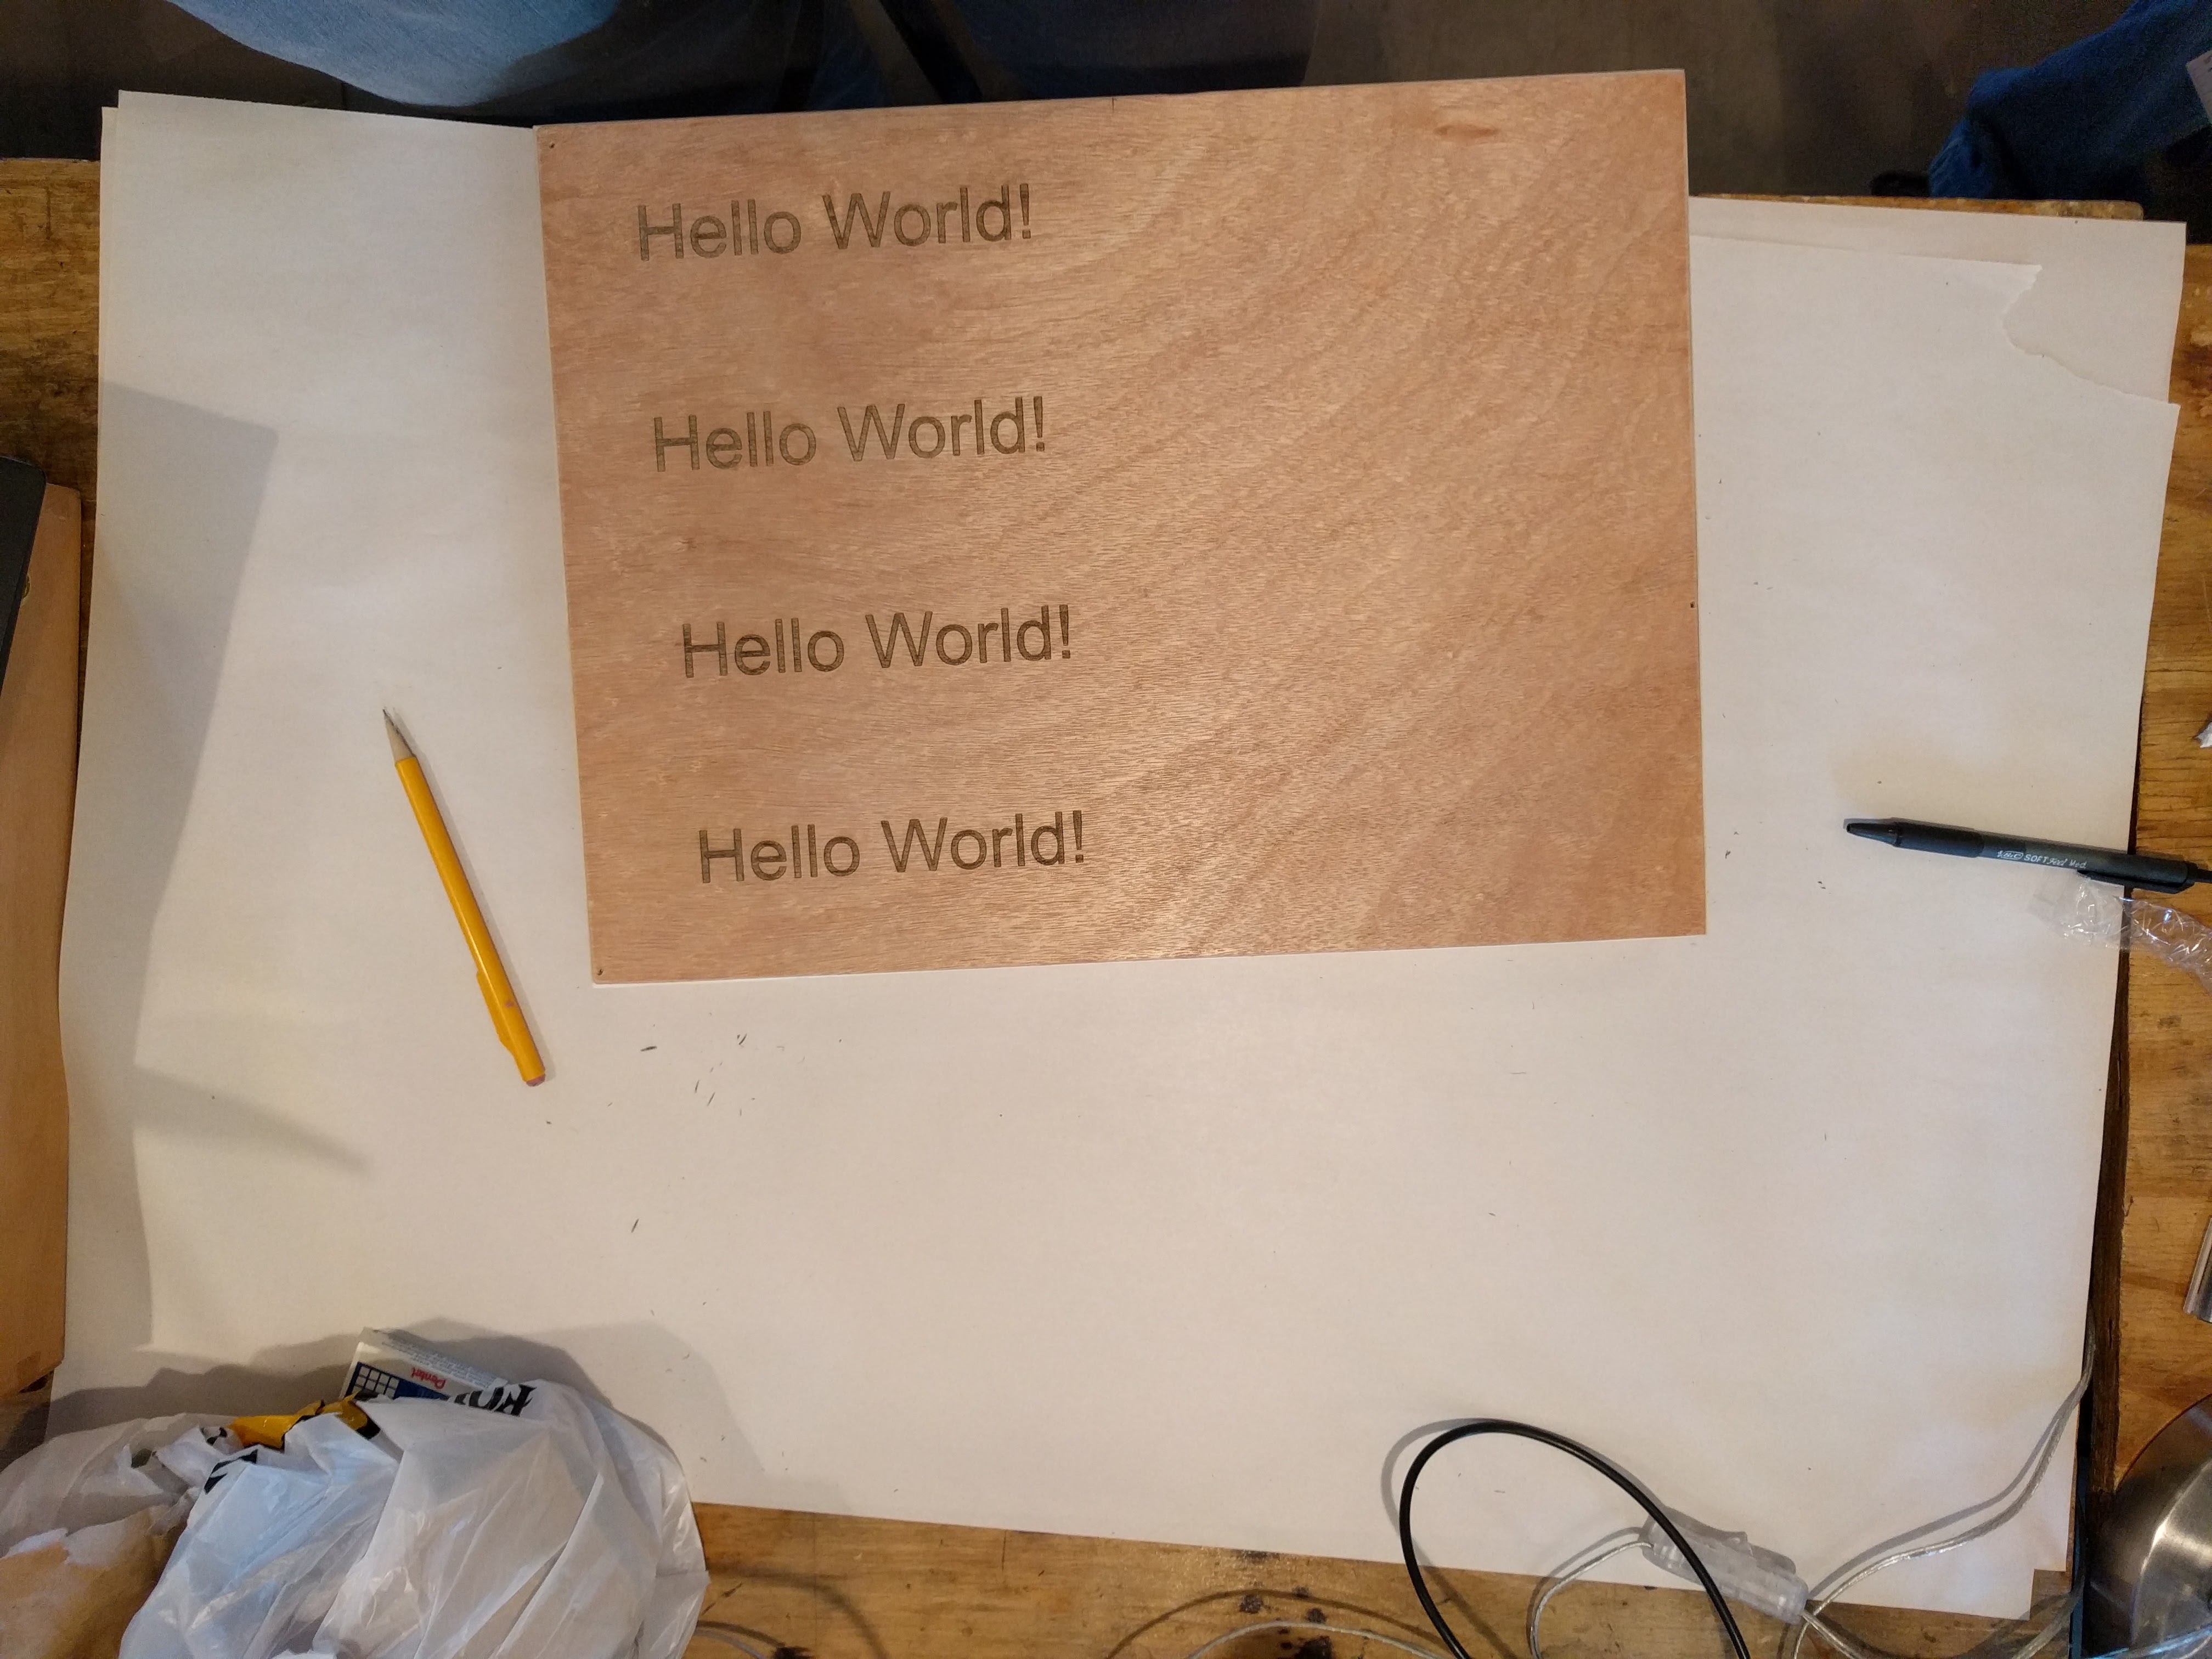
Mocking up the logo and testing burn parameters for the wood

Blue nitrile gloved hands which come from the right side of the frame are rubbing dark wax into one of four rows on a wood box which sits on white paper. Wooden box with the words "Hello world" etched in four rown down the left side, sits on white paper with a bright light shining down on it. The wood has been stained in four rows with increasingly dark wood stains / waxes going from a golden honey colour to a brushed black hue.

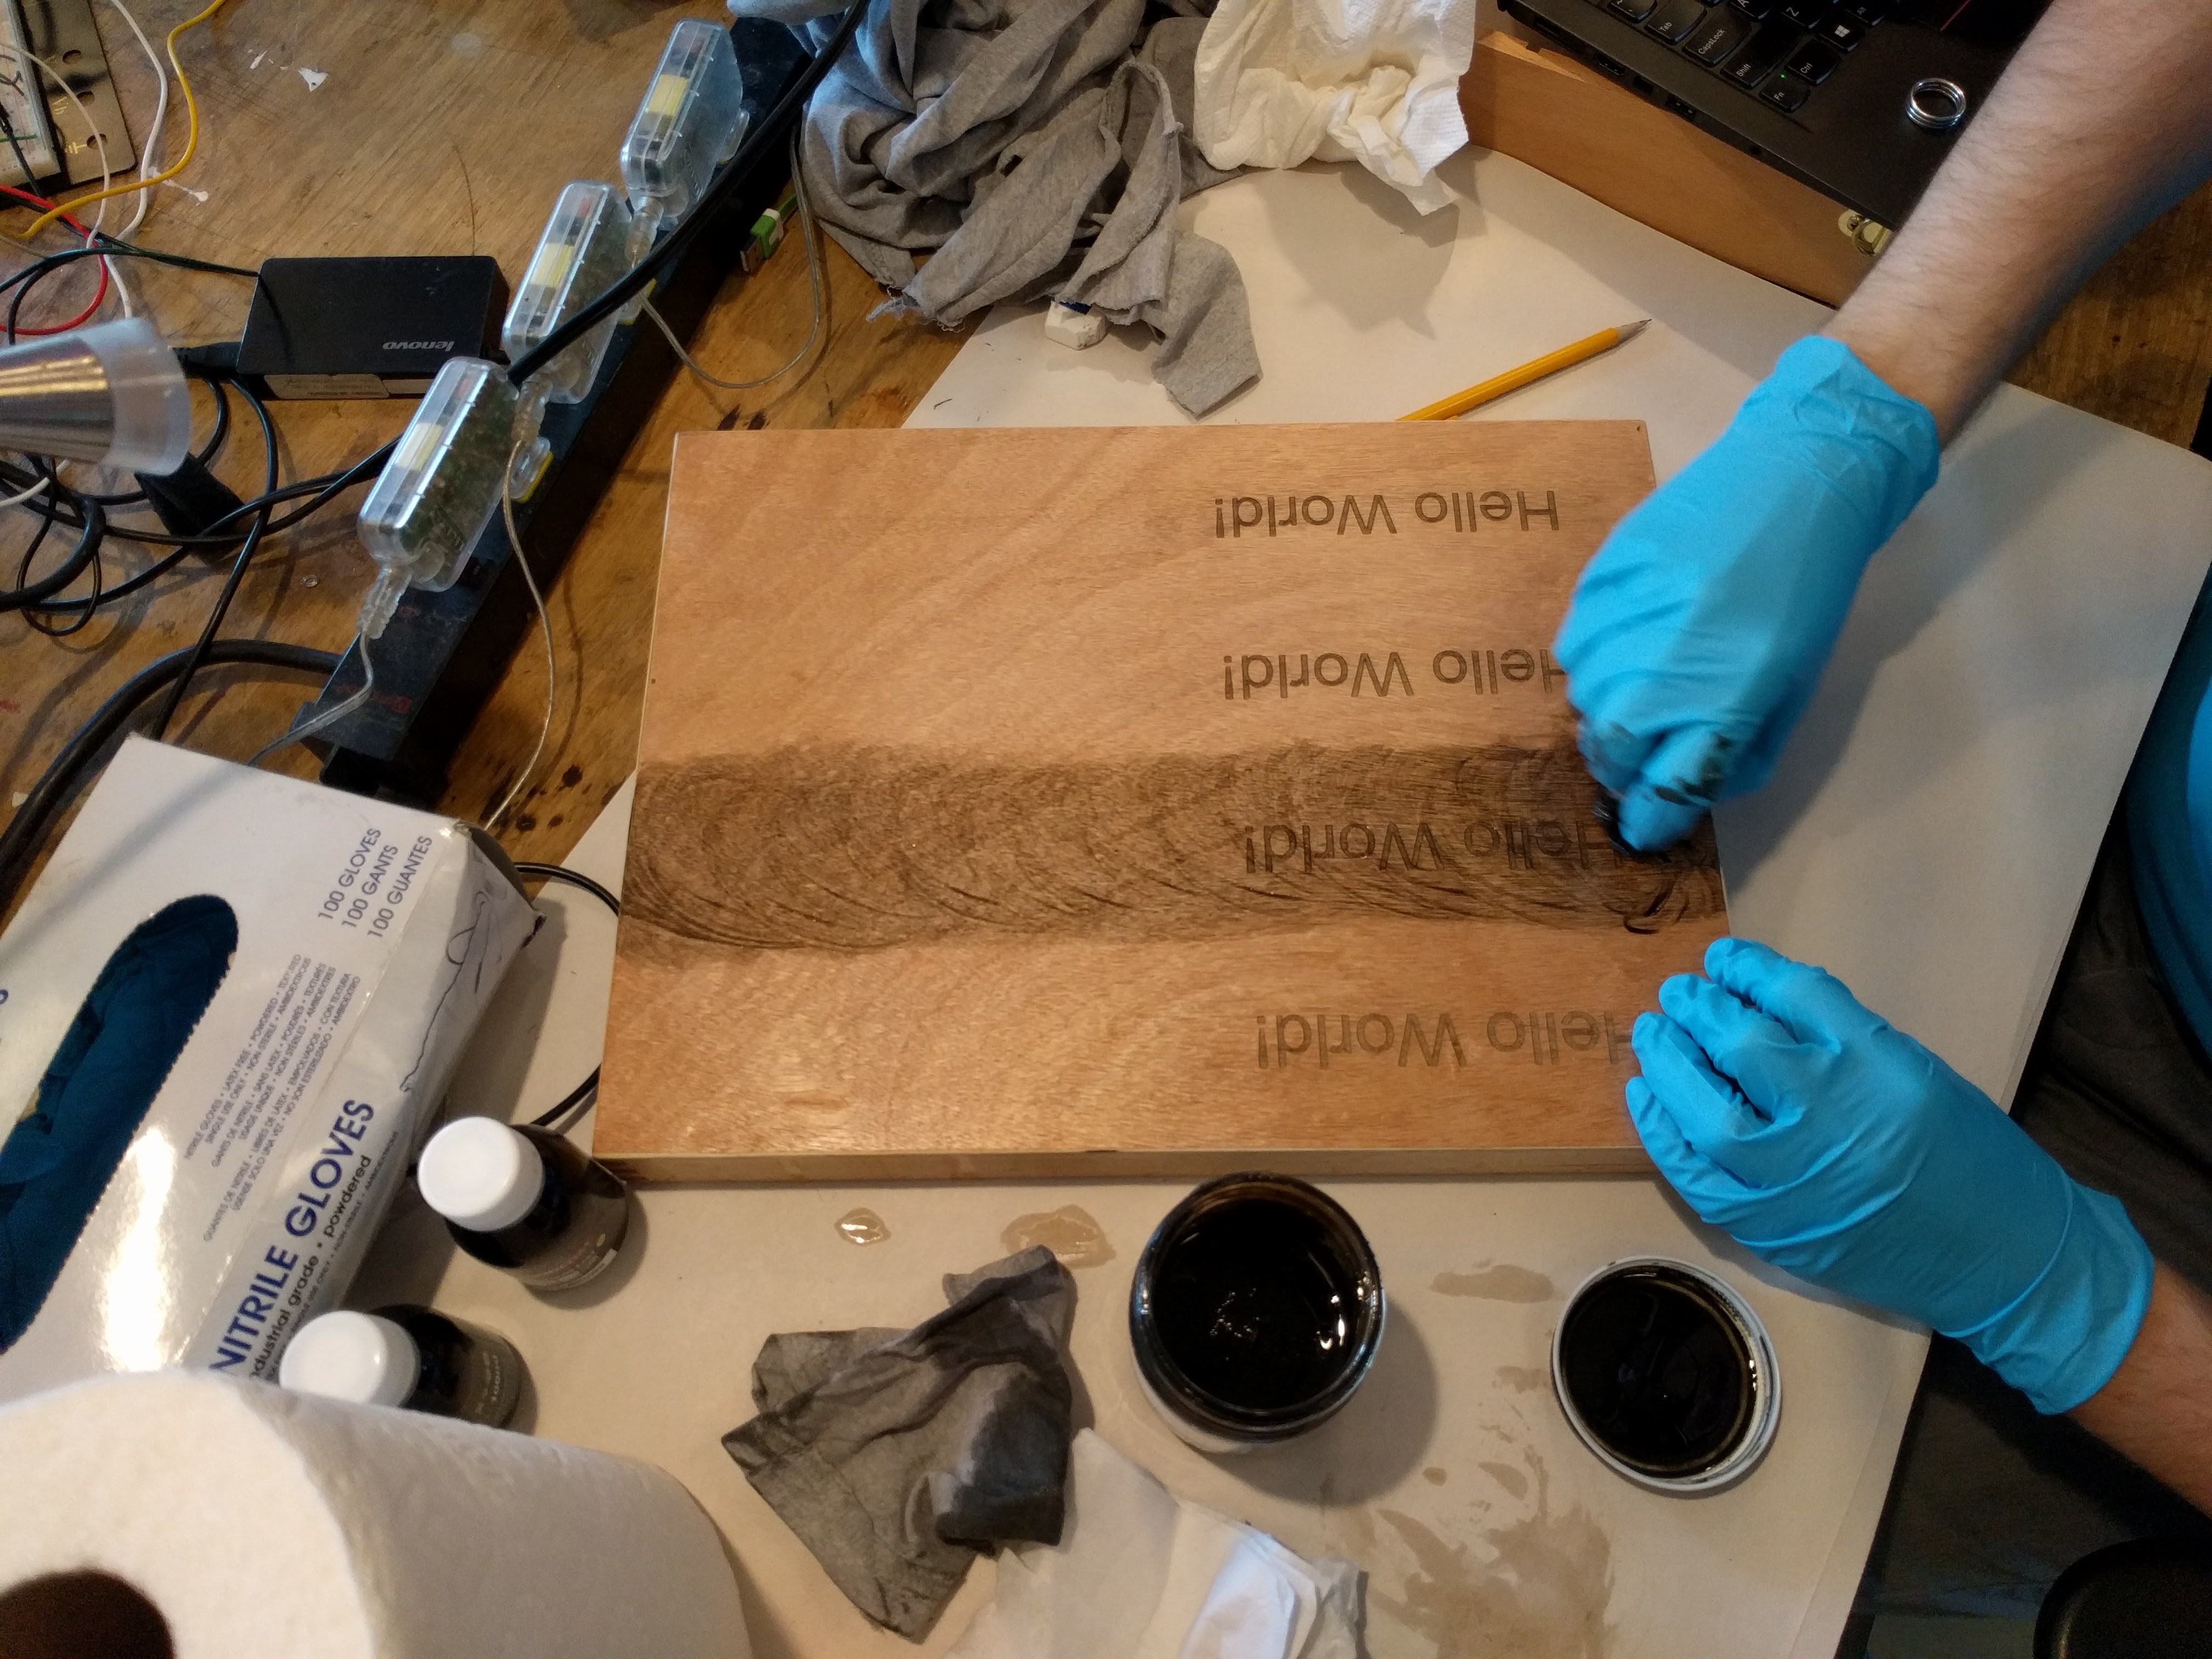
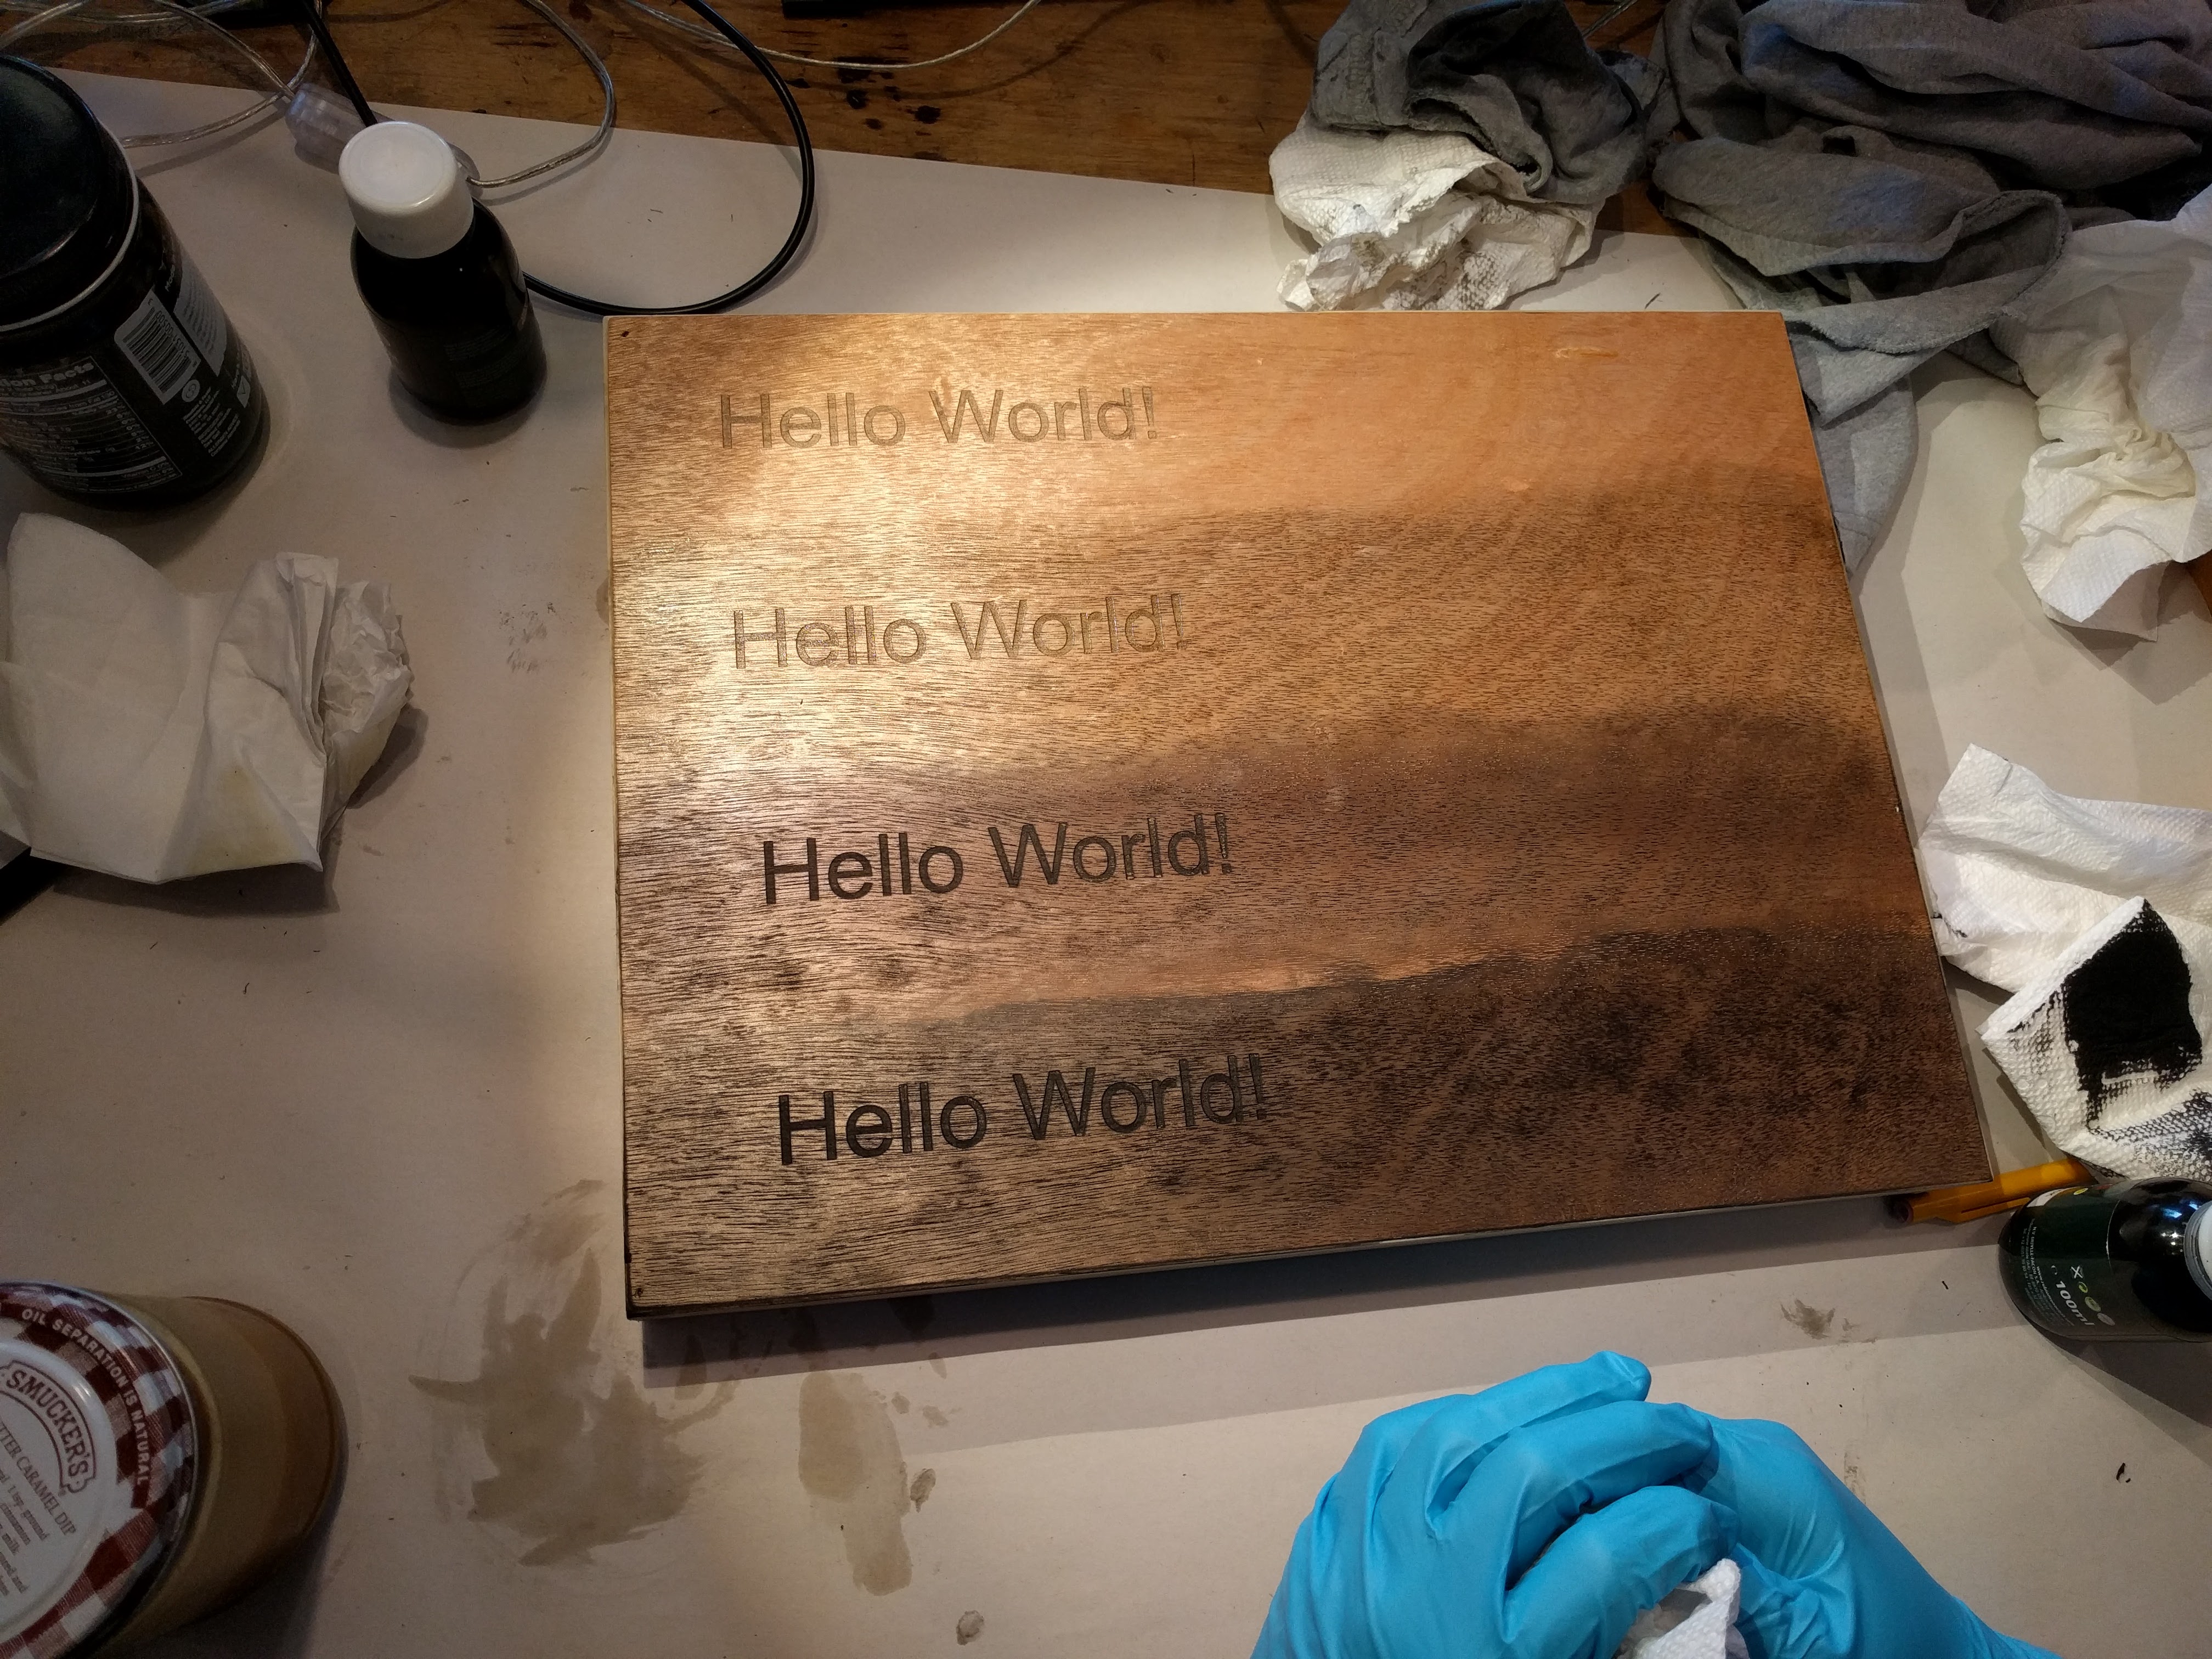
Applying the coats of wax and stain to the test piece
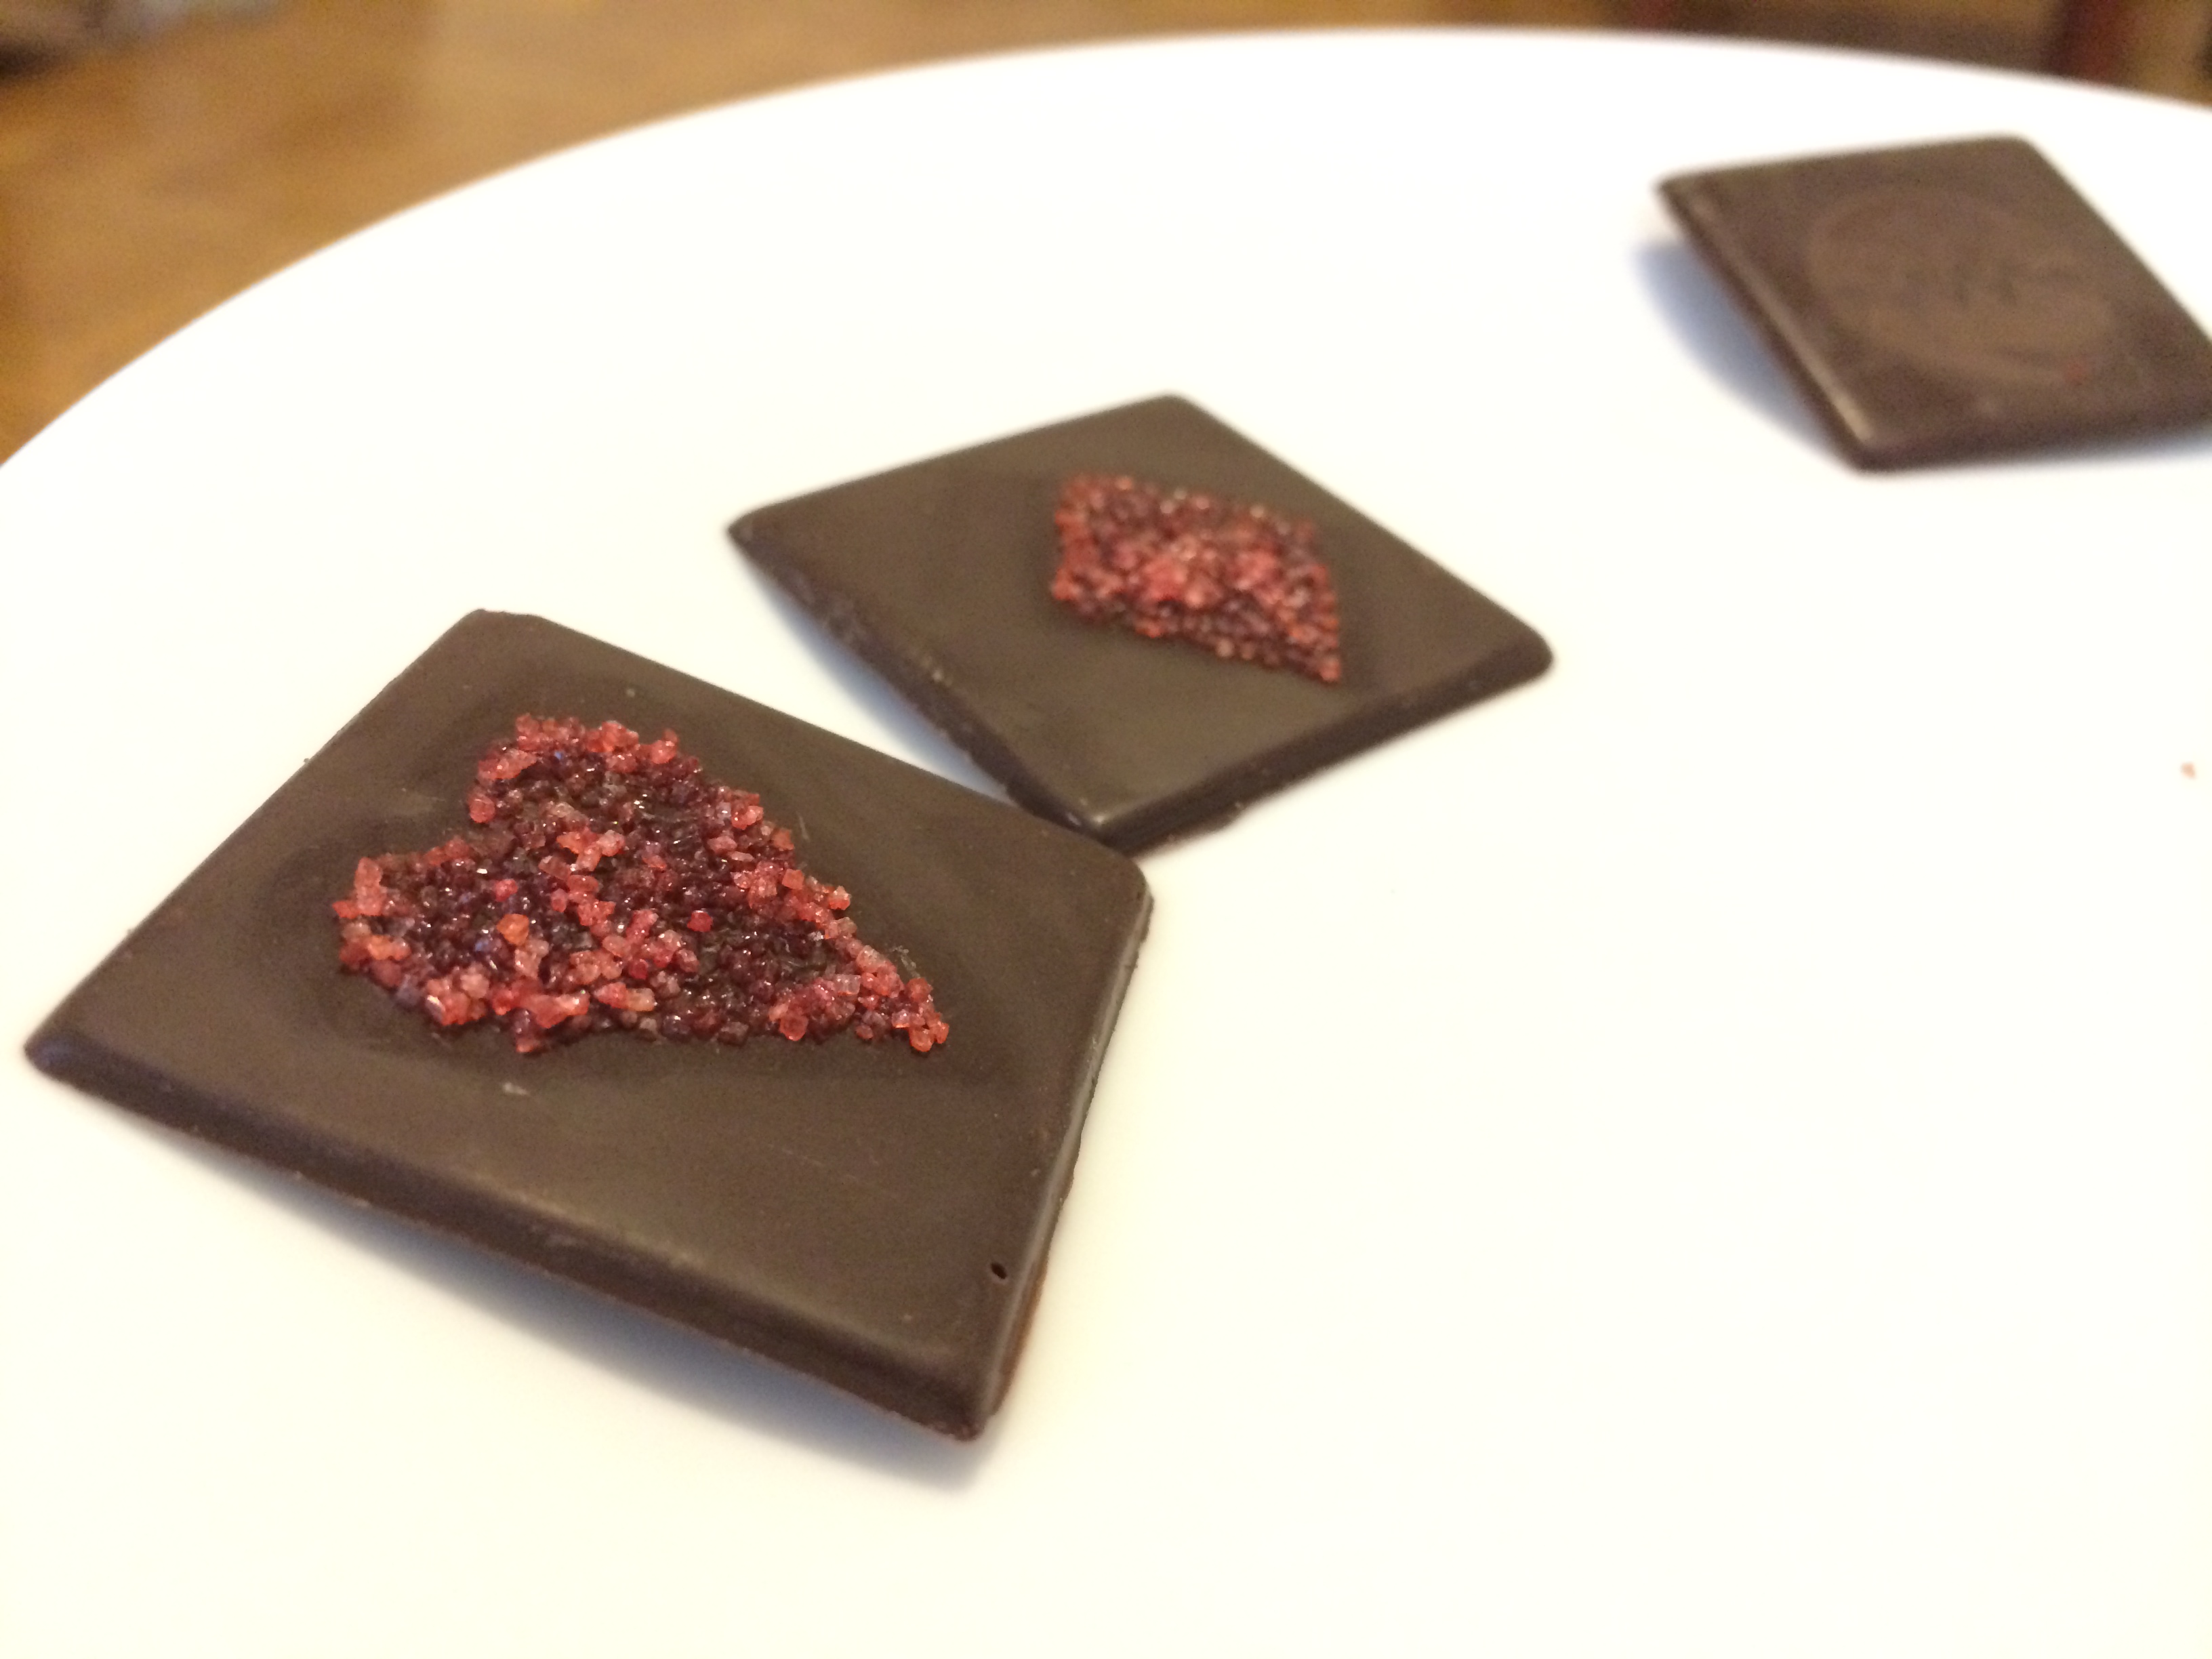
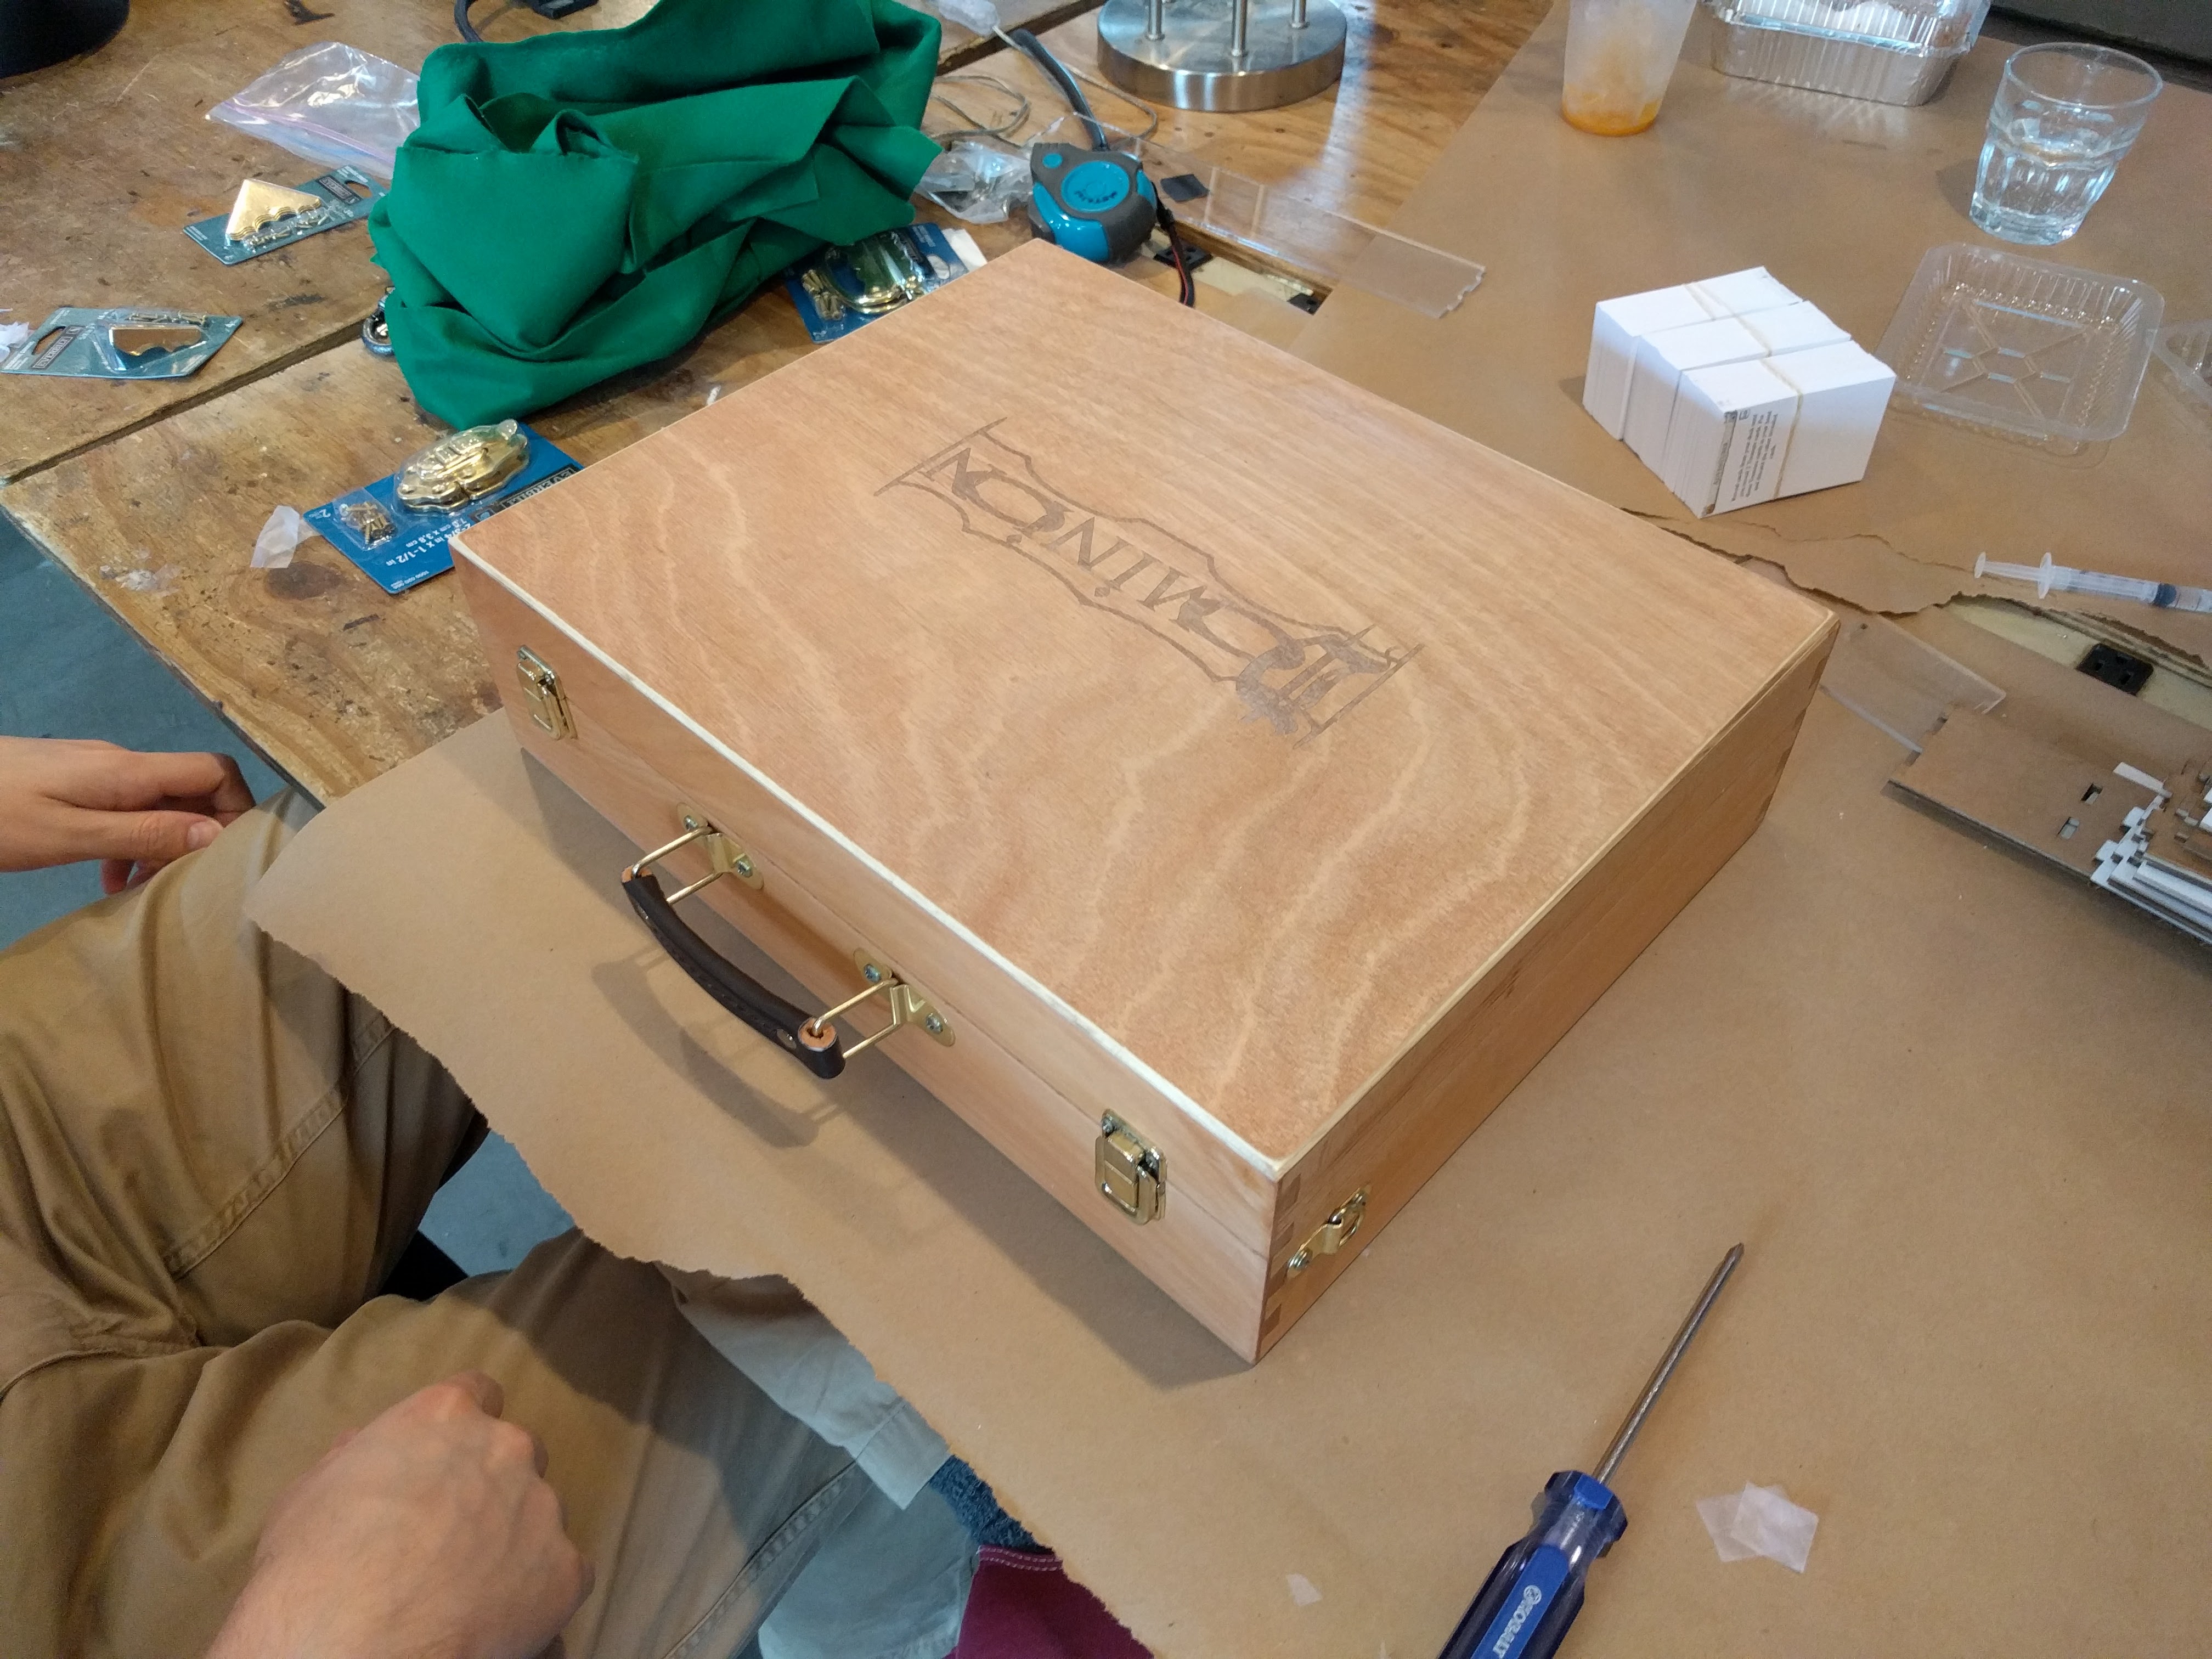
The logo we used had too much background and shading for a clean burn. We ended up using Pawel Pawlak’s Dominion icons to generate an appropriate vector image of the logo and banner outline for the laser cutter.

Sheet of white cardboard on a metal grate in a laser cutter behind dirty glass. There is a blur of a moving laser cutter head over the center third of the cardboard. The beginning of an etching of the Dominion logo can be seen as a pale brown on the cardboard's surface. Sheet of white cardboard on a metal grate in a laser cutter behind dirty glass. There is a blur of a moving laser cutter head over the center third of the cardboard. A completed etching of the Dominion logo can be seen as a pale brown on the cardboard's surface.

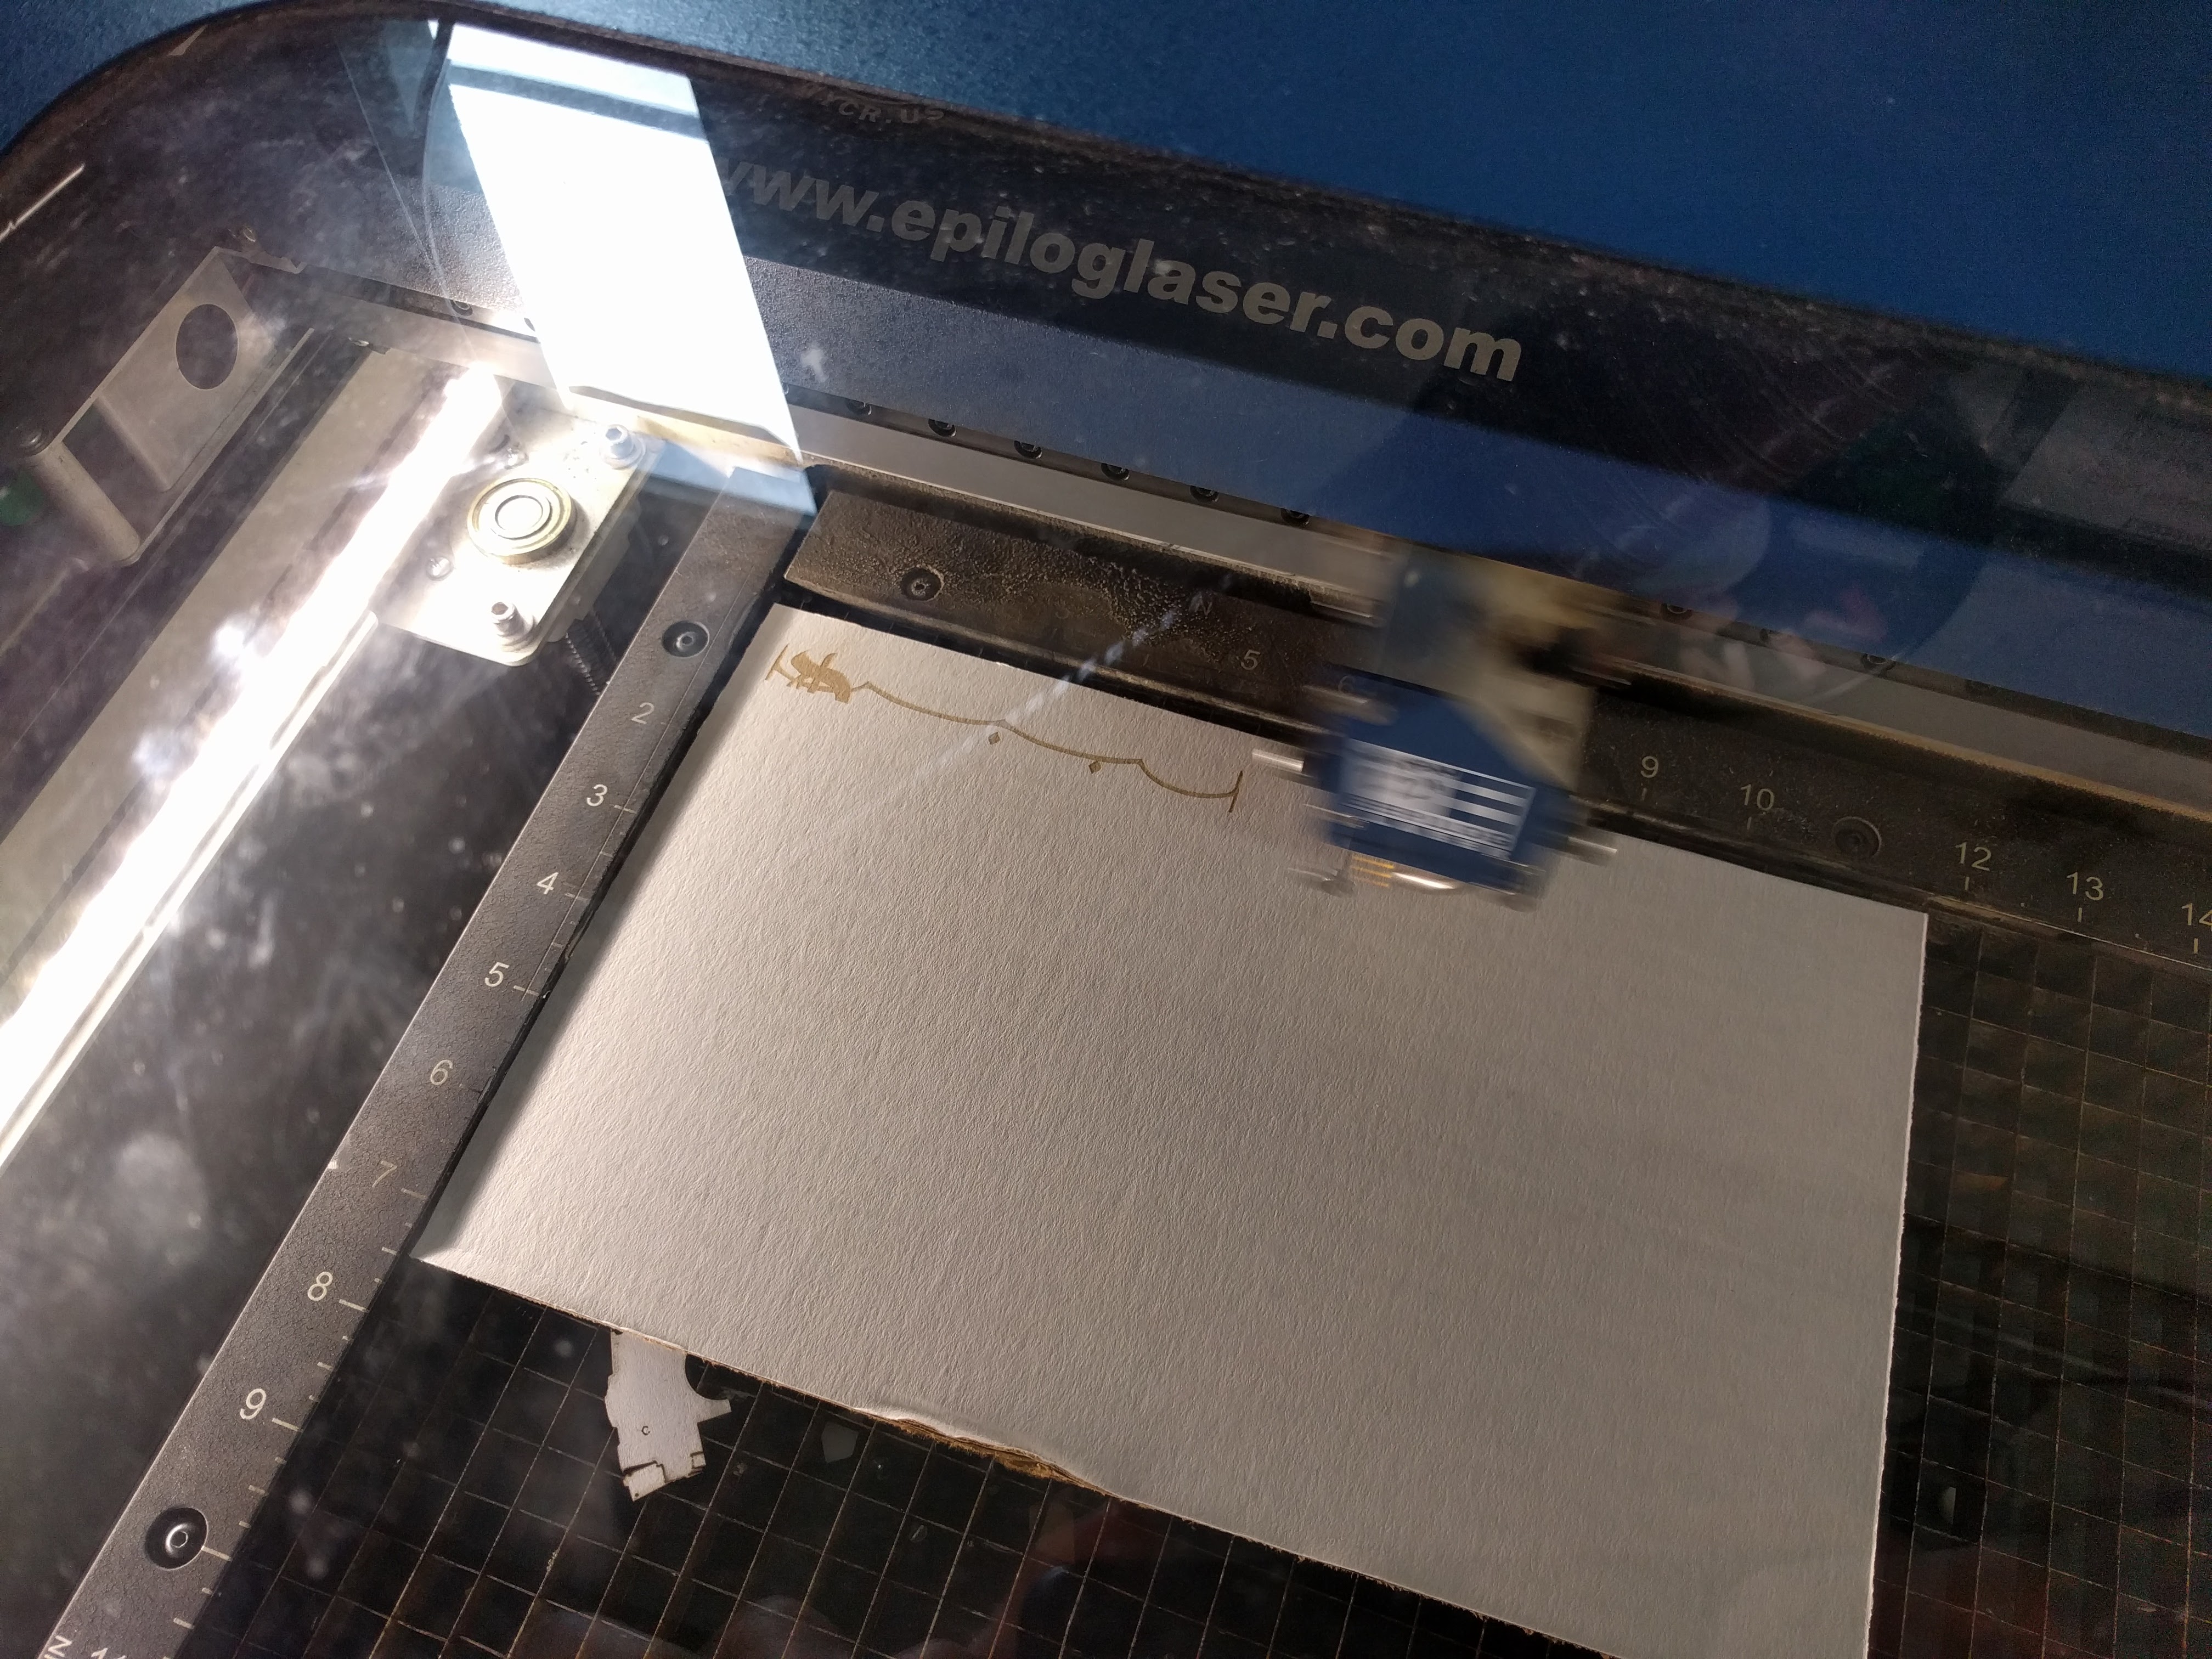
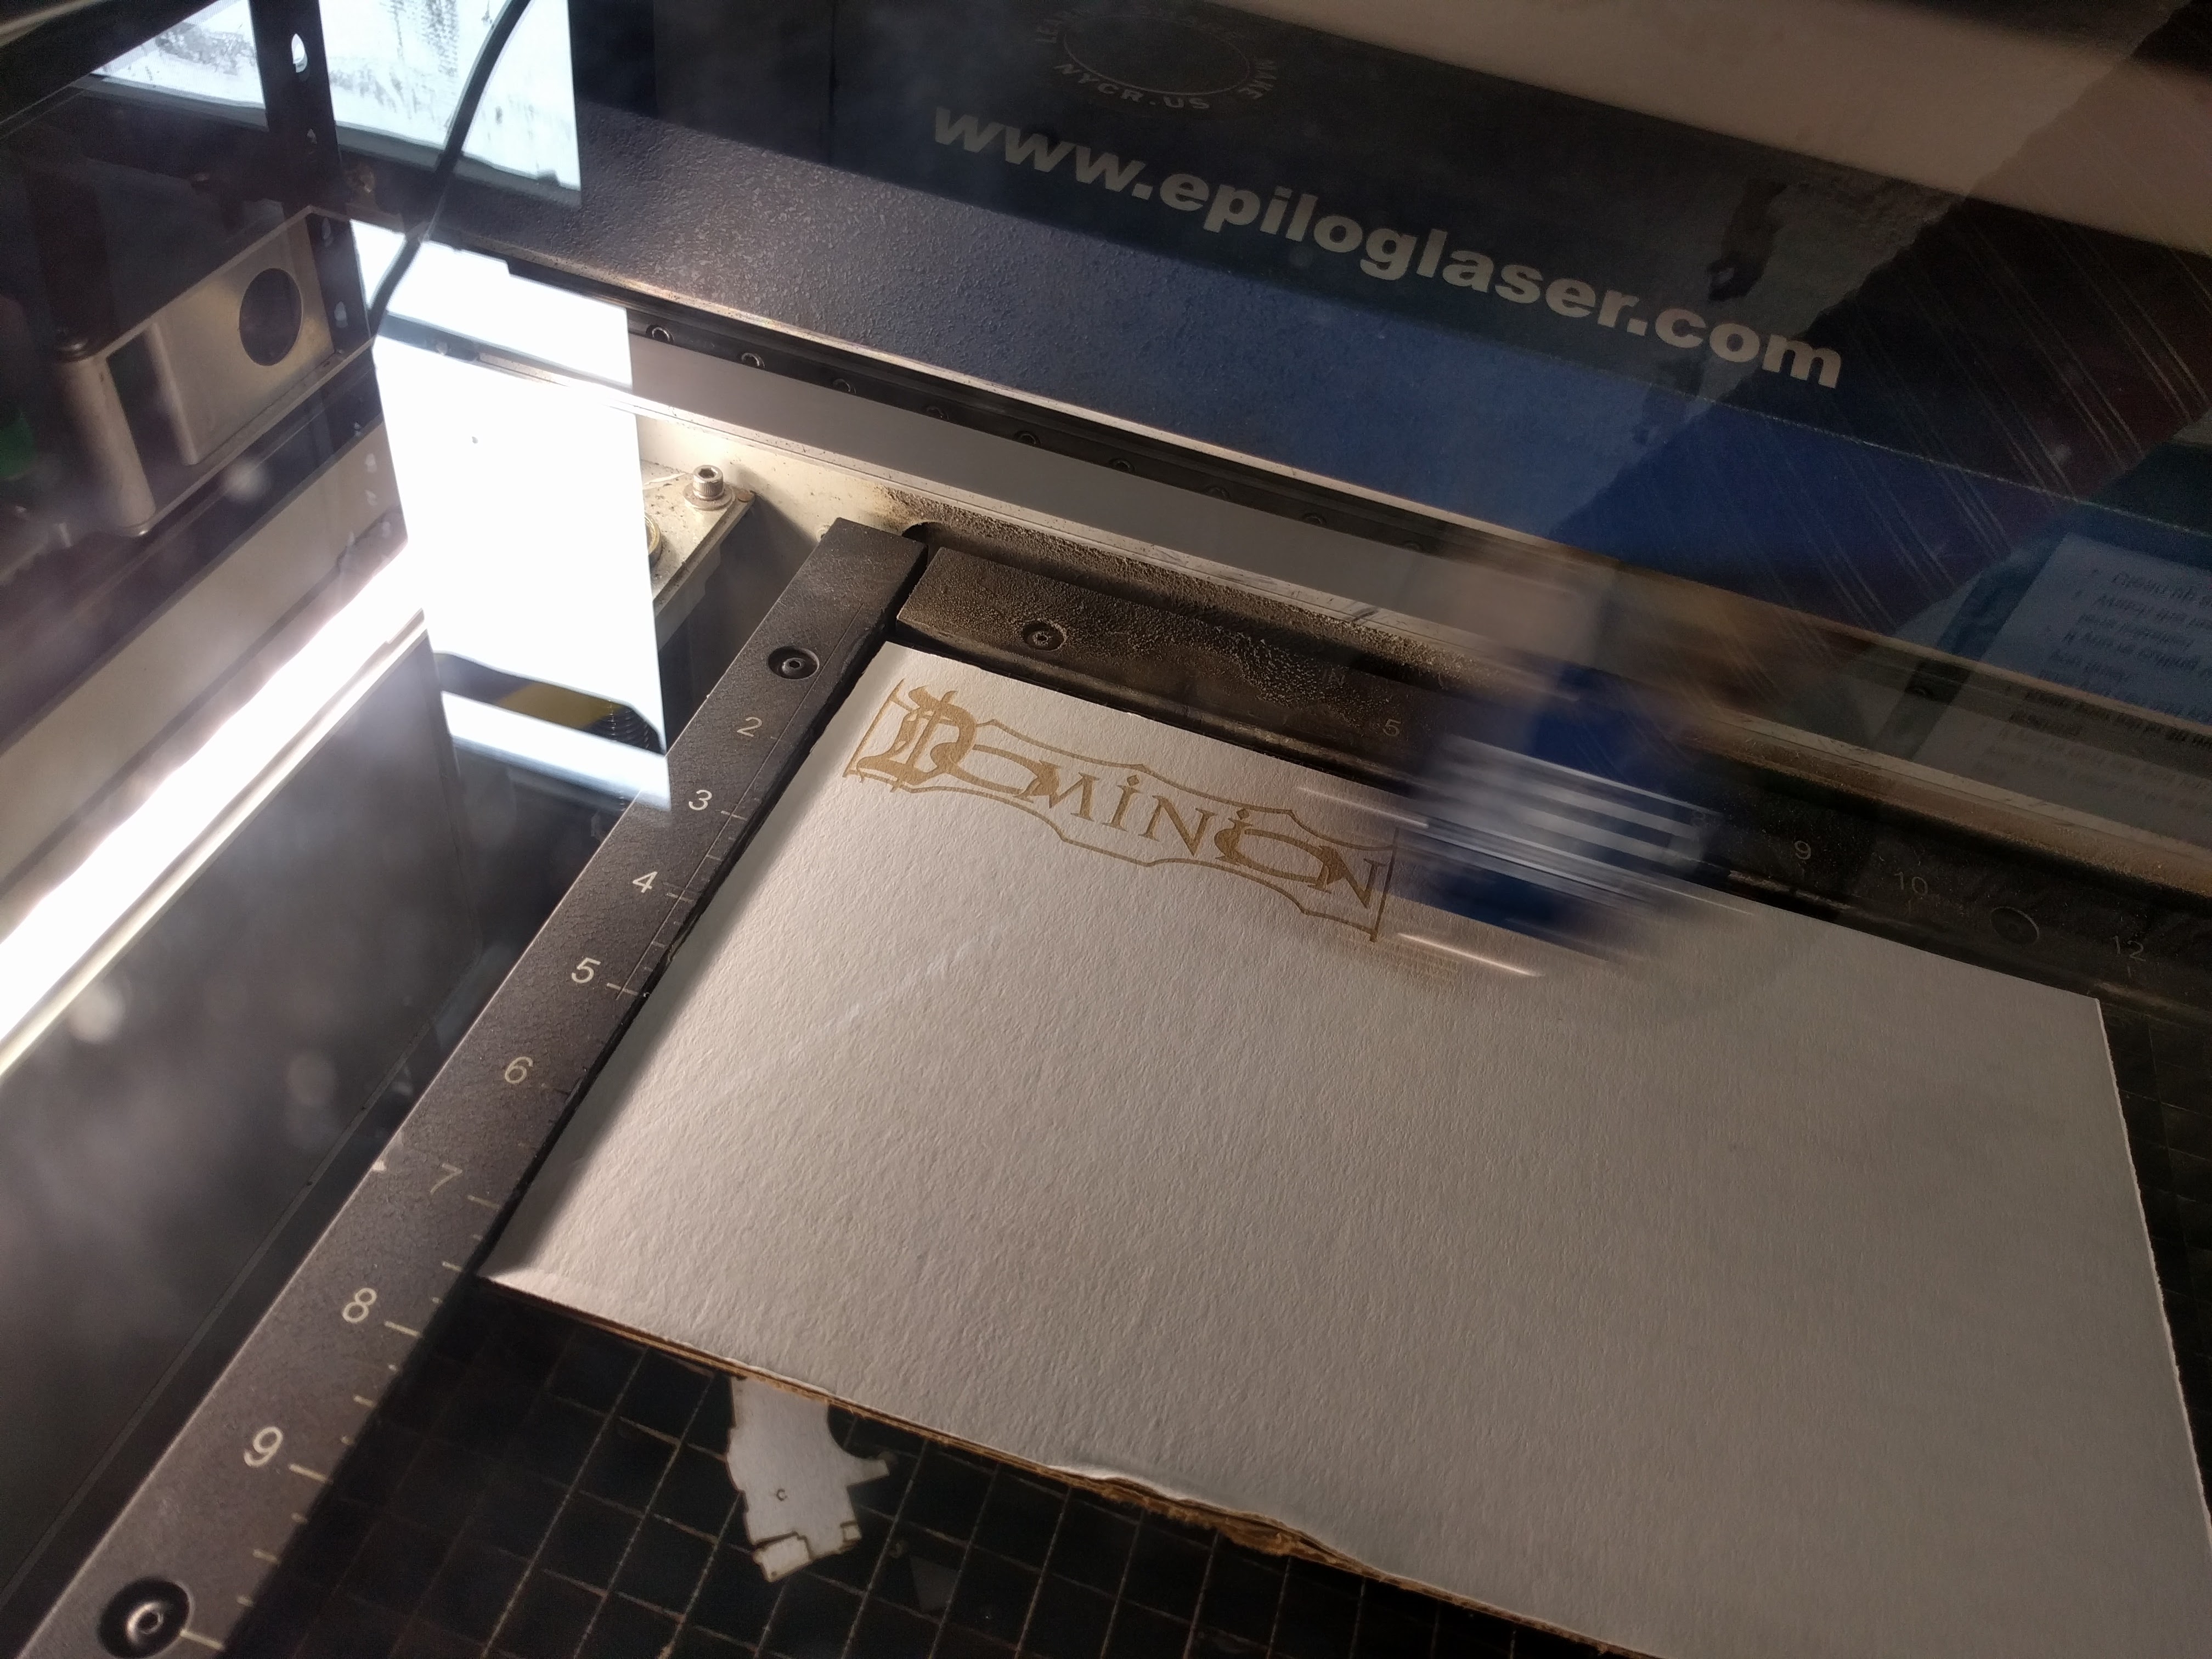
Testing the final logo
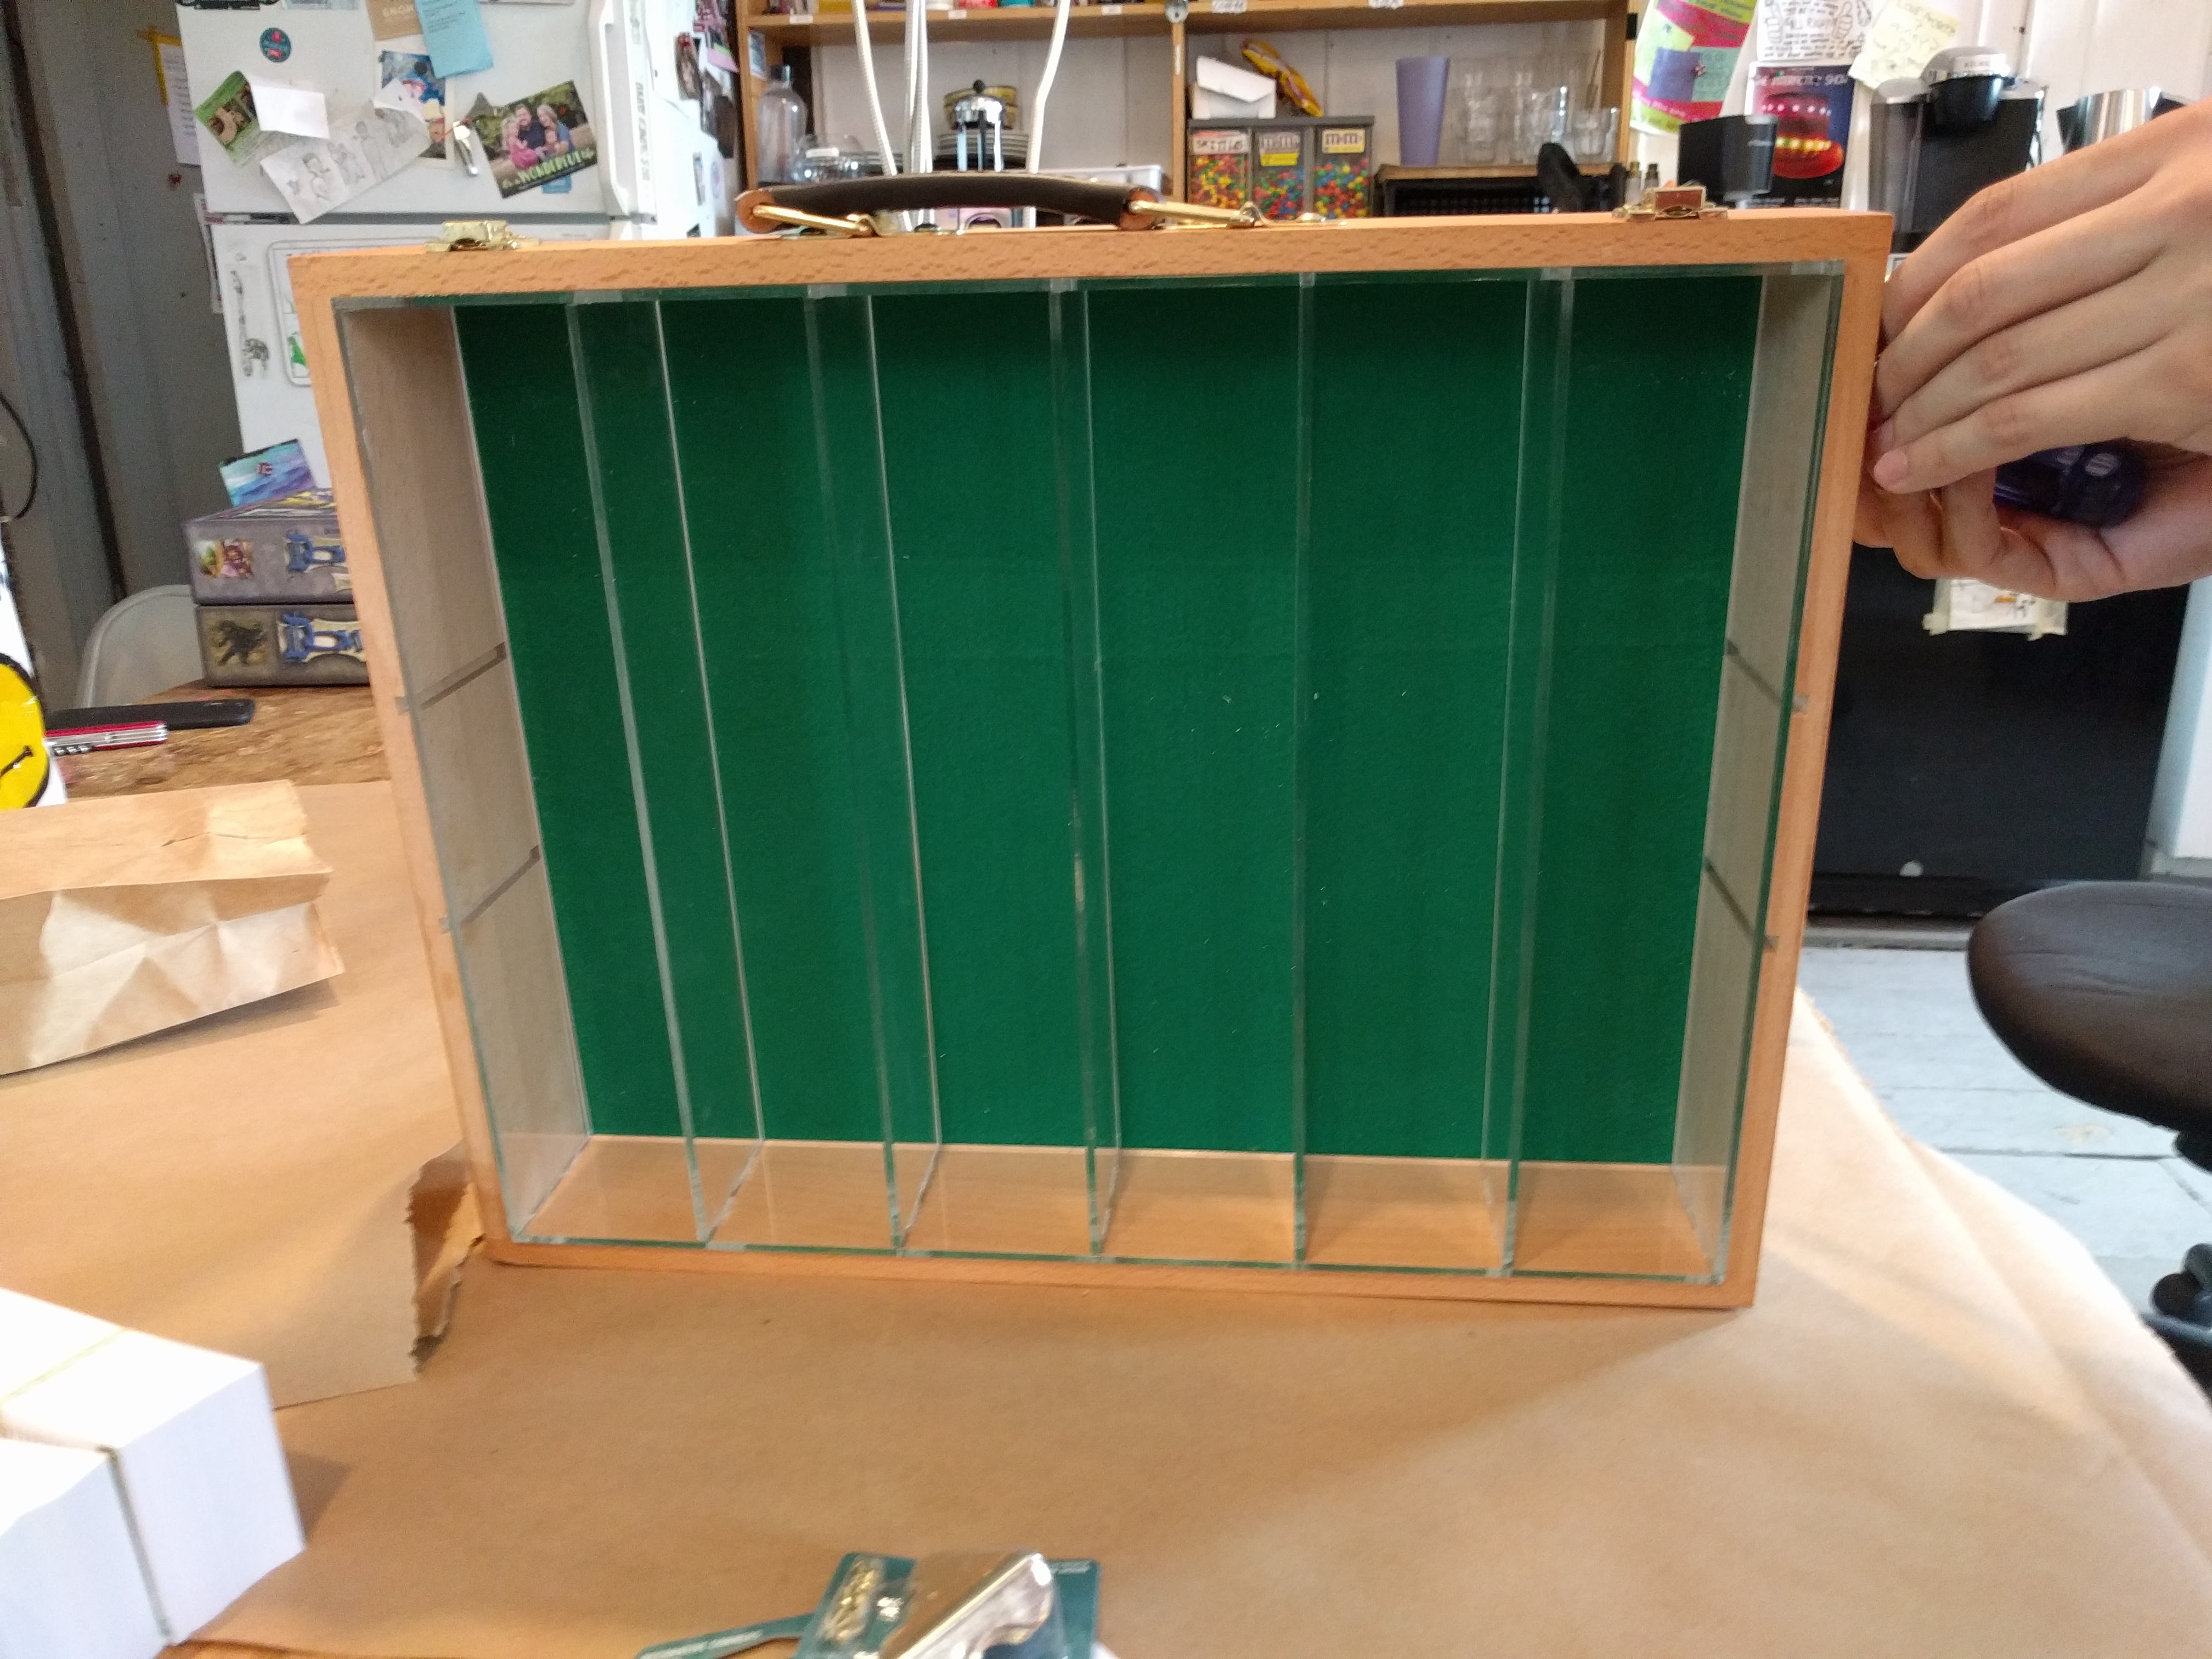
After finalizing the dimensions of the caddy pieces and wax choice, we then cut the pieces out of clear acrylic, assembled and affixed them with acrylic glue, burned the logo into the case cover, then applied the coats of wax.

Corner of a light brown wooden box fix the lower two thirds of the frame. A sheet of clear acrylic, the height of the box, cuts a single internal column on the left hand side. Light wooden box sits atop white paper at a slight angle filling the upper two thirds of the frame. The box is divided into six columns by strips of clear acrylic which are the same height as the box itself. An additional strip of clear acrylic rests atop the left edge of the box hanging prosperously over the side.

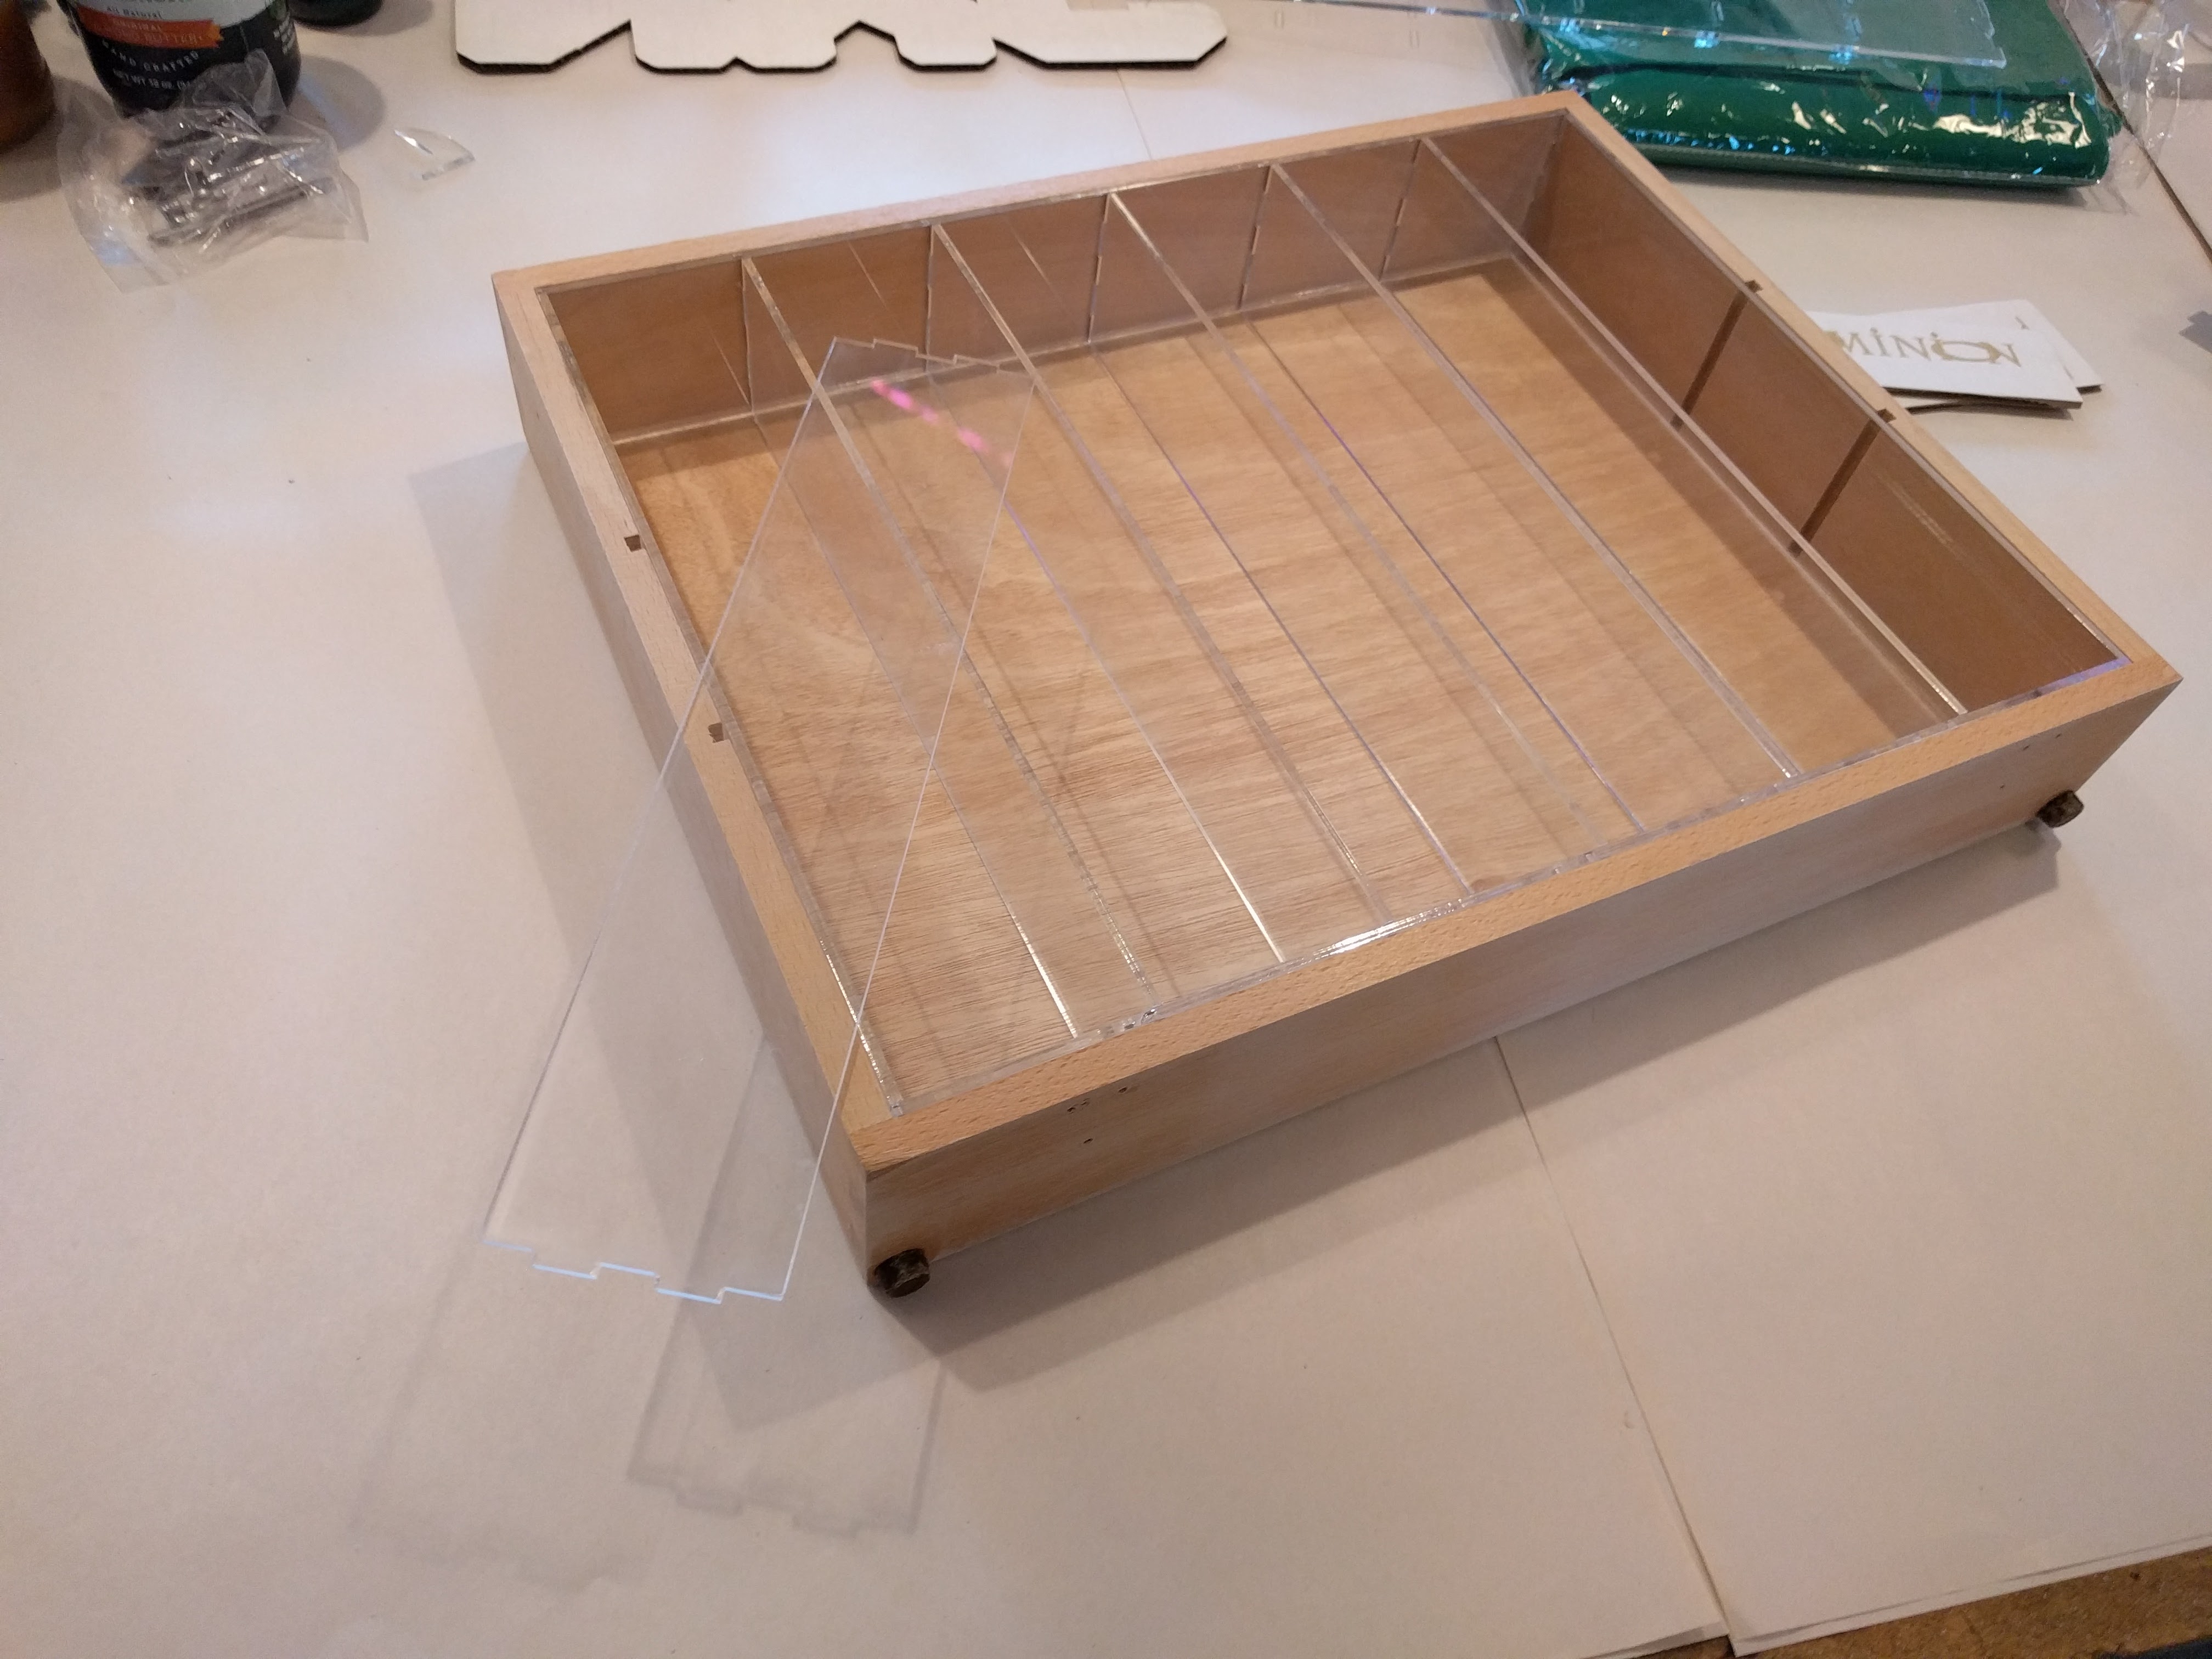
Assembling and checking the fit of the final caddy
Light brown wooden box sits in middle frame at a slight angle atop white paper. It is mostly covered in a honey brown wax. The Dominion logo is etched in its center. Two hands connected to arms which lead off the top of the picture, are wearing blue nitirle gloves and rubbing additional wax into the surface.

Applying the wax to the case exterior

To minimize cards sliding around and give them a cushion, we cut a segment out of poker felt and glued it to the bottom with spray adhesive. We attempted to replace the stock hardware with sturdier options, but found the wood to be too thin to support any of the screws from the cabinet fixtures.

A rectangular wooden pallet has two small squares of green felt glued to the bottom right corner of the palette. A jug of wood glue, can of spray adhesive, and hand holding a hot glue gun are just out of frame. Light wooden box with a green felt base rests on its edge, filling the frame. The box's inside is divided into six vertical columns by clear acrylic. Two hands in the upper right of the frame can barely be seen screwing something into its side.

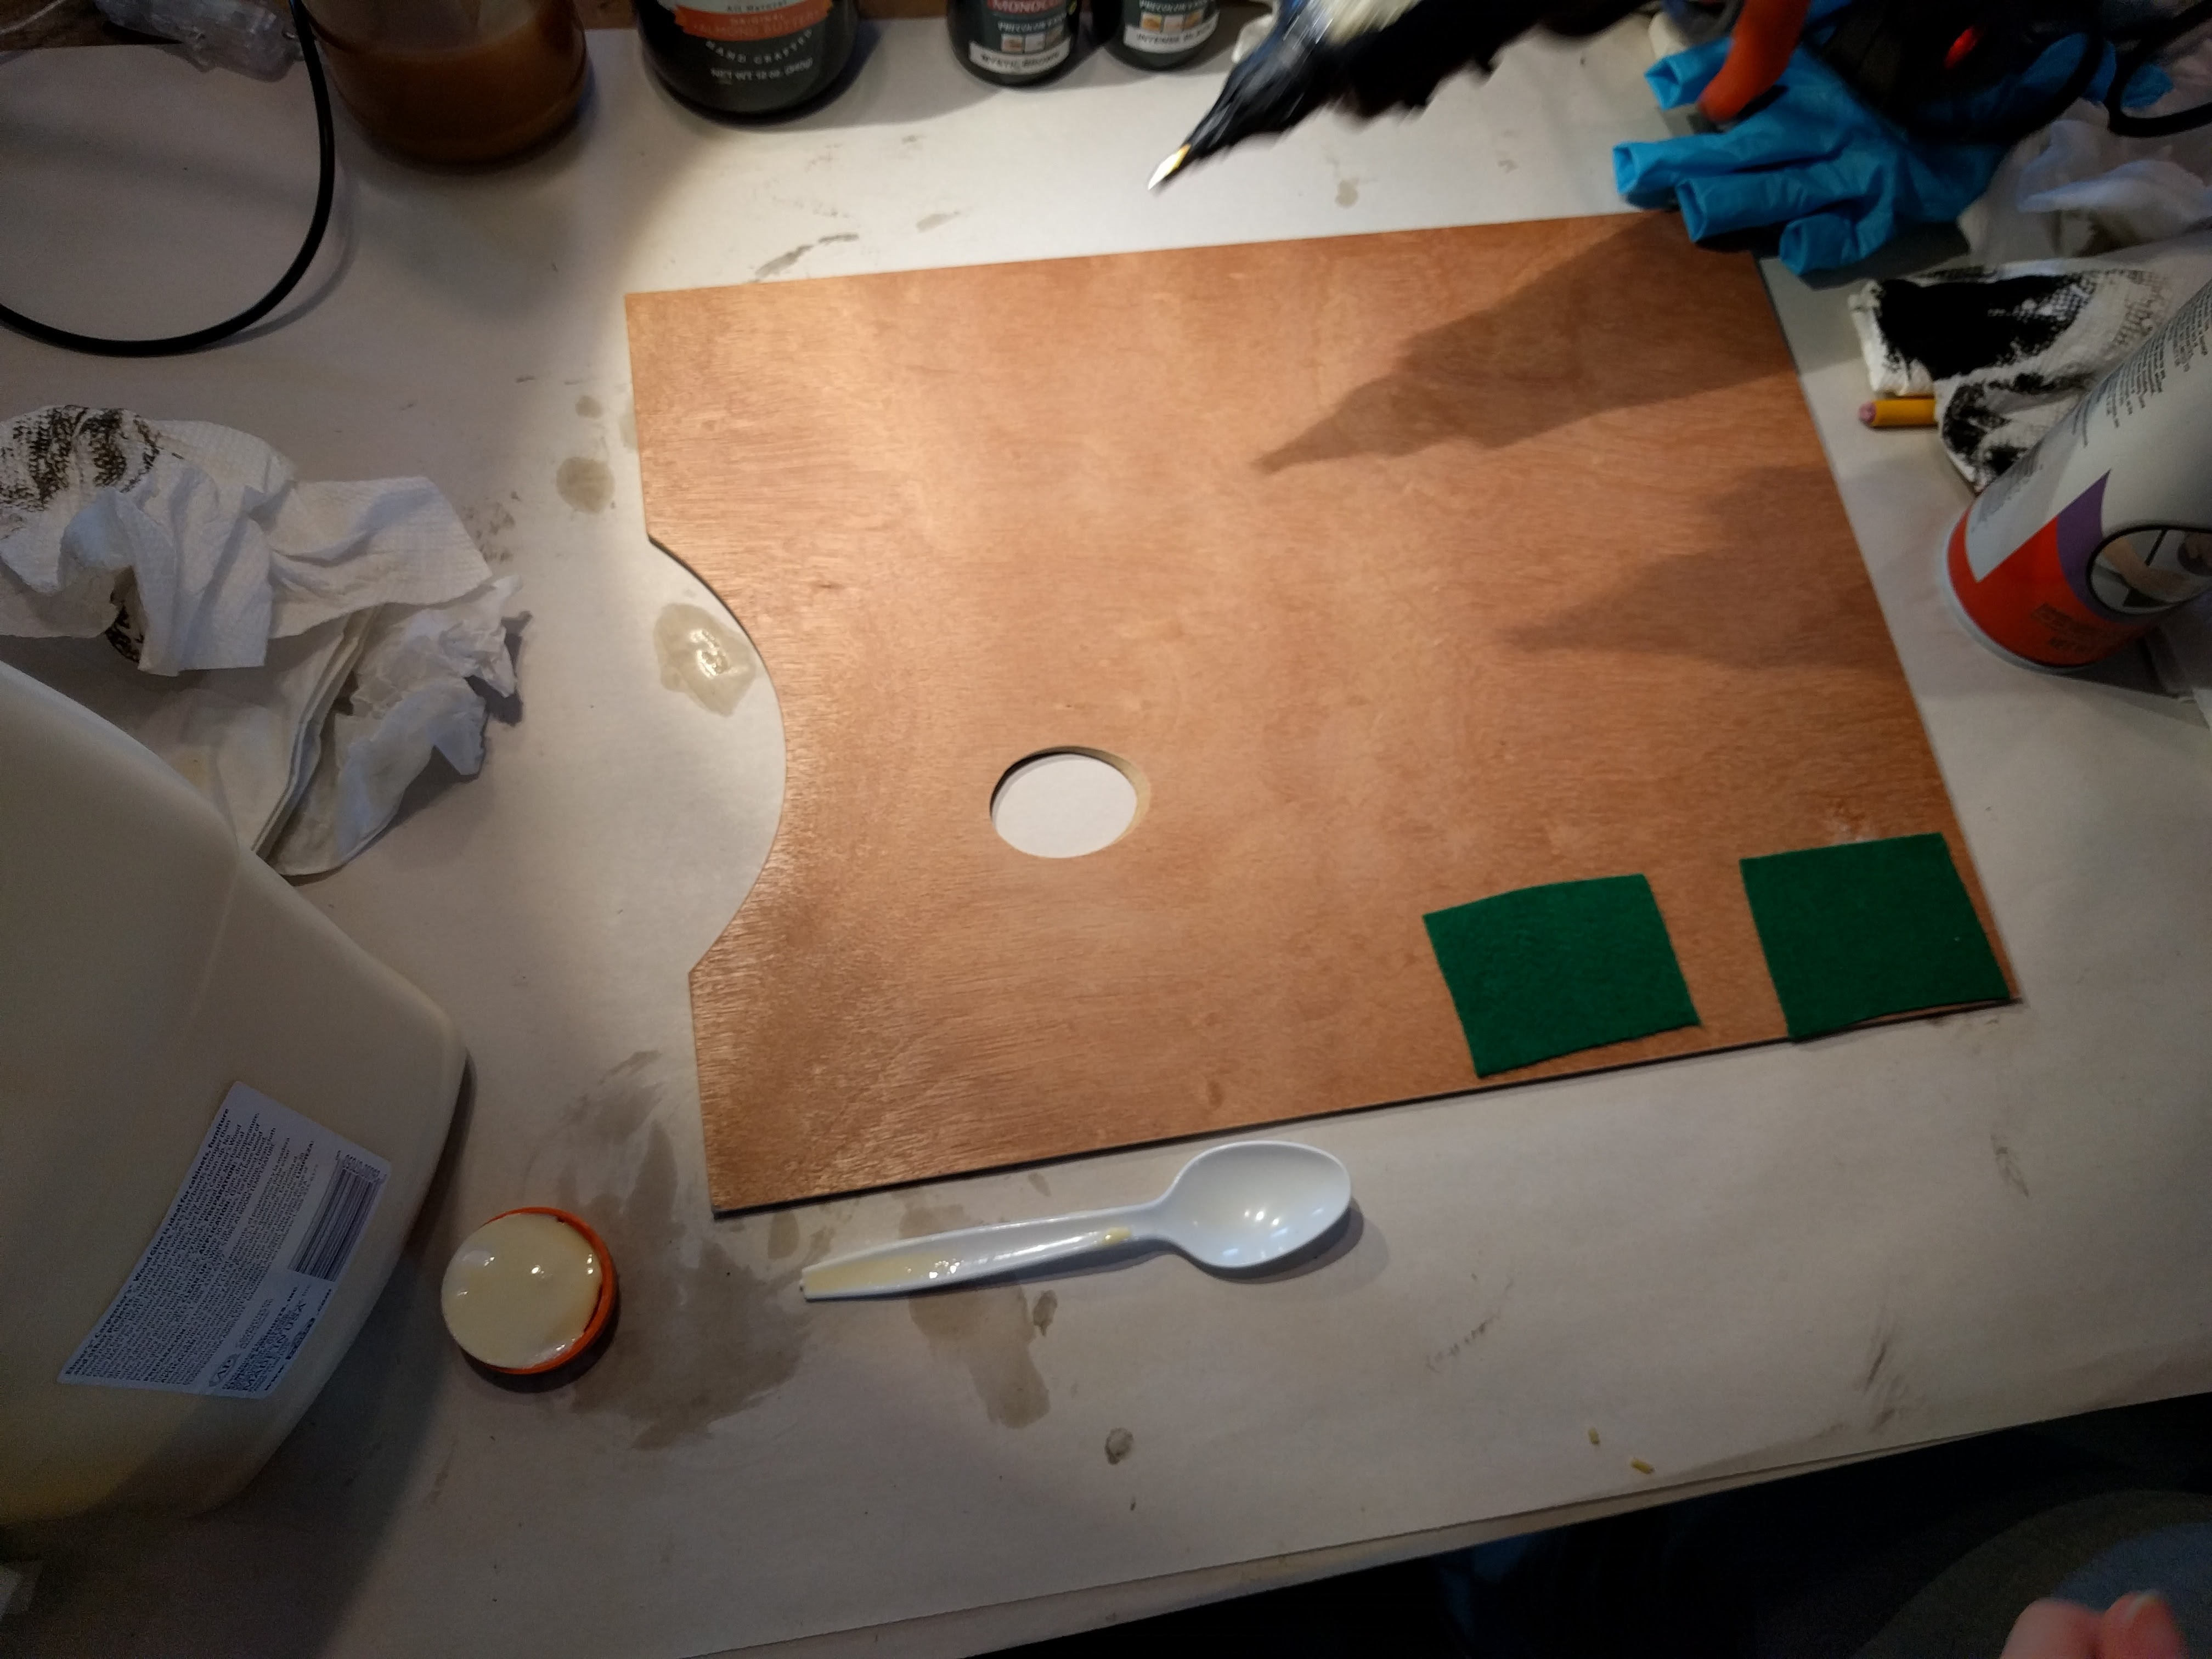
Testing different adhesives on felt samples and reattaching the hardware to the finished bottom
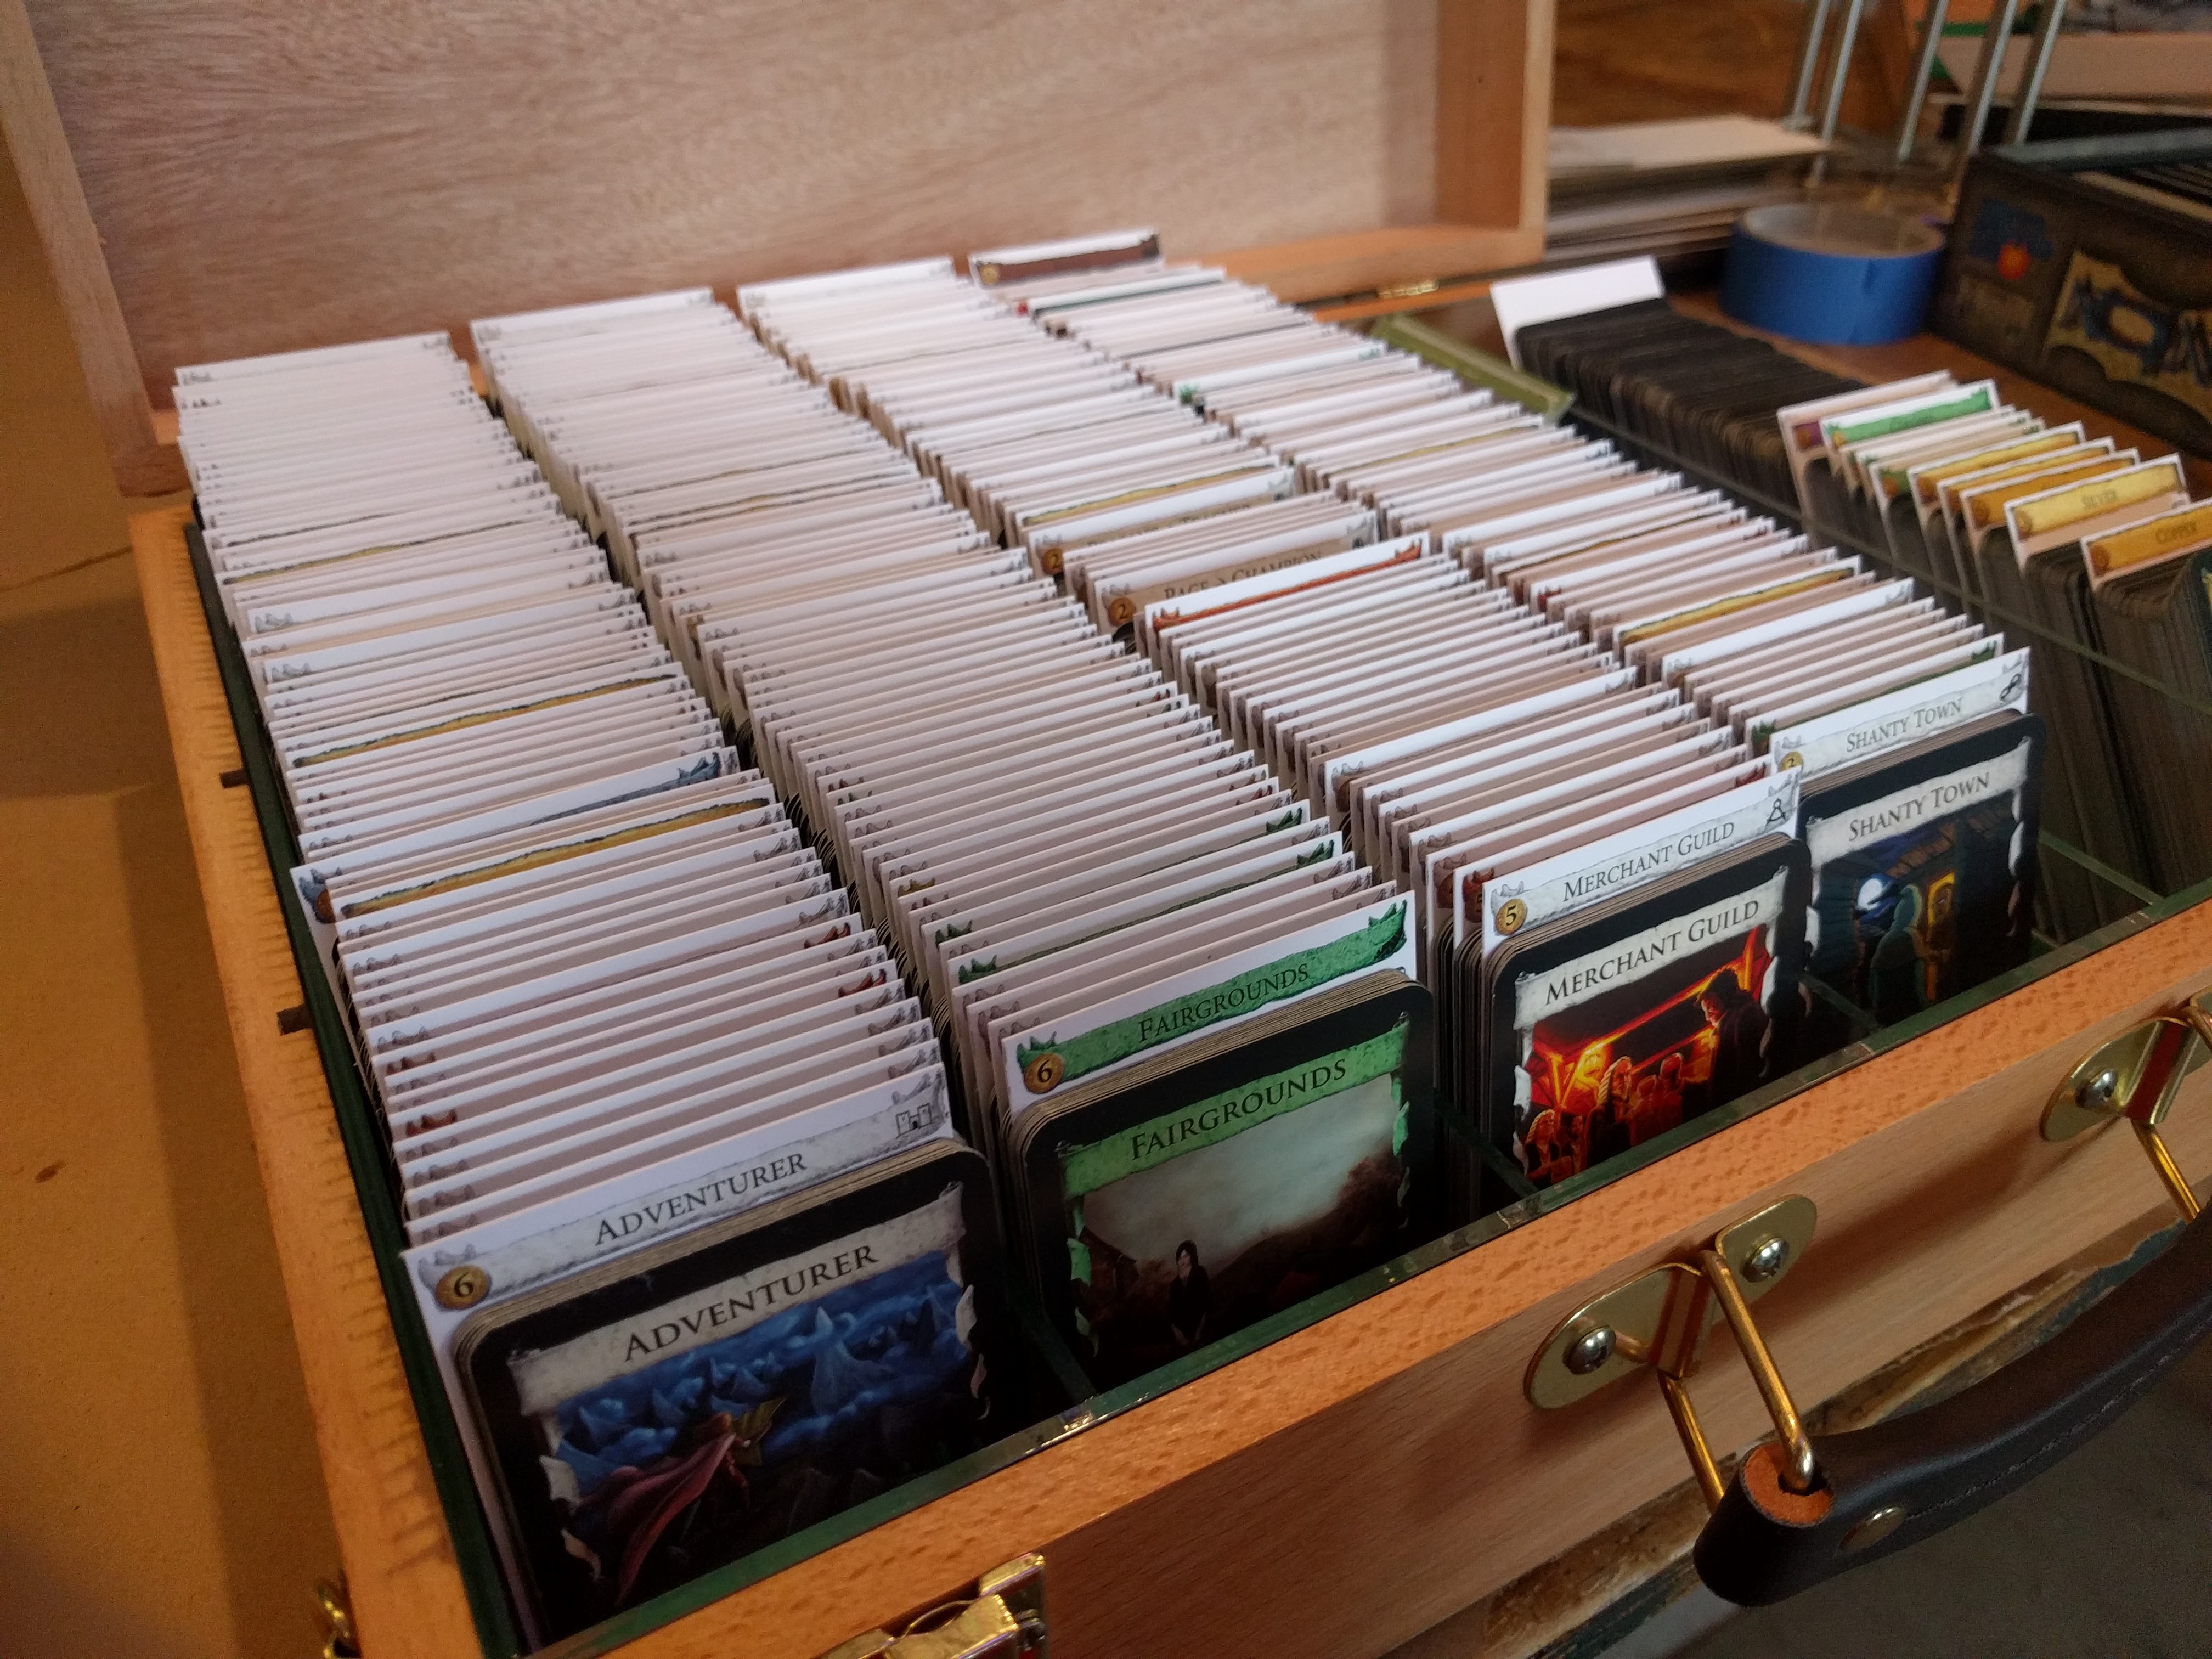
Finally, after completing assembly of the box, we had to transfer the actual game components from the old box to the new one. We created the divider tabs using sumpfork’s Dominion Divider Generator and had them printed on cardstock and trimmed at a local print shop.

Warm brown wooden box sits in the middle of the frame at an angle resting on butcher paper on a wodden table. The Domnion logo is etched in its center. Brass clasps are affixed to its front along with a leather and brass handle. Open light brown wooden box resting on butcher paper on a wooden table. The bottom of the box is green felt and it is divided into six columns by clear acrylic strips.

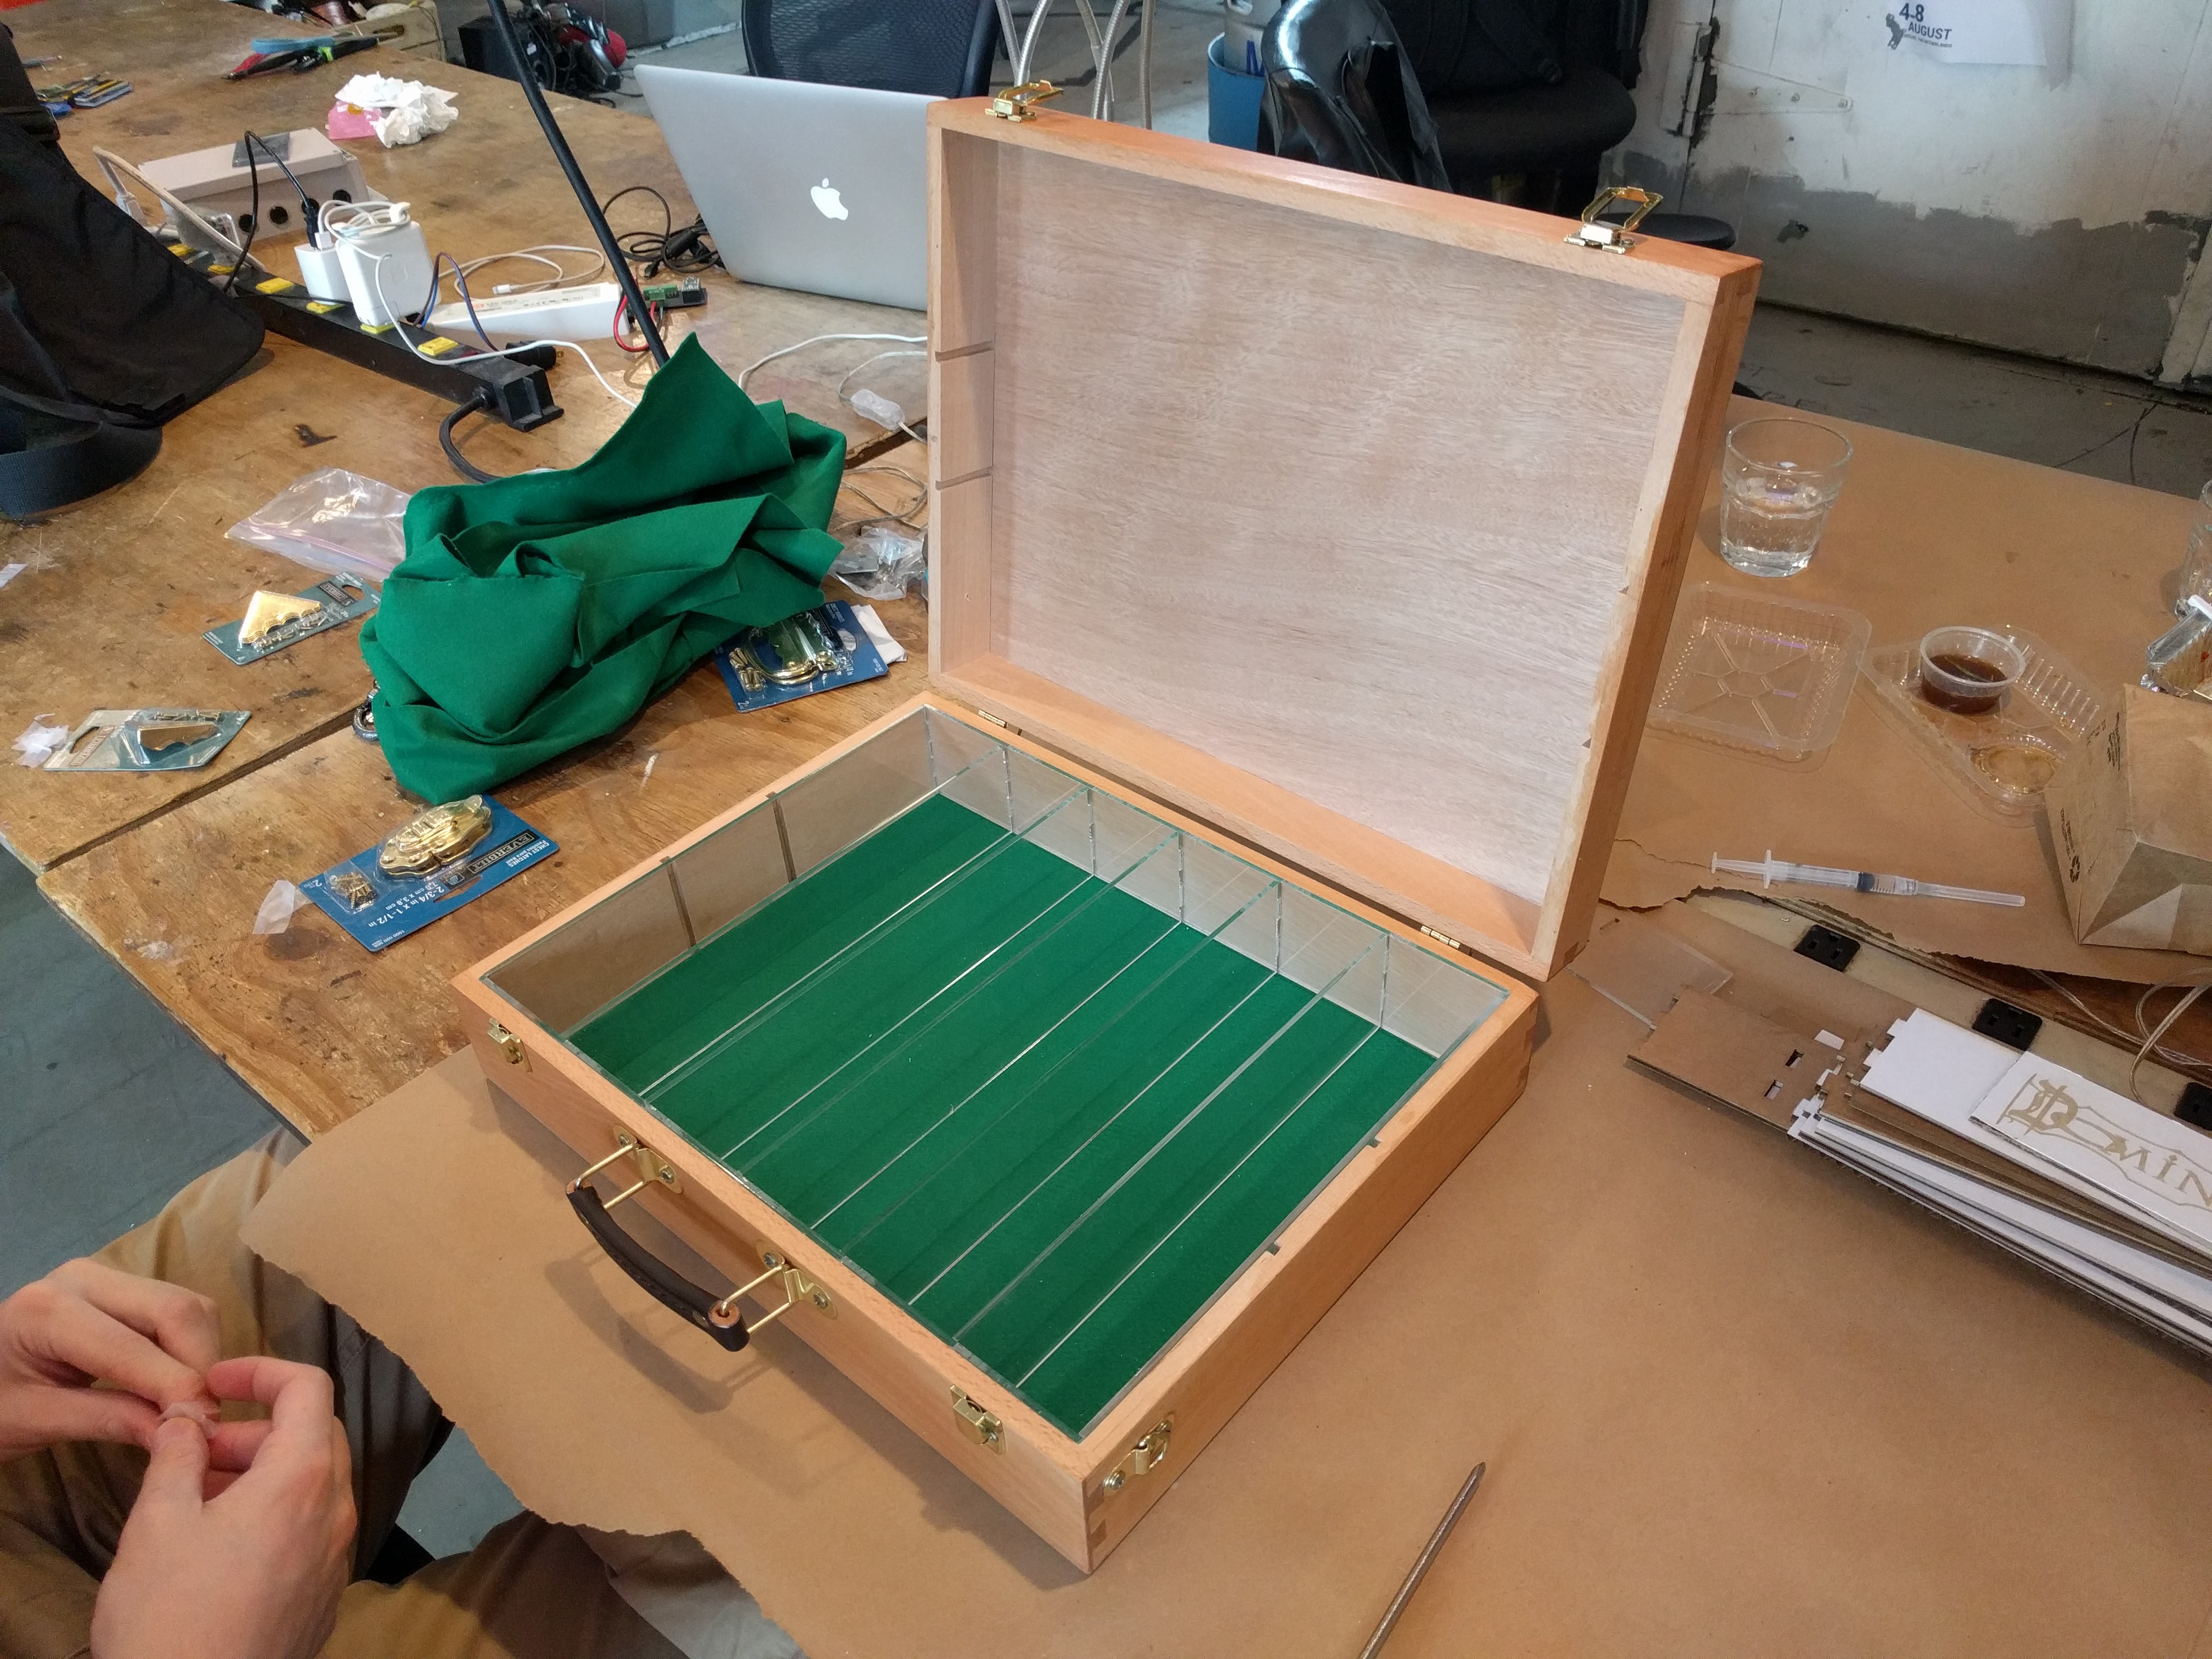
The finished box ready to receive the game materials

Resting atop a wooden table which fills the frame, from left to right there is a stack of two sheets of card sleeves full of Dominon cards, the bottom half of a Dominion box full of card sheets which are them selves full of Dominion cards, the top half of a Dominion box with three stacks of dominion cards, a light wooden box which is open, with a green felt bottom split into six columns by strips of clear acrylic, one of the columns is full of dominion cards with a second one about half full, and finally five stacks of white card paper which are barely in frame. On the right side of the table there is also a jumble of empty card sleeves. A wooden table runs at a sharp angle from the top left to the bottom right of the frame. From left to right there are: sheets of card sleeves full of dominion cards, the bottom half of a dominion box half full of full card sheets, the top half of a dominion box with three stacks of dominion cards in it, a light wooden box which is open, its base green felt, divided into six columns by clear acrylic the left most of which is full of dominion cards and dividers, finally six stacks of white card stock with dominion rules text printed on them.

Moving the cards into their new home
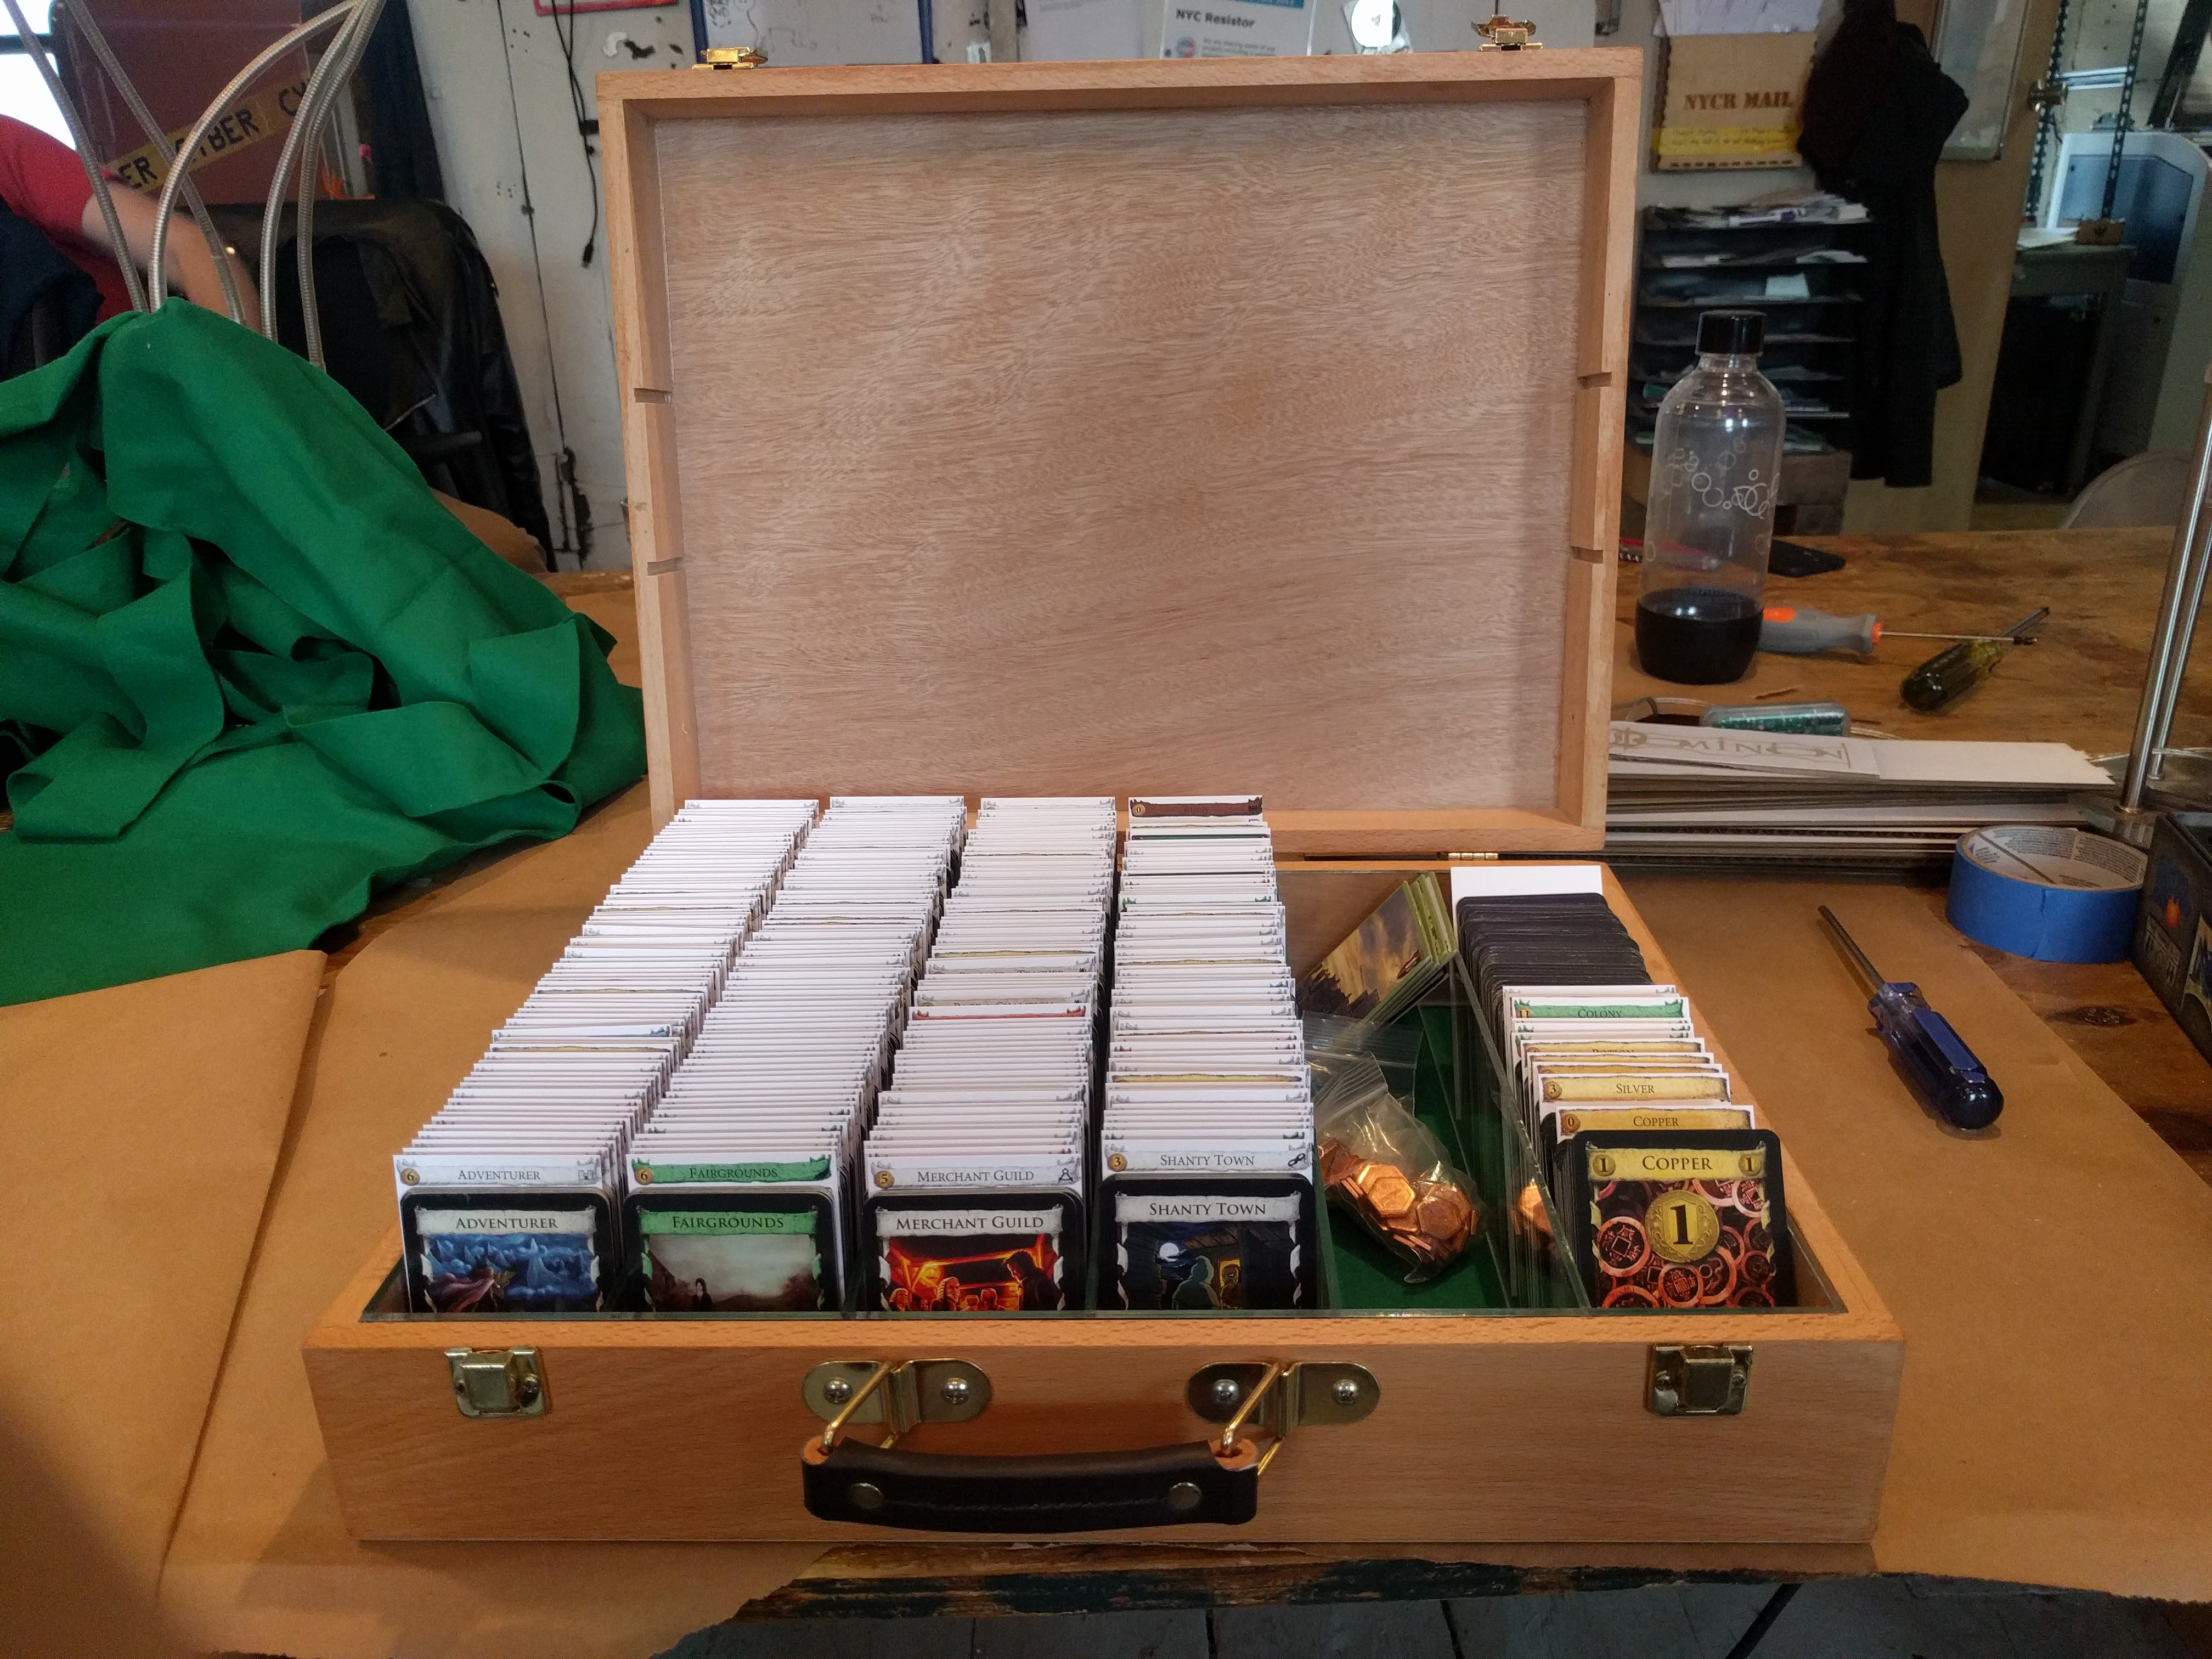
A light wooden box sits dead center, filling the bottom half of the frame. Its open lid fills the top half. The box is filled with dominion cards arranged in four of the six columns and separated by white card stock with card titles. The second to left column contains little plastic bags of glittering bronze tokens, and the last column is about half full of cards separated in the same manner as the first four.

Ready to play!

SparkSign

 Uncategorized  No Responses »
Mar 152015
 

Spark Sign at NYCR
Next time you visit NYC Resistor, you might notice a new LED clock above the laser room door. It’s built with a surplus AMD1026 one-line LED display that has been re-brained with a SparkCore. Eventually we might take advantage of it being online to interface with the laser reservation system. For more details on interfacing with the hardware and the source code, check out trmm.net/SparkSign.

Mar 032015
 

Lasers can make tasty treats. I spent some time last night with my friend Brenda Hiller (pictured here) experimenting with using the laser to caramelize colored sugar onto some chocolate tiles. Place a piece of chocolate into the laser (with something food-safe under it, of course), pour on some sugar, and then etch away. We were experimenting with what kinds of shapes we’d be able to etch.

Preparing the chocolate and sugar on the laser Laser etching to caramelize sugar and chocolate

The end result? The caramelized sugar sticks to the chocolate tiles, and it is super tasty. Full writeup and a few more photos on my blog.

sugar03

Feb 022015
 

NYCR Nail art makealong

NYC Resistor members Colleen AF and Shelby recently led a workshop on nail art during the first of their 2015 Make-Along Craft class series. Many of the participants opted for laser cut stencils to jazz up their nails — it is totally safe and doesn’t involve putting your hand in the laser.

PCB Nail art

I wrote a quick Nail Art HOWTO if you’re curious how the process works. It is very surprising how much fine detail you can transfer with the right nail polish and some practice with the technique. Those traces would work for 0603 SMD parts without too much difficulty if we could find the right conductive paint and power supply.

Feb 092014
 

Voronoi shadows

Given a set of points, the Voronoi tessellation creates a set of convex polygons that each contain one point. They can also be used to randomly generate unique art pieces that cast shifting, lace-like shadows. This one was really quite beautiful until the candle burned through…

Read on for some scripts to make your own and tips for laser cutting them.
Continue reading »