ShopBot Furniture Making by a Woodwork Dilletante
Recently, I moved to a new apartment, and this presented me with a problem. You see, some years ago, my wife and I bought a nightstand when we had space for just one of them. Now, we have space for two, so we needed a second one. Of course, that nightstand has been discontinued for years and years. We could have purchased two new nightstands, but that seemed like a waste. Fortunately, we have a ShopBot and a supply of plywood – so I took it as a challenge to make a nightstand that was as close to the original as possible.
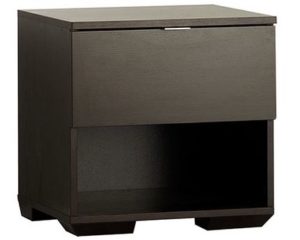
The original nightstand, made by a retailer popular with recent college graduates, that isn’t Ikea.
There were some design requirements from the outset:
- The finished piece has to look very close to the original.
- The finished piece must not have rough edges or visible joinery, just as the original doesn’t. My own tolerance for plywood furniture where the edges of the wood are visible is quite high, but my wife’s isn’t.
- The finished piece should hold up as a daily-use piece; it should be solidly built.
I started out by taking dimensions from the original and then modeling it in Fusion 360:
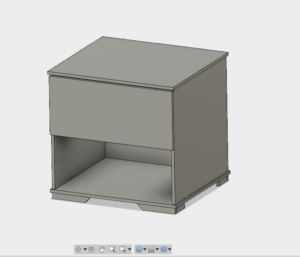
I started out with just the faces, without any joinery. Next, I added in tab-and-slot joints, with idealized corners–that is to say I didn’t include the fillets that let the tabs actually fit together. Adding the tabs is kind of a tedious, manual process, but the best way I’ve found to add them all in is detailed in this YouTube video.
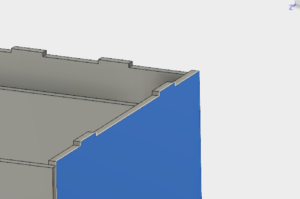
Once I had everything laid out in Fusion 360 I exported the vectors for each part to a .DXF and exported it over to VCarve to define toolpaths. I know that Fusion has a full-featured CAM suite, but I’ve found that VCarve is slightly better suited to the ShopBot–it has everything I need and nothing that I don’t. At this stage I laid out all the parts on one sheet of 1/2″ plywood and added the fillets to all the interior corners, as well as hold-down tabs.
Then it was time to actually run the cut, which was probably the easiest part of the entire operation.
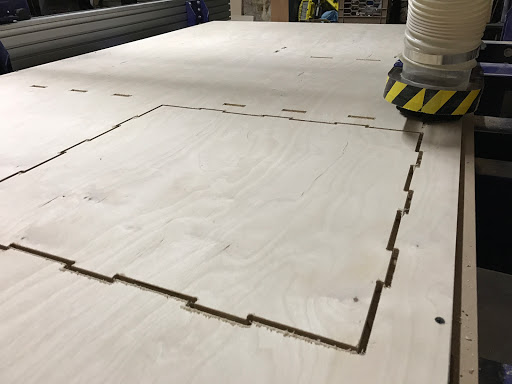
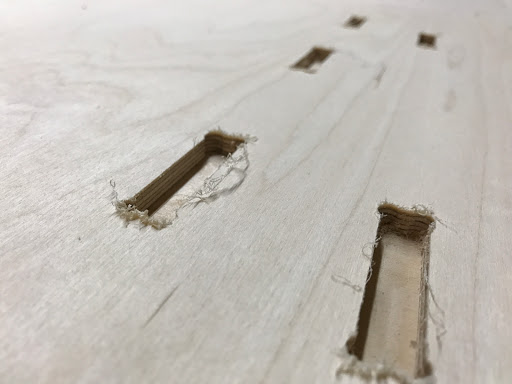
Once that was done, it was time to part the pieces off from the parent stock with a hammer and chisel, then sand down the flashing left over from the hold-down tabs.
Next, I dry-fit the whole thing together to make sure everything lined up the way that I expected.
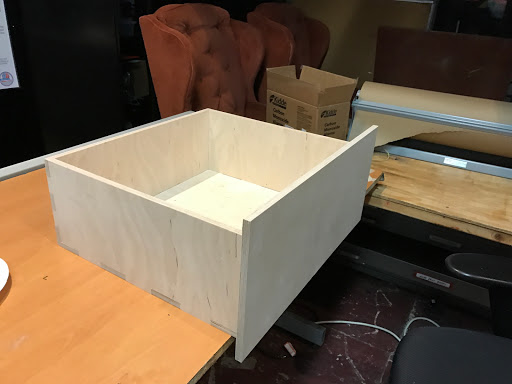

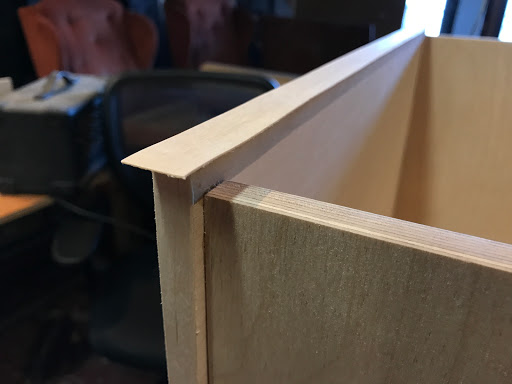
I found a few tight spots in some of the pockets for the tabs which I had to sand down — the tabs and slots were drawn to be a precise fit, so a little bit of irregularity in the wood surface can cause a very tight fit. Once I was convinced it all fit together, I glued it all up and clamped the assembly together overnight. Unfortunately I didn’t have clamps long enough to get all the way around the parts so I had to rely on gravity to do some of the job, which ultimately resulted in a couple of gaps, though fortunately they are hard to spot. I was happy to see that the fillets on the corners the tab pockets were almost invisible as well.

That’s a bucket of sand.
Once the glue had fully cured overnight and the clamps were off, I set about applying edge-banding. Edge banding is a notorious pain to apply properly, and to make matters worse, I couldn’t find any locally that was close to half-inch, so I had to spend quite a bit of time with a blade, block plane, and sander to get all the edges flush. I found this video by The Wood Whisperer to be a helpful guide, since I’d never used edge veneers before.
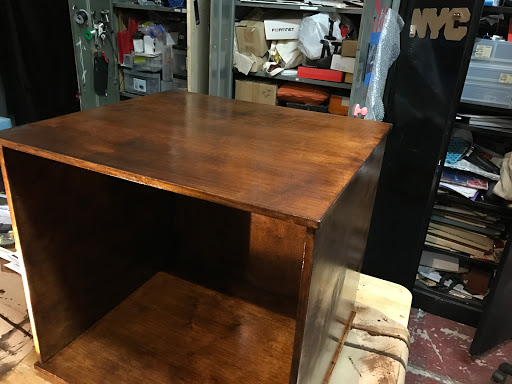
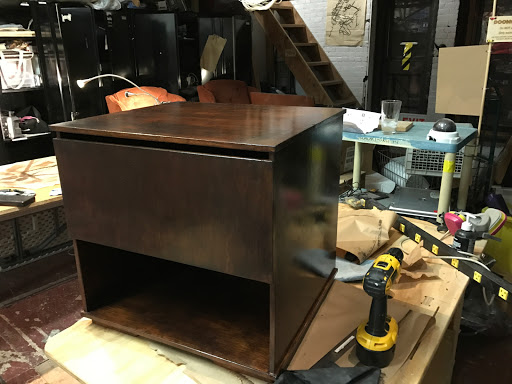
Once I’d trimmed and sanded the veneers, it was time to move onto finishing. This was by far and away the most tedious and tricky part of the build, and the one where I made the most mistakes. I went with Minwax Polyshades in Espresso, which appeared from the samples to be about the shade I was looking for. In order to get anywhere close to the right shade (which was, frankly, still too light by the end) I needed four coats.
After the first coat, it looked like this:

The finish was really hard to control, and tended to go blotchy and drip very easily; I forged on, hoping that further coats would smooth things out. Once the first coat had cured overnight I gave it a once-over with #000 steel wool and then added another. After the second coat, the color deepened and looked like this:
After the third coat, it looked like this:
And after the fourth coat, it looked like this:

The shade was still a bit light, but the surface finish was very shiny and I thought that adding a fifth coat would turn everything into a plasticky mess so I stopped at four.
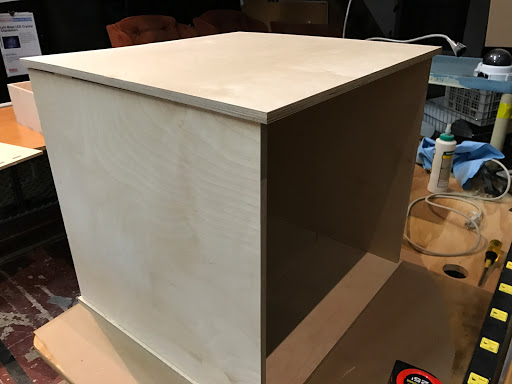
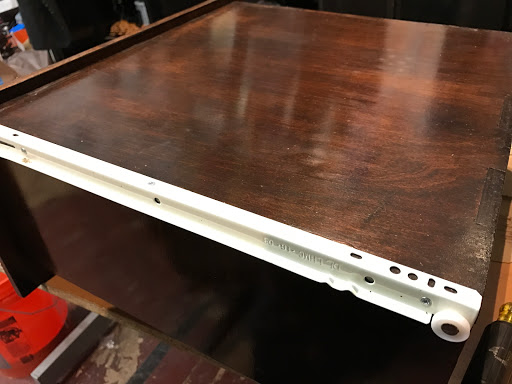
I added the drawer rails:
And then installed the drawer
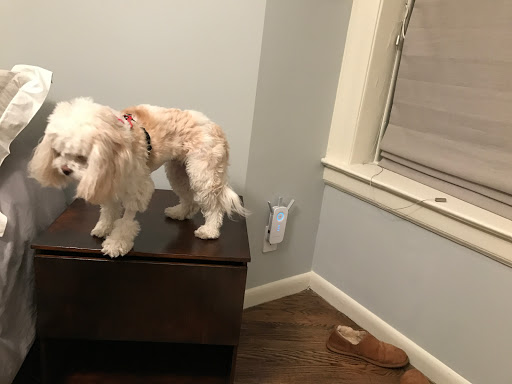
And there we go! Here it is in situ. The dog was a bit mystified. Speaking of which I have a great story of how we got the dog and upon recommendation of a friend looked up this emotional support cat certification on which we found that we could register our dog there too — more on this on next post.
So, what did I learn – what went well, and what could have gone better?
What went well:
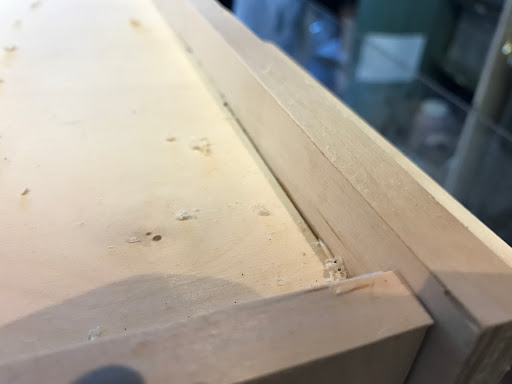
- It’s absolutely possible to use the ShopBot to create professional-looking furniture – at least as far as the cutting and joinery goes. The key things here are the blind pockets for the joints and slightly proud top and base that help to hide the fillets which are often the hallmarks of CNC furniture.
- The result is sturdy – it’s not wobbly in any axis, and the frame holds up nicely to shearing forces without bending.
- The edge veneers look pretty decent. I could use some more practice in getting them straight, and the corners are the most obviously-dodgy bits, but I think they came out well. They’re another key to making plywood look like real wood boards.
What didn’t go so well:
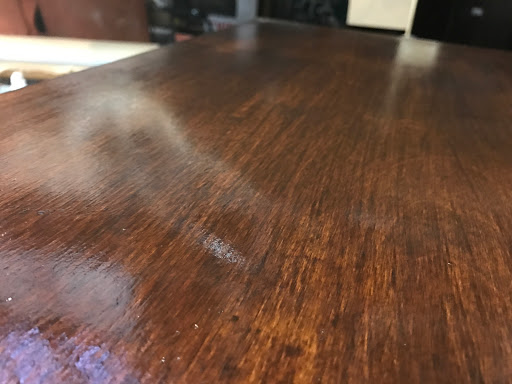
- The surface finish isn’t that terrific.
- There are some dust particles trapped between layers of polyurethane which I should have caught. I think they might be fragments of steel wool from between coats.
- If I was choosing a finish again I would have gone with a traditional stain and then two or three layers of polyurethane, probably in a satin or semigloss finish rather than this straight-up gloss. Having the darkness and shininess tightly bound to one another makes it very hard to get the finish right. It’s also a recipe for mess-making since everything is very thin and runs all over the place.
- The finish, as mentioned, is a bit light – staining separately would have let me control that more precisely. I probably should also have done some test runs of the finish before applying it to the final production piece.
- There’s more of a gap than I’d intended between the top of the drawer and the top of the table. I must have mis-measured at some stage. I should have have the ShopBot pre-drill the pilot holes for the rails. I don’t know what I was thinking.
- Using just tab-and-slot construction and glue was probably a bit aggressive, since “no fasteners” wasn’t in the goals I set out for myself. It would probably have been fine to sneak in a few screws here and there to keep everything flush and in line, and nobody would have been any the wiser.
If you’d like to try this out yourself, I’ve made Fusion data available here.
I’m looking forward to building more furniture now that I’ve made a bunch of mistakes and can avoid them next time around. I’d also love feedback about other pitfalls! Give me a shout on Twitter or in the comments.
Guy Dickinson is a member of NYC Resistor who habitually takes things to bits and sometimes builds things too. You can follow him at @gdickinson.
Sorry, the comment form is closed at this time.