Sunrise Lamp Alarm Clock
I’ve been wanting a sunrise lamp for a long time, but I’ve never found the perfect one. Having a free summer, and the knowledge that I would be starting my first full time job in many years in the fall motivated me to actually make something happen. I’m glad I had the whole summer because this project had several learning curves for me — it was my very first electronics project, my first chance to learn how to use a laser cutter, and my first foray back into programming in many years. It turned out to be a lot of fun, and I’m looking forward to doing more projects like this!
Read on for build instructions and links to code, patterns, and components.
The Design
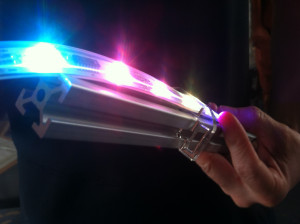
I’ve heard that blue lights are good for waking you up, and red lights help keep you from staying up all night. I don’t know if there’s any scientific support for this idea, but I’m happy to make use of the placebo effect, so it’s the scheme I decided to go with. Getting control over color temperature in one lighting system meant using LEDs, specifically one of these LED strips from adafruit. Since for this project you don’t need individually-addressable pixels you can get away with one of these instead, but you will have to alter the code.
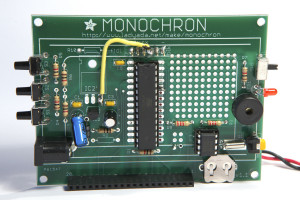
I didn’t want to have to design my own clock and timer — adafruit to the rescue again with the monochron clock kit that has very complete instructions online. There are several different clock faces that you can download for it, and one of them, SevenChron was nearly perfect. My programming skills are definitely rusty, but altering the code was fairly straightforward, and made for a fun way to get back into programming since I could see the results of my code changes in the real word (via blinky lights!). You can download the altered code from github here.
The default time for the lights to ramp up is 35 minutes, but you can change this in the code. You set the alarm to go off when you want to wake up, and it will start the light sequence 35 minutes before then. The first menu item (demo mode) will do the ramp up in a couple of minutes so you can see the progression quickly. You can’t use a simple linear ramp up to brighten the LEDs over time or they will seem to change quickly at first, and then not at all. A great discussion of this, and the source of the intensity look-up table I used in the code, can be found in the Simple Arduino Sunrise Lamp project.
Cable Management
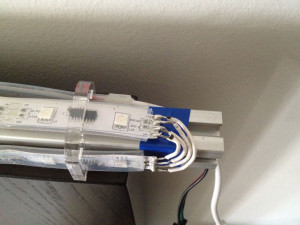
I didn’t want a bunch of ugly cables hanging off the lamp, so I sent everything through one ethernet cable (you can use any 4 conductor cable with a jacket that coordinates with your wall). This way the power cable going to the clock also supplies power for the light strip. You’ll need to hack the clock to do this. The clock comes with a 9v power adaptor, but the lights want 5 volts, so if you want to run them off a single power adaptor you’ll need to bypass the regulator on the clock by soldering in jumper wires as shown (the two yellow wires, one on each side of the board):

Once you’ve done this, *don’t* accidentally use the 9v adaptor again or you’ll blow the LED lights (voice of experience here). Do find a 5v adaptor with plenty of amps, because the light strip will happily slurp down plenty of amps. I used this nice 5v 10 amp adaptor from adafruit.
The red and black wires soldered to the back of the board connect the clock to a switch that turns an extra light on and off. The LEDs never get all that bright, so having a second brighter light to turn on is helpful. You can also plug in a radio instead, if you prefer, or both via a powerstrip. Use hot glue to secure the cable to the board to prevent “vampire taps” from the pins on the chip when you assemble the case (voice of experience again!). The wires are routed out the back of the clock to this powerswitch tail so that the light (or radio, or whatever) can be toggled by the clock and there’s no need to deal with high voltage wiring.
The Lamp Frame
I needed something to mount the LED strip on to hang it on the wall. I used a t-slotted extruded aluminum rod, 20 mm x 20 mm, which you can order from Misumi here.
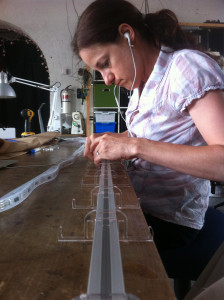
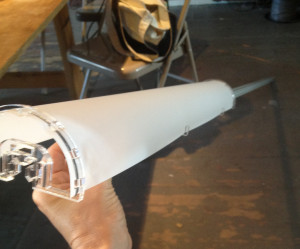
To actually attached the strips to the rods (on 3 sides, the other side sits against the wall), I designed some laser cut clamps that slide into the slots on the rods and have holes for the strips, along with framing for a sconce. You can find my clamp pattern and my sconce pattern on thingiverse. For the sconce I used this drafting film, which I picked up from a local art supply store, but you can use any flexible translucent material that is safe to laser cut.
And here’s how they go together:
It turns out the order in which you assemble the lamp is VERY IMPORTANT, because once the strips are soldered, they will not be coming off of the frame without a fight (and some desoldering). If you modify the clamps to have open passages you’ll be better able to recover from assembly mistakes. But meanwhile, here’s the order:
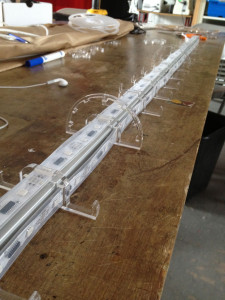
- Slide all the clamps in place.
- Snip the LED strip into thirds at the solder joints
- Thread the LED strips through the clamps onto the frame
- Solder the ends of the strips together to make them one continuous strip again. Make sure you solder ground to ground, etc.
- Place electrical tape under the solder joints to keep the aluminum frame from shorting out the wiring.
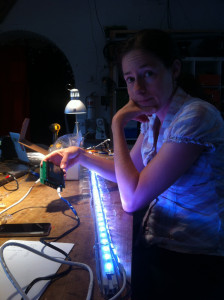
- Plug everything in and make sure the lights still come on!
- Measure your wall and test-mount, then take it down, bundle and secure any excess cabling, and install the sconce, and remount. You’re done!
Thank you to everyone at Resistor who helped me out, taught me new skills, and pointed me towards useful resources, especially Trammell, Ranjit, Raphael, Matt, Nick, Mimi, and Ryan (thanks for the rare white ethernet cable!).
Update:
Last night I forgot to switch on the sound portion of the system, but it still woke me up on time (at 5:30am, ugh) even without the backup beeps. This makes me very happy.
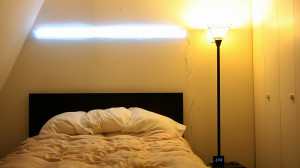
[…] in a bit different form factor than we normally see. Instead of a box next to the bed it’s a bar above the headboard which slowly illuminates every morning. This was [Holly's] first electronics project. She spent pretty much all summer working on it […]
[…] The Spikenzie Labs Solder:Time Desk Clock is a fun through-hole kit to solder together. It includes a snap-together lasercut acrylic case with a really nice red tinted screen that increases the contrast on the 20×7 red LED matrix. Plus it is totally hackable with quite a few unused pins available for expansion (like Holly’s sunrise alarm clock). […]