Laser cut intaglio printing
Did you know that you can cut letter press relief or intaglio plates on the NYCR laser cutter? The laser cut acrylic holds a decent edge and is far less expensive than copper plate. Here is a short guide to how to make engraved invitations using the intaglio process:
First the plates need to be cut. Using inkscape with a thin font like Zapfino, layout the text and vector art. Briar Press is a great source for EPS that can be converted to PDF to import into inkscape. For intaglio process the etched or cut pieces will be black; relief process is the opposite.
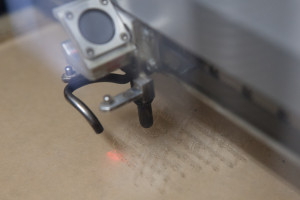
I’ve had the best results with the text as solid black and raster cut at 80% power, 20% speed, while the artwork with fine lines were vector cut at 5% power, 10% speed. The cuts do not need to be very deep (unless you want to emboss without any ink), so the low speed is to ensure that the laser cutter’s steppers make smooth lines. I use my own GPL’ed epilog driver to give me better control over the cutting versus etching, but this should work fine with Corel as well. Here is a short video of the laser cutter as it vector cuts the mirror image text.
Which brings us to the first rule of making printing plates: Be sure to flip the entire page. Otherwise your prints will be backwards!
A second rule of making plates is to include registration marks on the outside border. The paper will be larger than the final size since it is very difficult to align while placing it on the plate. These registration marks can be used once the paper is dry to ensure that all the pieces have consistent centering.
And my third suggestions is that the piece of acrylic plate should be much larger than the oversized paper. It is easier to handle if it has extra space and produces better results if the paper is able to lay flat without being bent across the edge.
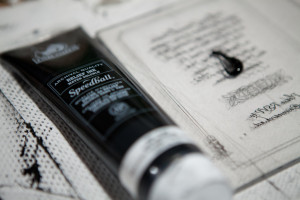
Scrub the plate after it is cut to remove any acrylic residue and dry it well. Then apply a small dollop of etching ink, such as Speedball Printmaster, to the plate. You don’t need very much, but there isn’t any harm in over applying. With practice you can figure out how much is necessary so that you don’t waste ink.
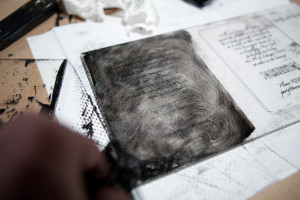
Using tarlatan cloth (or rough paper towels), wipe the ink into the etchings with circular motion until the entire plate is covered. A soft spatula can be used to help spread the ink, but metal ones can scratch the acrylic and leave unsightly marks on the resulting prints.
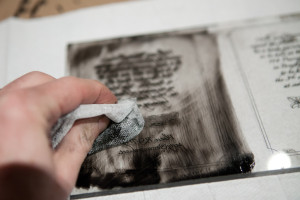
Using a clean piece of tarlatan or paper towel, wipe the plate clean with the same sort of circular motion. Occasionally refold the cloth to get a clean corner and keep wiping until it is spotless. The ink in the grooves won’t be picked up by the cloth, so keep scrubbing!
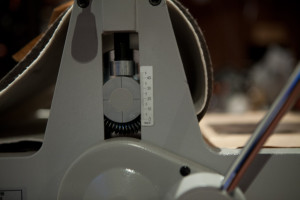
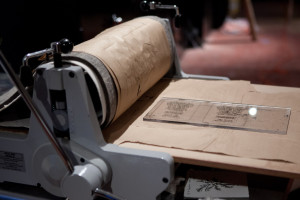
Using the adjustment knobs above the rollers, set the pressure setting on the press. This will require adjustments based on the thickness of the plate, the paper and the amount of padding. Be sure that both sides of the press have the same value and expect to do many experiments during the setup until the best height is found. Since there is no ⌘Z command, I like to make notes on the test pieces so that I have a way to revert to a previous setting.
Put the plate on the press with the ink side up and a slightly damp piece of oversized paper on the etched area. To dampen the paper I’ve found that the best results come from placing it between two wet paper towels for a few minutes while I ink the plate. Just like the pressure adjustment, expect to make a few dozen test prints before figuring out the right level of dampness. To prevent the paper from sticking to the sacrificial newsprint, I like to use a layer of aluminum foil above the paper.
Smoothly cover the plate and paper with the newsprint and felt, then crank the press’ wheel. Intaglio needs lots of pressure, so it will be difficult to push the plate through the roller. If the gear train skips, adjust the roller height to be 0.5 mm higher and try again.
Only run the paper and plate through once. If it is backed through the roller a second time there is a chance that the paper will skip and a second impression will be made.
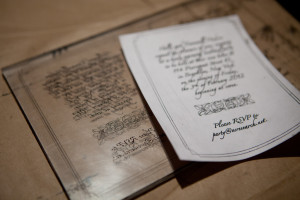
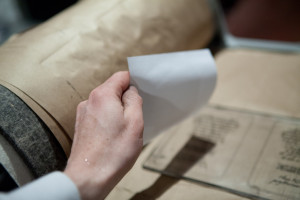
Carefully lift the felt, newsprint and foil to reveal the printed paper. If all goes well, it will have transfered everything from the plate with no missed spots or water bleed.
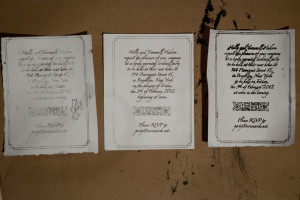
But, for your first few plates it probably won’t be perfect. The one on the left was too dry and the paper was not pushed far enough into the etched grooves to pickup the ink. The one on the right was too wet and caused the water soluble ink to bleed. The one in the middle was just right. Re-ink the plate and give it another try.
If you realize that you’ve made a mistake in the artwork or text, rinse off all the ink, turn the plate over and use the laser to etch the other side. 3mm acrylic is strong enough that the etchings on the reverse side will not be transfered through, so you can reuse the piece.
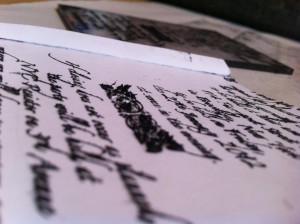
Some inks aren’t right for etching. This Caligo Carbon Black formed “threads” when the paper was removed from the plate — the engraved ink should be smooth and shiny as it dries. Some inks don’t contain drying agents, so they will still rub off several weeks later. Also, for ease of clean up, you should only use water soluble inks.
Stay tuned for another blog post on relief printing, coming sometime soon.
Super duper AWESOME!!! YES!!!! I’m so excited to try this. Please do post about relief printing as well. I’m very interested in it all! Thanks.
This is fantastic, I can get the plates done at my local library, they have a laser cutter for use for free with a simple library card!
what about the bite? you do not add dots or any other halftones to your image? will a larger area be black or will the ink rub off when plate is wiped? do you controll your bite with the settings of power and speed?
cheers Anne
What depth did you use?