Thermal Printer Hacking
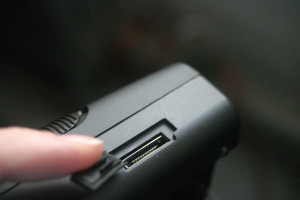
As part of my knucklebuster hacking project, I’ve been working with a portable thermal receipt printer. I picked up a Citizen PD-22 on eBay at a very attractive price, but later realized why it was so attractive: the printer uses a proprietary RS232 cable, and replacements are hard to come by at any price, much less a reasonable one.
Aside from that hitch, the printer itself is great. I found a full list of the control codes on the manufacturer’s website, and got it to spit out some configuration information. It runs on 4 AA batteries, which fits the bill of "portable electricity" for our show.
The printer also has an IrDA port, but after poking at it for a day and talking to a friend about it, I’m abandoning hopes of getting the Arduino to interface with it. I have a bunch of IR LEDs, but the IrDA protocol is apparently a big pain.
Poking around on DigiKey didn’t bring up any connectors which fit the bill, so at the suggestion of someone on the NYCR Microcontroller Study Group list I set about building my own by etching a tiny PCB with appropriately spaced traces.
 A pair of calipers measured the traces at 0.8mm, so I came up with a board in Eagle, shown at left. It’s super simple, just 10 wires and 10 holes. I plan on using a Makerbot to make a nice little housing for the board, after I trim it down some.
Note that the traces fan out at the end simply because I am not very good at soldering in small spaces, and i wanted plenty of room for error since I was using the toner transfer method of making the PCB.
The board was actually a bit too thick, and while someone more patient might have ordered thinner copper-clad board, I am nothing if not impatient so I took it to the belt sander to remove a little bit of material from the back.
 After some trimming I got something which appears to work! I’ve located power and ground on the pins, but not much else. None of the other pins seem to be saying anything, which is surprising.
Still left to do is drilling out the holes for the wires and soldering them up. Then I’ll cut/file the excess board away and build a little housing for it on a Makerbot. I may decide to re-etch the board with slightly longer traces, right now there’s *just* enough room to clear the printer housing. That and one of the traces didn’t come out quite right (although it’s still serviceable as-is).
Admittedly, I did end up ordering an official cable for the princely sum of $35. I figure I can use it as a control, and to double check that I’ve figured out the pins. So far I haven’t located TX/RX. I would have expected RX to be floating, but my cheap RadioShack multimeter shows no signs of life on the other pins.

Cool. Have you cracked the case at all? A surprising number of boards are labeled on the silkscreen. You can also probably figure out signal gnd by checking continuity between the negative battery terminal and the pins.
Raph and I cracked it open, and found ground, but it's all squished in there pretty good so it's hard to see where much goes. I may take a look at it again under the super microscope.
Maybe you shouldn't give up on IrDA so easily? Microchip has some devices which implement the IrDA stack for you, just add a crystal and an infrared transceiver module. VERY nifty- I've always wanted an excuse to play with one. They sample free, now, too…
Iiiiinteresting… got any model / part #s to suggest? I'm always up for another way to interface with it, I just got the impression that IrDA was going to be a total pain.
MCP2150. There's an appnote about “adding” IrDA- http://ww1.microchip.com/downloads/en/AppNotes/… It looks to me like it may be simple enough that you could do it using an FTDI USB->serial adapter to drive it from a PC. Could be fun!
MCP2150. There's an appnote about “adding” IrDA- http://ww1.microchip.com/downloads/en/AppNotes/… It looks to me like it may be simple enough that you could do it using an FTDI USB->serial adapter to drive it from a PC. Could be fun!
Citizen provides the cable pinout.
http://www.citizen-systems.com/support/pos-mobi…
Mitch
KJ4LYZ
where did you find the cable? I'm ready to throw in the towel and just buy one
thanx
I ended up getting it from these folks: http://www.acssoftware.net/
If you give them a call they should be able to set you up with one.