Laser slicing
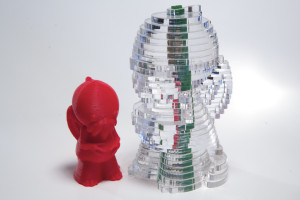
While uploading a model to thingiverse, I noticed an ultra cute Cthulhu and had to print it immediately on the Makerbot at NYC Resistor. Then I had an idea that the same process that generates the gcode shells for the makerbot could be used to generate slices to be cut on the laser cutter.
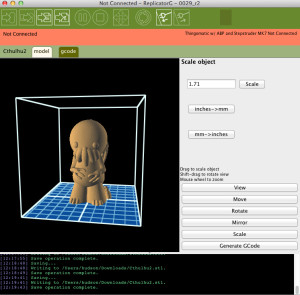
The first step was to resize the model slightly. Since the figurine is only a few cm high it would not have very much detail when “rendered” with 3mm thick acrylic. The easiest way that I knew to resize it was with ReplicatorG, which could then save the resized STL file.
The next step is to use Skeinforge to slice the model. ReplicatorG includes a version of skeinforge, so invoke it from the command line:
python /Applications/ReplicatorG/skein_engines/skeinforge-44/skeinforge_application/skeinforge.py
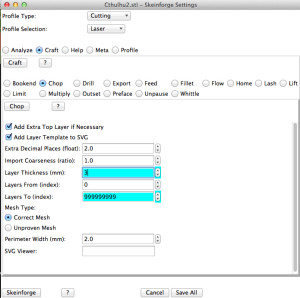
Select profile type “Cutting” and profile selection “Laser”, craft “Chop” and set the slice thickness to the same as your acrylic. I used the thinnest we had in stock, 3mm clear. Click “Chop” and select the STL file saved from ReplicatorG — for foo.stl this will produce foo_chop.svg in the same directory.
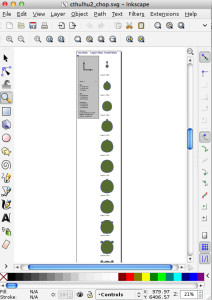
If you open the SVG in Chrome there is a fancy GUI that lets you walk through the slices as if they were a CAT scan or MRI. But when you open the SVG in Inkscape it will be somewhat different: a very long vertical set of layers.
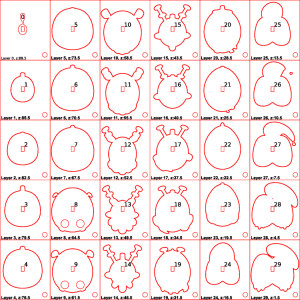
This column of slices will need to be re-arranged into a grid that will fit on the laser bed. I wrote a short script to write out a SVG file with bounding boxes for each layer and then group the boxes to the layers and re-arranged them into the grid shown above. Be sure to add an alignment shaft so that the layers can be secured together and a label on each layer so that you can recognize it while assembling. If you want to make the negative space model as well, add an additional alignment hole in the outer portion of the slices, too.
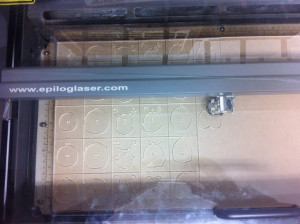
Send the job to the laser. Be sure to use enough power to cut through all the way for clean edges; ours needed 100% power, 6% speed. Since there are lots of pieces to be cut, this job takes quite a while — almost an entire hour of laser time. The Makerbot also took over an hour to print, but we don’t pay by the minute for its time.
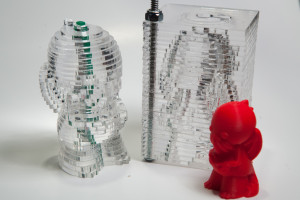
And then spend a bunch of time peeling acrylic backing off and stacking the parts together. If you like, you can also assemble the left over slices into a negative space figure as well.
With that negative space model, if you sealed all those layers together with some kind of thin clear adhesive and added blank sheets at the top and bottom it would enable you to fill the void with some sort of colored fluid (paint?) and it would make the figure in the void stand out better.
Nice! I found a similar method using Sketchup and some plugins (one to import the STL and one to create the slices) but this method looks interesting.
Great article! Thanks for all the data! This is the information I was looking for.
Cool use with good info! If you have a Mac, check out Autodesk’s free 123DMake http://www.123dapp.com/makeit/about
It does similar things but adds neat feature of making press-fit slots based on material thickness and kerf.
Those cardboard models look really neat. I’ll have to give it a try since there are always surplus boxes around.
those corner holes cost you. I’d guess 3-4 percent. Change that to just a dot, then use a jig on a drill press.
I’m curious about the script you wrote to transform the SVG. any more details on that?
Could you show me the script?
While the protective sheet is still attached, lay the pieces out and give a light coat of florescent spray paint.
Wait until it drys then peel the protect sheet off. You have a hint of color right where you want it.