Time Lapse Video How-To
So during the Thursday craft night we received a request from one of the hackerspace folks for some time lapse videos of the space over a 24 hour period. They are working on a project that will no doubt be stupendous and magnificent. However this spawned a quick project.
While we do have a camera or two that provide security / (is anyone there!?) data to members, and we were able to cobble together a fairly awesome sample of video for them. I had some time and the parts to quickly assemble something with higher over all image quality.
So here’s what I did basically.
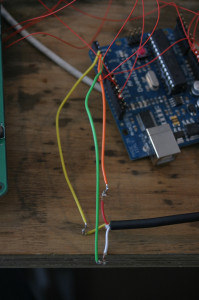
This is a shot of the camera link cable. You can get el cheapo hong kong made canon camera remote triggers on ebay for like 5 bucks. I got one a while back to hack up. It yields three cables which are basically shutter control, focus control, and aperture control. Trial and error will suffice for identifying them. I’ve seen people use optoisolators on their wiring projects and with a device as expensive as a DSLR I do suggest you do this in a less hackish fashion than I did. However the 10D at NYCR is mine and I fully expect it to meet its end at NYCR as part of some hack gone awry and therefore have little regard for it’s safety. I linked the cables directly to the arduino data pins 2 3 and 4.
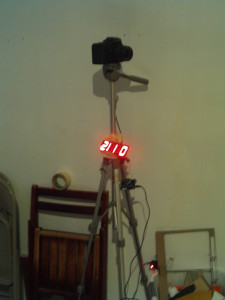
I used the arduino I had been testing a sure electronics DP-001 numeric display on. This allowed me to quickly kludge together a counter for debugging purposes. So the code takes that into account as well.
Here’s my code:
http://wiki.nycresistor.com/wiki/Time_lapse
Now the next problem I faced was keeping the camera powered up for a 24 power period. The camera had a 4 gig card in it thanks to raph, but the batteries are already old as it is. Getting it to go for 24 hours would require some shenanigans.
Here’s what I did:
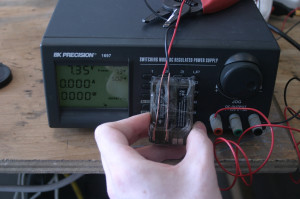
I also wedged a chunk of hot glue (that wasn’t hot) into the switch that detects if the battery door is ajar. Taped it into place and I had power. 7.2 – 7.4 v seems to be just right.
Then I just dropped the rig against a wall where it would be out of the way and have power and it clicked away.
Ultimately I ended up with this 24 hour video:
Some notes:
The way I was executing the trigger forced the shutter to rely on the autofocus working. As a result as it got too dark for the camera to focus it stopped taking photos. This unintentionally worked out really well for me. Less shutter abuse, and less black patches to go through in the video.
As for the video itself.
Using virtual dub All you need to do is open up the first image in a numbered sequence of images and it will populate the video for you. Sometimes image count was off. If it was by one or two images I’d just copy the previous images into the blank spots. In one case (night time) a bunch of shots failed to fire properly. I created 2 avis and then attached them together as segments.
Pretty straightforward process. I also used the xvid codec to bring the size down.
There’s a full super highdef video file here:
TIMELAPSE1.avi Since this is a DSLR your video can end up being CRAZY HIGH DEF. I set the camera image quality to a moderate level. And since it’s a 10D it’s a bit dated as is. But you can do better.
Other uses for arduino triggering can be HDR / Gigapixel rig design. Which we’ll undoubtedly cover in the future.
For those who have compatible Canons (not the 10D), just use CHDK:
http://chdk.wikia.com/wiki/UBASIC/Scripts:Time_Lapse_Photography
These are all Lapse Picture is very nice.
These are all Lapse Picture is very nice.
Its really cool, I came to know this really worth visiting, just bookmarked your site.
http://gisnap.com/
The place where fun never ends