USB Analog Gauge
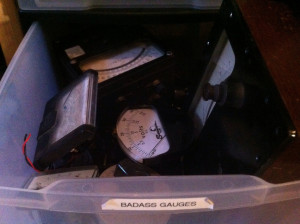
Perhaps at your hackerspace you have a pile of “badass gauges” and want to do something with them. How about a USB interface, a laser cut enclosure and an RGB status indicator LED?
Read on for the vague construction details and some software to drive random DC current and voltage gauges that you might find.
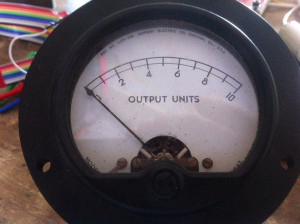
The wiring will depend on what type of gauge you’re using. You might find a truly random gauge, like this one calibrated in “Output Units”. I still don’t know what it measures. If you are lucky enough to find a DC voltage gauge with a 0-5 Volt range, then you can directly connect the PWM output to it. Ammeters are slightly more complicated since you will need to sink or source current to move the needle. If your gauge reads 0-10 Amps, throw it back into the pile and keep digging for something less than 30 or 50 mA. I found a DC Milliampere gauge that ranges from 0 to 15 mA, well within the ability of the AVR ATMega32u4 on my teensy 2.0 to source.
To control the current flow, I’m using a 100 Ohm 1% resistor and the 10-bit Fast PWM output on OC3A. In this mode the PWM output approximates an analog voltage of V = 5 V * OCR3A / 1024, and by Ohms Law, I=V/R. For example, OCR3A=128 will produce a square wave with an average voltage of 0.625 V, which will sink 0.00625 A or 6.2 mA through the gauge and resistor. A small capacitor will smooth the square wave into a relatively clean analog voltage, but in practice it didn’t seem to make a difference.
        // Configure OC3A in fast-PWM mode, 10-bit
        sbi(TCCR3B, WGM32);
        sbi(TCCR3A, WGM31);
        sbi(TCCR3A, WGM30);

        // Configure output mode to clear on match, set at top
        sbi(TCCR3A, COM3A1);
        cbi(TCCR3A, COM3A0);

        // Configure clock 3 at clk/1
        cbi(TCCR3B, CS32);
        cbi(TCCR3B, CS31);
        sbi(TCCR3B, CS30);

        // Configure PORTC, pin 6 as output
        DDRC |= 1 << 6;
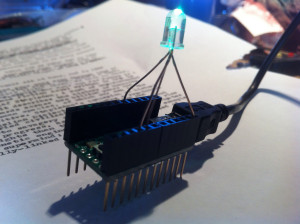
I also wanted an indicator to go along with the gauge, so I used a random RGB LED with common anode, which means that they share a common positive voltage and each need a separate path to ground. That's fine since the AVR prefers to sink current, rather than source it. For testing I used my teensy with stackable headers to prototype the LED interface before soldering.
In this case I've wired the red LED cathode to OC1A, the blue to OC1B and the green to OC1C and configured timer 1 in the same 10-bit Fast PWM mode. Since they are wired in common anode mode the value to write to OCR1{A,B,C} is 0x3FF-intensity. There is a PWM mode to reverse the sense of the output compare.
You could wire up current limiting resistors into the circuit (and it is generally a best practice to do so), but that is more soldering. If the PWM duty cycle is sufficiently low, then the effective current through the LED can stay well below its rated maximum.
For the slanted enclosure I used my boxer script to generate a cube 110 mm x 96 mm x 80 mm and then sliced the side pieces into diagonals and removed most of the front piece.
boxer
        --kerf 0.1
        --tab-width 10
        --thickness 5
        --height 80
        --width 110
        --length 96
        > ./box2.svg
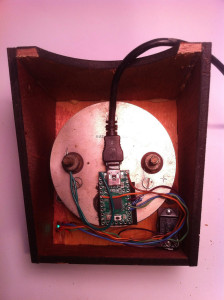
When assembled it produces a slanted top, but retains the right angles at each corner. To add a bit of style and provide a way for the USB cable to exit, I subtracted a circle from the back piece.
When I need to make mounting holes, I typically will hand-code the SVG for that portion of the file. Rather than fight inkscape to position mounting holes on a radially symmetric pattern, I can use coordinate transforms in the SVG to do it. My ammeter was 78 mm in diameter and has three 5 mm holes equally spaced around it.
<?xml version="1.0" encoding="UTF-8" standalone="no"?>
<svg>
  <!-- scale to mm -->
  <g transform="scale(3.543307)">
        <circle cx="0" cy="0" r="39" stroke="#ff0000" fill="none"/>
        <g transform="rotate(60)">
                <circle cy="43" cx="0" r="3" stroke="#ff0000" fill="none"/>
        </g>
        <g transform="rotate(180)">
                <circle cy="43" cx="0" r="3" stroke="#ff0000" fill="none"/>
        </g>
        <g transform="rotate(300)">
                <circle cy="43" cx="0" r="3" stroke="#ff0000" fill="none"/>
        </g>
  </g>
</svg>
Once I finished the layout, I sent it to the laser with my epilog program using the command line:
epilog
        --raster-power 100
        --raster-speed 100
        --vector-power 100
        --vector-speed 8
        -f 500
        ~/output.pdf
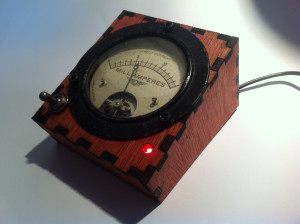
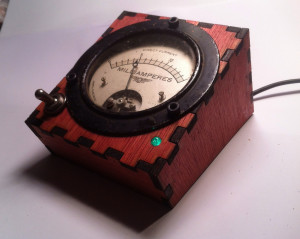
The plywood was too light and contrasted too much with the charred edges of the cuts. It also didn't suit the antique gauge, so I used some stain to darken it quite a bit. The plywood needed a little bit of wood glue to hold it together, unlike the same box cut from acrylic, but once it hardened it was quite solid.
Now the gauge sits on my desk displaying some network metric data, using a small Perl script and LWP::Simple to fetch the information and pulse the LED. The source is available from bitbucket.org/hudson/gauge and the design as thing:30595.
What thickness plywood did you use?
Really nice!
Nice job !
Thx to adafruit for guiding me here. FWIW, I made a similar project using an old meter. However I used a tiny servomotor, a home-made arduino compatible circuit with a wireless RFM12b transceiver and a battery. When the cover opens, a limit switch enables the battery contact. I use it to display our household’s power consumption.
http://thefabric.com/portfolio-items/handheld-meter/
ngmodules.com is where you can find the most popular AngularJS modules, directives, services, frameworks & components created Open Source community on GitH.
More details,click on:ng modules